
The BEST Loaded Hasselback Potatoes Recipe You’ll Ever Try
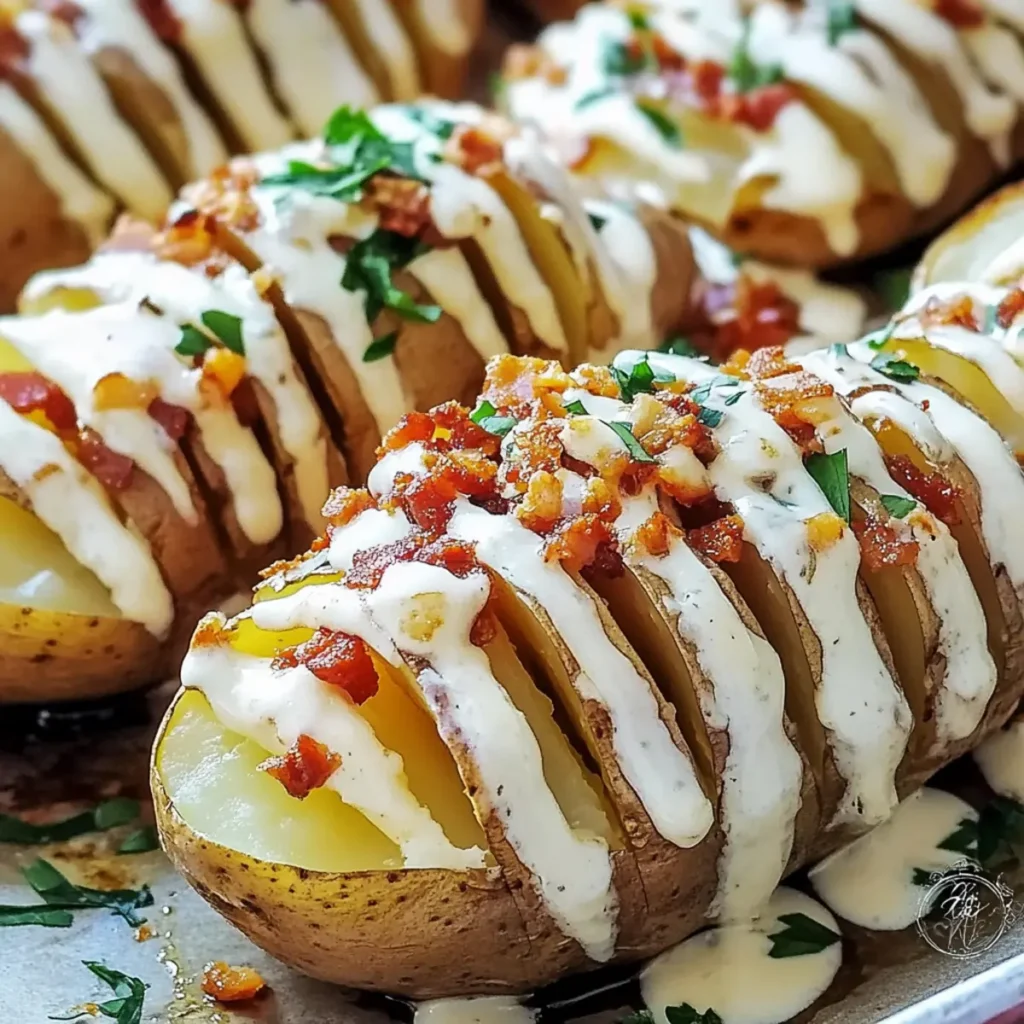
Indulging in the heavenly taste of loaded Hasselback potatoes is like wrapping your taste buds in a warm, cheesy hug. With each crispy layer revealing pockets of bubbling cheese and savory bits of bacon, this dish becomes the star of any dinner table. Imagine the aroma wafting through your kitchen as it bakes—cooked to golden perfection, and just bursting with flavor. Trust me, this is not just food; it’s a celebration of flavors and textures that you don’t want to miss! The BEST Loaded Hasselback Potatoes Recipe You’ll Ever Try is perfect for those cozy family dinners, spirited holiday gatherings, or even a solo movie night when you deserve a treat. Whether served as a side or a delightful main dish, these potatoes will definitely steal the show and have everyone coming back for more. You can practically hear your friends and family cheering in delight as they sink their forks into this glorious, cheesy, crispy creation! Ingredients for The BEST Loaded Hasselback Potatoes Recipe You’ll Ever Try Here’s what you’ll need to make this delicious The BEST Loaded Hasselback Potatoes Recipe You’ll Ever Try: 8 pieces Potatoes (small to medium) – Opt for waxy potatoes like Yukon Gold for a creamy inside and crispy skin. 2 tablespoons Olive oil – This helps to achieve a golden-brown exterior; feel free to substitute with melted butter for extra richness. 1 teaspoon Paprika – Adds a subtle smokiness and beautiful color; consider smoked paprika for an enhanced depth of flavor. 1 teaspoon Garlic powder – Provides a savory undertone that pairs beautifully with the potatoes and cheese. Salt and pepper to taste – Essential seasonings for bringing all the flavors together. 4 ounces Cheddar cheese, sliced – Go for sharp cheddar for a punch of flavor that melts beautifully. 3 ounces Bacon strips – Adds a tantalizing crunch and savory goodness; crispy crumbled bacon can be used as a topping as well. 4 tablespoons Sour cream – A creamy, tangy topping that balances all the rich ingredients perfectly. 1 tablespoon Fresh parsley, finely chopped – Brightens the dish and adds a fresh burst of color to the presentation. How to Make The BEST Loaded Hasselback Potatoes Recipe You’ll Ever Try Follow these simple steps to prepare this delicious The BEST Loaded Hasselback Potatoes Recipe You’ll Ever Try: Step 1: Prepare the Potatoes Start by washing your potatoes thoroughly under running water. Use a food brush to scrub away any dirt, leaving them clean and ready for action. Step 2: Make Hasselback Cuts Place two chopsticks on either side of a potato on a chopping board. This will prevent you from cutting all the way through. Make several evenly spaced cuts across the potato—you want to create slits without slicing through completely. Step 3: Season the Potatoes Transfer the potatoes to a baking tray lined with baking paper, cut side up. In a small bowl, mix together olive oil, paprika, and garlic powder. Brush this savory mixture generously on top of each potato, then season with salt and pepper to taste. Step 4: Bake Until Almost Done Preheat your oven to 400°F (200°C) and place the baking tray in the oven. Allow the potatoes to bake for 55 minutes, until they’re almost fully cooked. Your kitchen will smell amazing by this point! Step 5: Add the Good Stuff Remove the tray from the oven and carefully fill the slits with slices of cheddar cheese and pieces of bacon. These flavorful additions will meld beautifully as they bake. Slide the tray back into the oven for another 10-15 minutes, or until the bacon is crispy and the cheese is melted. Step 6: Top and Serve Once your loaded Hasselback potatoes are out of the oven, it’s time to be generous! Top them with more cheese, crispy crumbled bacon, a dollop of sour cream, and a sprinkle of fresh parsley to finish. These glorious potatoes are best served warm and will surely impress as a starter or side dish. So there you have it—the BEST Loaded Hasselback Potatoes Recipe You’ll Ever Try! Friends will rave, family will applaud, and your taste buds will sing tunes of cheesy, smoky delight. Happy cooking! Perfecting The BEST Loaded Hasselback Potatoes Recipe You’ll Ever Try Cooking Process The secret to a flawless The BEST Loaded Hasselback Potatoes Recipe You’ll Ever Try starts with washing the potatoes thoroughly and seasoning them before baking. Bake until tender, then load them with cheese and bacon for a crisp, gooey experience everyone will love. Add Your Touch to The BEST Loaded Hasselback Potatoes Recipe You’ll Ever Try Feel free to swap in your favorite cheeses or add toppings like jalapeños or green onions to customize The BEST Loaded Hasselback Potatoes Recipe You’ll Ever Try. You can even experiment with different herbs. Creativity is key for a delicious twist! Storing & Reheating The BEST Loaded Hasselback Potatoes Recipe You’ll Ever Try To store The BEST Loaded Hasselback Potatoes Recipe You’ll Ever Try, keep them in an airtight container in the fridge for up to three days. Reheat in the oven at 350°F for about 15 minutes for that delightful crispiness. Cooking The BEST Loaded Hasselback Potatoes always reminds me of family gatherings, where laughter fills the kitchen as everyone dives into these delightful spuds, their eyes lighting up with each cheesy bite. FAQs About The BEST Loaded Hasselback Potatoes Recipe You’ll Ever Try What is The BEST Loaded Hasselback Potatoes Recipe You’ll Ever Try? The BEST Loaded Hasselback Potatoes Recipe You’ll Ever Try is a delightful twist on classic baked potatoes. By slicing them almost all the way through, these potatoes create perfect crevices to absorb goodness. Loaded with melty cheese, crispy bacon, and topped with creamy sour cream and fresh herbs, this dish brings together mouthwatering flavors and textures. It’s an easy yet impressive dish that’s perfect for any occasion, from casual dinners to festive gatherings. How do you make perfect Hasselback potatoes? To make perfect Hasselback potatoes, start with small to
Delicious Wisconsin Cheddar Cheese Fondue with Trio of Cheeses Recipe
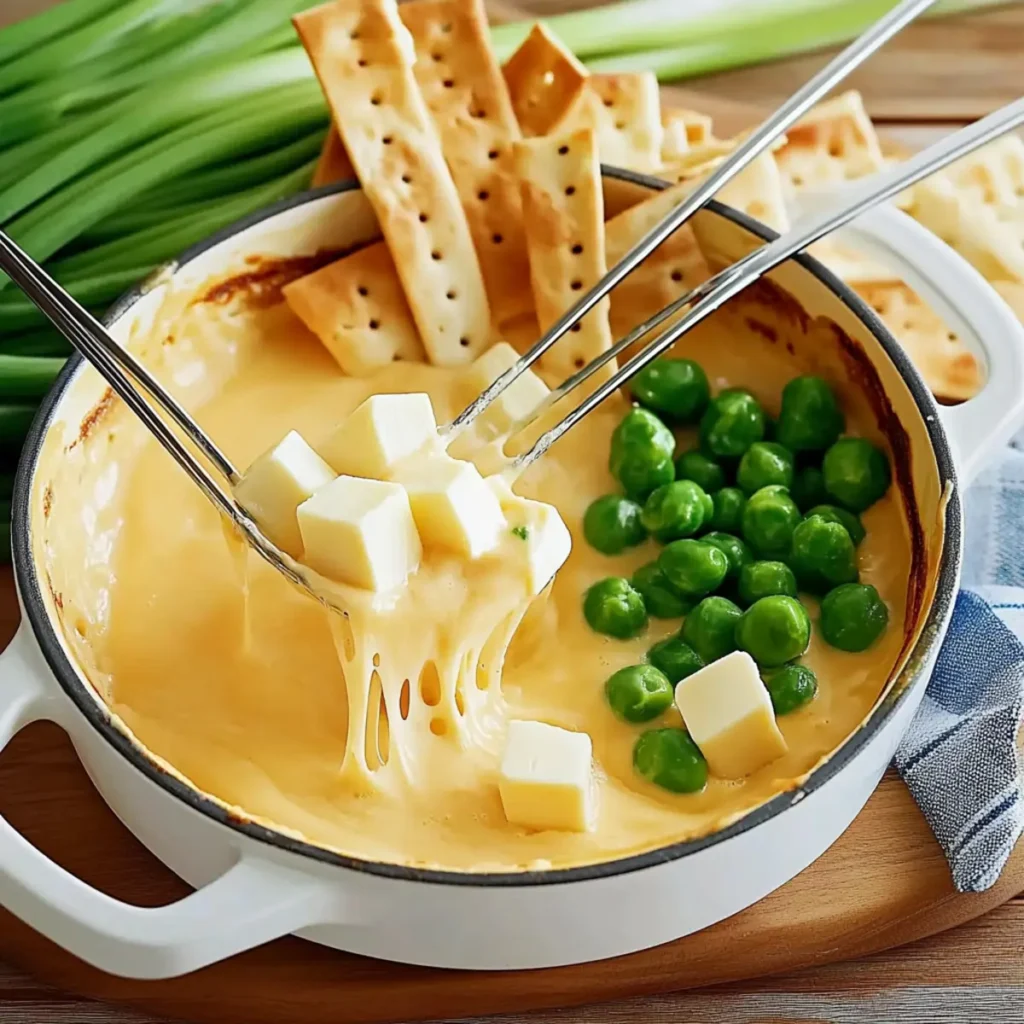
The aroma of melting cheese wafts through the kitchen as you prepare for a spectacular experience that is delicious Wisconsin cheddar cheese fondue with a trio of cheeses. Imagine the smooth textures and rich flavors melding together to create a warm, gooey delight that brings friends and family together, ready to dip their favorite foods and savor every last drop. As I recall my first fondue night, it was an impromptu gathering with friends, a raclette pot teetering on the edge of disaster, where the cheese glopped and melted in all the wrong places. But the laughter and camaraderie were so worth it. That’s the beauty of this delicious Wisconsin cheddar cheese fondue – it’s all about connection, shared laughter, and indulging in flavors that excite the senses. So grab a fork, gather your dipping delights, and let’s dive into this cheesy goodness! Ingredients for Delicious Wisconsin Cheddar Cheese Fondue with a Trio of Cheeses Here’s what you’ll need to make this delicious Delicious Wisconsin Cheddar Cheese Fondue with a Trio of Cheeses: 8 ounces butterkase cheese – Creamy and mild, this cheese melts beautifully and adds a silky texture. 8 ounces fontina cheese – A rich, nutty flavor that brings depth to your fondue mix. 2 teaspoons cornstarch – Helps to bind the cheese together, preventing clumping during the melting process. 1 cup dry white wine – Opt for a crisp and acidic variety like Sauvignon Blanc to add brightness to the fondue. 1/4 cup dry sherry – For an added layer of flavor and complexity. 1 tablespoon shallots – These finely chopped beauties offer a hint of sweetness and an aromatic punch. 1 teaspoon black pepper – Freshly ground for the best flavor experience in every bite. 4 tablespoons blue cheese – Crumbled for a bold tang that elevates the overall flavor profile. 2 tablespoons green onions – These provide a fresh and crunchy garnish, brightening up the dish visually and flavor-wise. How to Make Delicious Wisconsin Cheddar Cheese Fondue with a Trio of Cheeses Follow these simple steps to prepare this delicious Delicious Wisconsin Cheddar Cheese Fondue with a Trio of Cheeses: Step 1: Combine the Cheeses In a large bowl, stir together the butterkase cheese, fontina cheese, and cornstarch until all the cheese is evenly coated with cornstarch. This is the secret to your fondue’s creamy consistency! Step 2: Heat the Base In a fondue pot or a double boiler over simmering water, combine the dry white wine, dry sherry, and shallots. Heat this mixture for about one to two minutes until it’s just warm and fragrant. Step 3: Melt the Cheese Add about half of the cheese mixture into your pot. Whisk constantly until the cheese melts smoothly into the wine and sherry. This is where the magic begins! Step 4: Incorporate Remaining Cheese Gradually add the remaining cheese in handfuls while whisking. Continue until all the cheese is melted and beautifully integrated into that luscious, gooey concoction. Step 5: Add Finishing Touches Gently fold in the crumbled blue cheese and freshly ground black pepper. Taste and adjust the seasoning if necessary. This is your fondue, so let your taste buds lead the way. Step 6: Serve and Enjoy Just before serving, sprinkle the chopped green onions on top for a fresh crunch. Pair your glorious fondue with fresh green apple slices, crunchy broccoli, tender cauliflower, vibrant carrots, and slices of crusty bread. Get ready to dip, savor, and repeat! This delicious Wisconsin cheddar cheese fondue with a trio of cheeses is perfect for cozy evenings, romantic date nights, or any occasion that calls for a fun, interactive dining experience. You may even want to keep a spoon handy for that last bit of cheese left in the pot – because who could resist a bit of cheesy goodness? So go ahead, make this fondue, and watch as everyone gathers around, eager to dip and share in the joy of melted cheese. Bon appétit! Perfecting Delicious Wisconsin Cheddar Cheese Fondue with a Trio of Cheeses Cooking Process Begin by preparing your cheese mixture, tossing the butterkase and fontina cheeses with cornstarch. While that sits, heat the wine, sherry, and shallots until they are fragrant, then gradually add the cheese mixture, whisking constantly for creamy perfection. Add Your Touch to Delicious Wisconsin Cheddar Cheese Fondue with a Trio of Cheeses Feel free to switch up your cheese selections for a unique spin. Try adding a sprinkle of nutmeg for warmth, or even toss in some roasted garlic to elevate your fondue game to gourmet levels. Storing & Reheating Delicious Wisconsin Cheddar Cheese Fondue with a Trio of Cheeses To store, let the fondue cool completely, then place it in an airtight container in the refrigerator. When reheating, use low heat on the stove and gradually add a splash of wine to restore creaminess. Sharing a fondue experience with friends during a cozy winter gathering transformed our usual movie night into a delightful adventure of tastes and laughter, proving that good food always warms the heart. FAQs About Delicious Wisconsin Cheddar Cheese Fondue with a Trio of Cheeses What is Delicious Wisconsin Cheddar Cheese Fondue with a Trio of Cheeses? Delicious Wisconsin Cheddar Cheese Fondue with a Trio of Cheeses is a rich, creamy dish that combines butterkase, fontina, and blue cheeses to create a melt-in-your-mouth experience. This fondue is not only a delightful appetizer but also a fantastic centerpiece for gatherings, encouraging a fun, interactive dining experience. As you dip your favorite veggies, fruits, and bread into this luxurious cheese blend, you’ll discover layers of flavor that warm the heart and spark joy at the dinner table. How can I customize Delicious Wisconsin Cheddar Cheese Fondue with a Trio of Cheeses? Customization is where the magic happens with Delicious Wisconsin Cheddar Cheese Fondue with a Trio of Cheeses. You can explore different cheese variations by incorporating sharp cheddar or smoked gouda for additional depth. Spice things up with a hint of cayenne pepper or roasted
Crispy Korean Chili Cauliflower Recipe for Irresistible Crunch
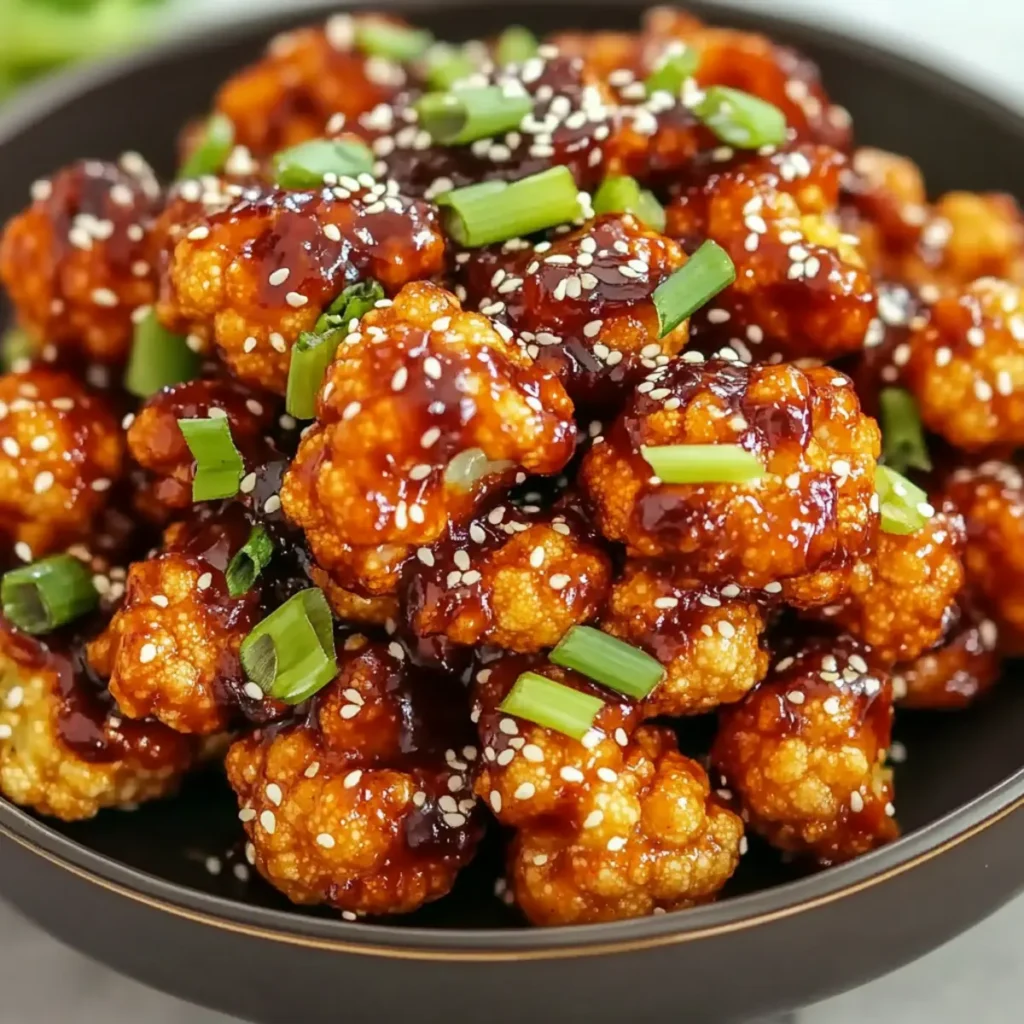
Crispy Korean Chili Cauliflower is the harmony of crunchy textures and punchy flavors coming together to form a delightful culinary dance. Picture those beautifully fried cauliflower pieces, resembling perfect little golden nuggets, coated in a spicy-sweet glaze that is almost too good to be true. Imagine biting into that crisp outer layer, only to reveal tender, flavorful cauliflower that greets your taste buds with an umami explosion. Whether it’s party time, game day, or just a Tuesday when you need to impress yourself, this dish transforms even the simplest occasions into flavor-packed celebrations. Ingredients for Crispy Korean Chili Cauliflower Here’s what you’ll need to make this delicious Crispy Korean Chili Cauliflower: 1 head cauliflower – About 2 pounds, cut into 2″ bite-sized pieces. Freshness is essential for the best texture and taste. 1 cup cornstarch – This provides that coveted crunch; make sure it’s evenly coated for an ideal crisp. 1 cup all-purpose flour – This helps to create a light batter that clings perfectly to the cauliflower. 1 teaspoon baking powder – This adds a delightful lightness to the batter, ensuring that every bite is fluffy inside and crispy outside. 1 tablespoon kosher salt – Enhances the overall flavor of the cauliflower and the batter. 1 tablespoon white pepper – Offers a gentle heat, complementing the dish’s flavor profile without overpowering it. 1 teaspoon garlic powder – Infuses a savory essence that tantalizes your taste buds. 1 teaspoon onion powder – Adds an aromatic layer to the dish that enhances its overall depth. 1.5 cups ice cold soda water – Creates that magical, crispy texture; the colder, the better! 1 quart neutral oil – Essential for frying; choose something like canola or vegetable oil for the best results. 0.5 cup soy sauce – Low sodium is preferable to keep flavors balanced without being overly salty. 3 tablespoons sugar – This sweetens the sauce and balances the heat of the gochujang. 2 tablespoons honey – Adds a natural sweetness that pairs beautifully with the spices. 2 tablespoons gochujang – The star of the dish; this Korean chili paste brings heat and depth of flavor. 0.5 tablespoon gochugaru – For a smoky kick that enhances the overall flavor profile. 1 tablespoon rice vinegar – Brightens the sauce and cuts through the sweetness. 0.25 cup water – Helps to thin out the sauce for easier application. 1 teaspoon sesame seeds – Perfect for garnishing, adding a delightful crunch and nuttiness. How to Make Crispy Korean Chili Cauliflower Follow these simple steps to prepare this delicious Crispy Korean Chili Cauliflower: Step 1: Prepare the Cauliflower Cut the cauliflower into bite-sized florets and arrange them on a tray. This way, you’ll ensure they’re ready for the glorious batter that’s about to envelop them. Step 2: Make the Batter In a large bowl, combine the cornstarch, flour, baking powder, salt, pepper, garlic powder, onion powder, and those ice-cold soda water. Mix until smooth and bubbly, as this will create a light and crispy coating. Step 3: Heat the Oil Heat the oil in a deep pot or Dutch oven over medium-high heat until it reaches 375°F. A kitchen thermometer can be your best friend here, helping you avoid any culinary mishaps. Step 4: Fry the Cauliflower Working one piece at a time, dip the cauliflower into the batter, allowing the excess to drip off before gently placing it in the hot oil. Fry for about 5-6 minutes until they turn a glorious golden brown and are irresistibly crispy. Step 5: Drain and Sprinkle Once golden, remove the cauliflower and let them drain on a wire rack. It’s crucial to sprinkle them with salt immediately while they’re still hot, ensuring that the salt sticks beautifully. Step 6: Prepare the Sauce Combine soy sauce, sugar, honey, gochujang, gochugaru, rice vinegar, and water in a small saucepan over medium heat. Stir until bubbling and thickened; this is the magical glaze that will elevate your crispy treats to new heights. Step 7: Glaze the Cauliflower Brush the savory sauce generously over the crispy cauliflower, ensuring every piece gets a lovely coat. For an added touch, garnish with chopped scallions and a sprinkle of sesame seeds right before serving. Transfer to plates and prepare for the happy dance that will ensue after each delectable bite. Your Crispy Korean Chili Cauliflower is ready to steal the show at any gathering—or just for your late-night snack adventures! Perfecting Crispy Korean Chili Cauliflower Cooking Process Start by preparing the cauliflower and the batter at the same time for efficiency. While the oil heats, get your sauce simmering. This multitasking will keep everything fresh and maximize your crispy crunch. Add Your Touch to Crispy Korean Chili Cauliflower Feel free to personalize your Crispy Korean Chili Cauliflower by using different vegetables like broccoli or zucchini. Swap in a gluten-free flour for a dietary preference, or play with the spice level by adding more gochugaru for an extra kick. Storing & Reheating Crispy Korean Chili Cauliflower For storability, keep any leftovers in an airtight container in the fridge for up to three days. To reheat, pop them in the oven at 375°F for about 10 minutes to regain their delightful crispiness. When I first made this Crispy Korean Chili Cauliflower for a family gathering, the sheer delight on my cousin’s face after the first bite made my day. It’s those little moments that turn a simple recipe into a cherished memory. FAQs About Crispy Korean Chili Cauliflower What is Crispy Korean Chili Cauliflower? Crispy Korean Chili Cauliflower is a delectable dish that transforms humble cauliflower into a flavor-packed sensation. It features succulent cauliflower florets coated in a light, crispy batter and fried until golden brown. The dish is then tossed in a spicy-sweet sauce made with gochujang, honey, and other seasonings, making it an irresistible appetizer or side dish. Perfectly crunchy and bursting with umami flavors, this recipe is often enjoyed in Korean cuisine and is loved by foodies around the world. How can I
Delicious Garlic Butter Cheeseburger Bombshells Recipe in 30 Minutes

You know those moments when you stumble across a dish that promises to pack a punch of flavors while also eliciting oohs and aahs from everyone at the dinner table? Enter the delicious Garlic Butter Cheeseburger Bombshells. Imagine buttery, flaky biscuit dough enveloping juicy, cheesy goodness seasoned with garlic; it’s like a hug from your favorite comfort food, all wrapped up in one awesomely portable bombshell! These little bites of heaven make for the ideal meal when you want to impress your guests or simply enjoy a cozy night in. Picture this: you’re hosting a game night or having friends over for a casual dinner, and the aroma of garlic and melted cheese wafts through your house. Everyone’s tastebuds are tingling with anticipation. Trust me, these bombshells deliver a symphony of flavors that will have you and your guests reaching for seconds—if not thirds! Ingredients for Delicious Garlic Butter Cheeseburger Bombshells Here’s what you’ll need to make this delicious Delicious Garlic Butter Cheeseburger Bombshells: 1 pound ground beef – Opt for 80/20 blend for a juicy result; leaner beef might make it dry. 2 cloves garlic – Minced fresh garlic elevates the flavor; try to avoid garlic powder for maximum aroma. 1/2 cup Parmesan cheese – The nuttiness of Parmesan adds depth; shredded cheese can work too, but cubes give a fun surprise. 1 cup cheddar cheese – Use sharp cheddar for a bolder flavor that complements the beef beautifully. 1 can biscuit dough (16.3 oz) – This shortcut ensures a flaky, golden crust; feel free to use homemade dough if you’re feeling ambitious. 2 tablespoons butter – Melt it for brushing over the top to achieve that golden, glossy finish. 1 tablespoon parsley – Fresh parsley adds a pop of color and a hint of freshness to balance the richness. How to Make Delicious Garlic Butter Cheeseburger Bombshells Follow these simple steps to prepare this delicious Delicious Garlic Butter Cheeseburger Bombshells: Step 1: Preheat the Oven Start by preheating your oven, following the instructions on the biscuit dough package, typically around 375°F (190°C). Meanwhile, have your baking sheet ready—line it with parchment paper for easy cleanup. Step 2: Craft the Filling In a large bowl, combine the ground beef, minced garlic, diced Parmesan, and cubed cheddar cheese. Use your hands to mix everything together until well combined; just a little bit of elbow grease is all that’s needed! Step 3: Prepare the Biscuits Open the can of biscuit dough and separate each biscuit. Take one biscuit and flatten it out gently—think of it as a mini pizza dough ready to be filled with cheesy goodness. Step 4: Fill and Seal the Bombshells Place a generous portion of the beef and cheese mixture in the center of the flattened biscuit. Fold the dough over the filling and pinch it to seal really well. You want a secure bombshell—no leaks allowed! Step 5: Butter Up! Once all your bombshells are sealed and lined up on the baking sheet, brush the tops with melted butter. Sprinkle chopped parsley over each one like confetti; it adds flair and freshness! Step 6: Bake to Perfection Bake according to the biscuit dough package instructions, usually around 10-15 minutes, or until they’re gloriously golden and puffed up. As they bake, your kitchen will fill with mouthwatering aromas that will make your dinner guests weak at the knees. When they’re done, remove them from the oven and let them cool for just a moment. Serve them up hot, perhaps with a side of dipping sauce like ranch or ketchup for extra fun. Trust me; every bite will be a burst of garlicky, cheesy joy. Enjoy your masterpiece and watch as they disappear faster than you can say “delicious Garlic Butter Cheeseburger Bombshells”! Perfecting Delicious Garlic Butter Cheeseburger Bombshells Cooking Process Begin by preheating your oven to the temperature specified on the biscuit dough can; then, mix your beef and cheeses while the oven warms up. Afterward, assemble the bombs, bake them together in batches to ensure even cooking and mouthwatering results. Add Your Touch to Delicious Garlic Butter Cheeseburger Bombshells Feel free to swap out ground beef for ground turkey or chicken for a lighter option. You can add jalapeños for a spicy kick, try different cheeses like pepper jack, or incorporate your favorite herbs to personalize the flavors of your bombs. Storing & Reheating Delicious Garlic Butter Cheeseburger Bombshells To store, let the cheeseburger bombshells cool completely before placing them in an airtight container in the fridge. When reheating, pop them in the oven for a few minutes to regain that delightful crispiness, or use the microwave for a quick heat-up. While preparing these cheeseburger bombshells, I remember my sister’s wide-eyed delight when she took her first bite. She couldn’t stop grinning and declared these to be “the best homemade bites ever!” Moments like that remind me why I love cooking. FAQs About Delicious Garlic Butter Cheeseburger Bombshells What is Delicious Garlic Butter Cheeseburger Bombshells? Delicious Garlic Butter Cheeseburger Bombshells are delightful bite-sized treats filled with a savory combination of seasoned ground beef, melted cheese, and aromatic garlic, all wrapped in golden, flaky biscuit dough. They’re incredibly versatile, perfect for parties, game days, or a fun family dinner. They pack a flavorful punch, offering a unique twist on traditional cheeseburgers in a convenient package. The buttery sheen on top adds an irresistible finish, making them a sure hit at any gathering. Plus, they can be customized with your favorite ingredients for added fun! How long does it take to make Delicious Garlic Butter Cheeseburger Bombshells? You can whip up these scrumptious Delicious Garlic Butter Cheeseburger Bombshells in just 30 minutes! With a quick prep time of around 15 minutes and a cooking time of only 15 minutes, they are perfect for any busy schedule. Whether you’re hosting a game night or just want to enjoy a delicious dinner, these bombs are ready in no time, allowing you to spend more moments enjoying delicious bites with
Easy No-Bake Protein Balls Recipe for Healthy Snacking
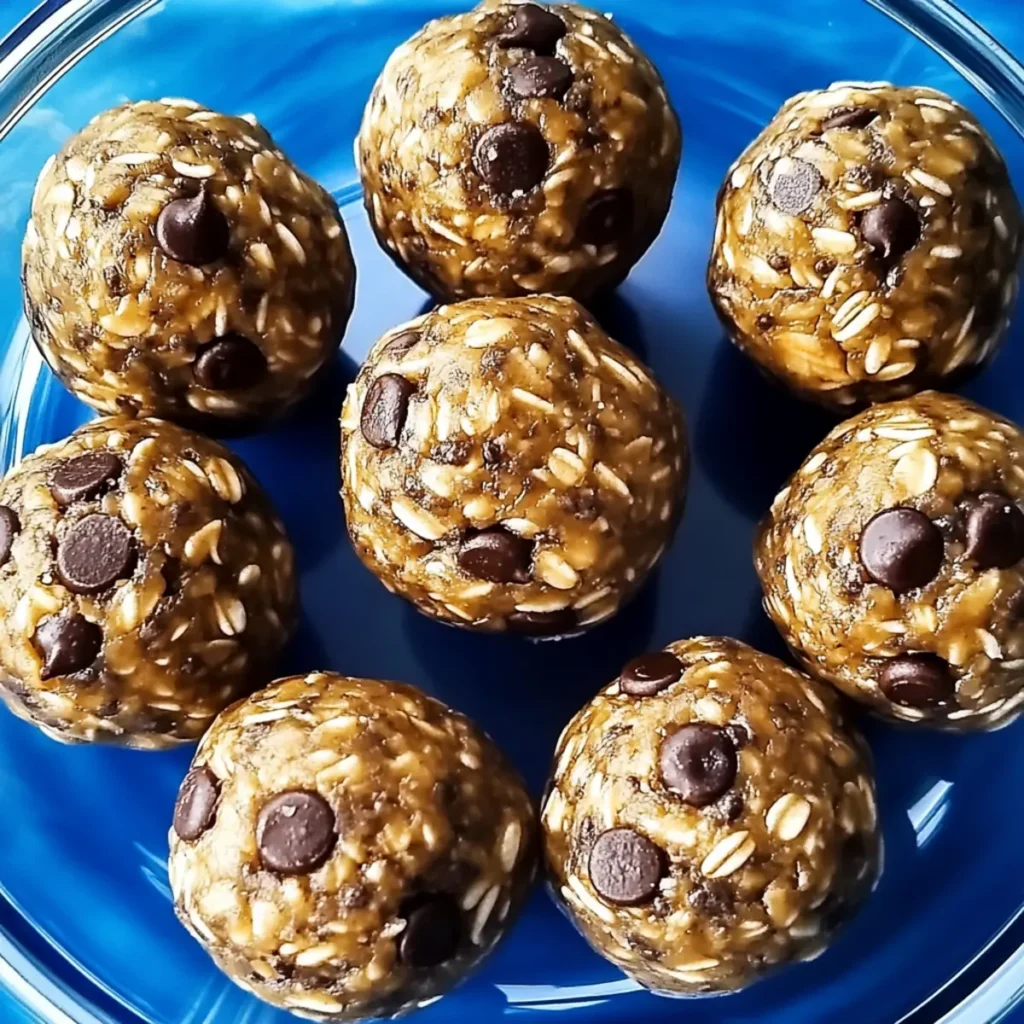
The moment you take a bite of these No-Bake Protein Balls, it feels like your taste buds have joined a joyous little party! They’re a chewy, nutty explosion that hints at the delightful sweetness of chocolate, all wrapped up in one scrumptious bite. The aroma of creamy peanut butter combined with a touch of honey is simply intoxicating, making this treat not just a snack but an experience. Picture yourself indulging after a workout or during a Netflix binge – this recipe is as flexible as your yoga instructor! It’s funny how a simple recipe can trigger memories. I still remember the first time I attempted to create my own snack with a bunch of ingredients lying around. My kitchen turned into a sticky battleground. Let’s just say, the protein powder explosion left me more in need of a vacuum than a snack! Fast forward to today, and these No-Bake Protein Balls have become my go-to snack for both fitness and fun. They’re perfect for lazy days or those mid-afternoon slumps when you just need a quick pick-me-up – all you need is ten minutes and a little bit of mixing magic! Ingredients for No-Bake Protein Balls Here’s what you’ll need to make this delicious No-Bake Protein Balls: 1.5 cups whole rolled oats – These form the base of our protein balls, offering a hearty texture and fiber, making you feel satisfied longer. 1 cup creamy natural peanut butter – Choose a good quality peanut butter for a rich flavor; this acts as a delightful binder. 0.25 cups ground flaxseed – Packed with omega-3s, this adds nutritional benefits while giving a nice nutty taste. 0.25 cups honey – This natural sweetener not only enhances flavor but also helps in binding the ingredients together beautifully. 2 scoops protein powder (approximately 0.25 cups) – Choose your favorite flavor or type; it’ll give your balls a healthy protein punch! 1 teaspoon vanilla extract – A splash of vanilla enhances the overall flavor profile, making it more inviting. 6 tablespoons mini chocolate chips – Because life is always better with a little chocolate! These add decadent little bursts of flavor. How to Make No-Bake Protein Balls Follow these simple steps to prepare this delicious No-Bake Protein Balls: Step 1: Gather Your Ingredients First things first, gather all your ingredients. Ensure you have a large mixing bowl and a cookie scoop on standby. Step 2: Mix the Ingredients In your mixing bowl, combine the oats, peanut butter, ground flaxseed, honey, protein powder, vanilla extract, and half the mini chocolate chips. The good news? No fancy gadgets are needed – just your sturdy spoon or spatula! Expect a thick, somewhat sticky mixture that you’ll be able to mold later on. Step 3: Form the Balls Use a 2-tablespoon cookie scoop to portion out the mixture. With slightly damp hands, roll each portion into balls. How easy is that? Imagine your hands coated in this delicious concoction; it’s downright satisfying! Step 4: Chill to Perfection Once rolled, place your protein balls on a lined baking sheet or plate. Pop them in the fridge and let them chill for 1 to 2 hours. This step is crucial as it helps solidify their shape and makes them easier to handle. Step 5: Enjoy or Store After chilling, your No-Bake Protein Balls are ready to be devoured! They can be kept in the fridge for up to a week or tossed in the freezer for a quick snack later. Just be sure to separate them with parchment paper if you freeze them; nobody likes a stuck-together ball! With these simple steps, you’ll have made a delightful snack that’s easy to grab on the go and perfect after a workout or whenever you need a sweet boost. You Must Know About No-Bake Protein Balls This showstopping No-Bake Protein Balls delivers restaurant-quality results using simple ingredients you probably already have at home. The perfect balance of textures and flavors creates an unforgettable dining experience that will have everyone asking for seconds. Picture-perfect presentation with vibrant colors makes this dish absolutely Instagram-worthy and guaranteed to impress any dinner guest. Incredibly versatile recipe that works beautifully for weeknight dinners, meal prep, special occasions, or even outdoor entertaining sessions. Perfecting No-Bake Protein Balls Cooking Process To streamline making No-Bake Protein Balls, start by mixing the dry ingredients first, then add the wet ingredients. This ensures even distribution of flavors and makes the mixing process smoother. Add Your Touch to No-Bake Protein Balls Feel free to swap peanut butter for almond or cashew butter for a unique twist. Additional options could include coconut flakes, dried fruits, or different flavored protein powders to suit your taste. Storing & Reheating No-Bake Protein Balls Store these delicious No-Bake Protein Balls in an airtight container in the fridge for up to a week or freeze them for up to three months. No reheating is necessary; just grab and enjoy! It was a rainy Sunday afternoon when I first made No-Bake Protein Balls. My friends raved about them, insisting they were the perfect snack for movie marathons. It’s moments like these that warm my heart and inspire my cooking. FAQs About No-Bake Protein Balls What are No-Bake Protein Balls? No-Bake Protein Balls are a convenient, nutritious snack made without the need for an oven. Comprised mainly of oats, nut butter, and protein powder, these tasty bites pack a punch of energy and flavor. They’re perfect for on-the-go snacking or as a nutritious addition to your meal prep. Not only are they quick to prepare, but they also offer a healthy balance of protein, carbohydrates, and healthy fats, making them a favorite among fitness enthusiasts and busy families alike. How do I make No-Bake Protein Balls? To make No-Bake Protein Balls, start by mixing whole rolled oats, peanut butter, ground flaxseed, honey, protein powder, vanilla extract, and chocolate chips in a large bowl. The mixture will come together into a thick mass. Scoop it out using a 2-tablespoon cookie scoop and
Delicious Gourmet Blue Cheese Coleslaw Recipe Perfect for Any Occasion
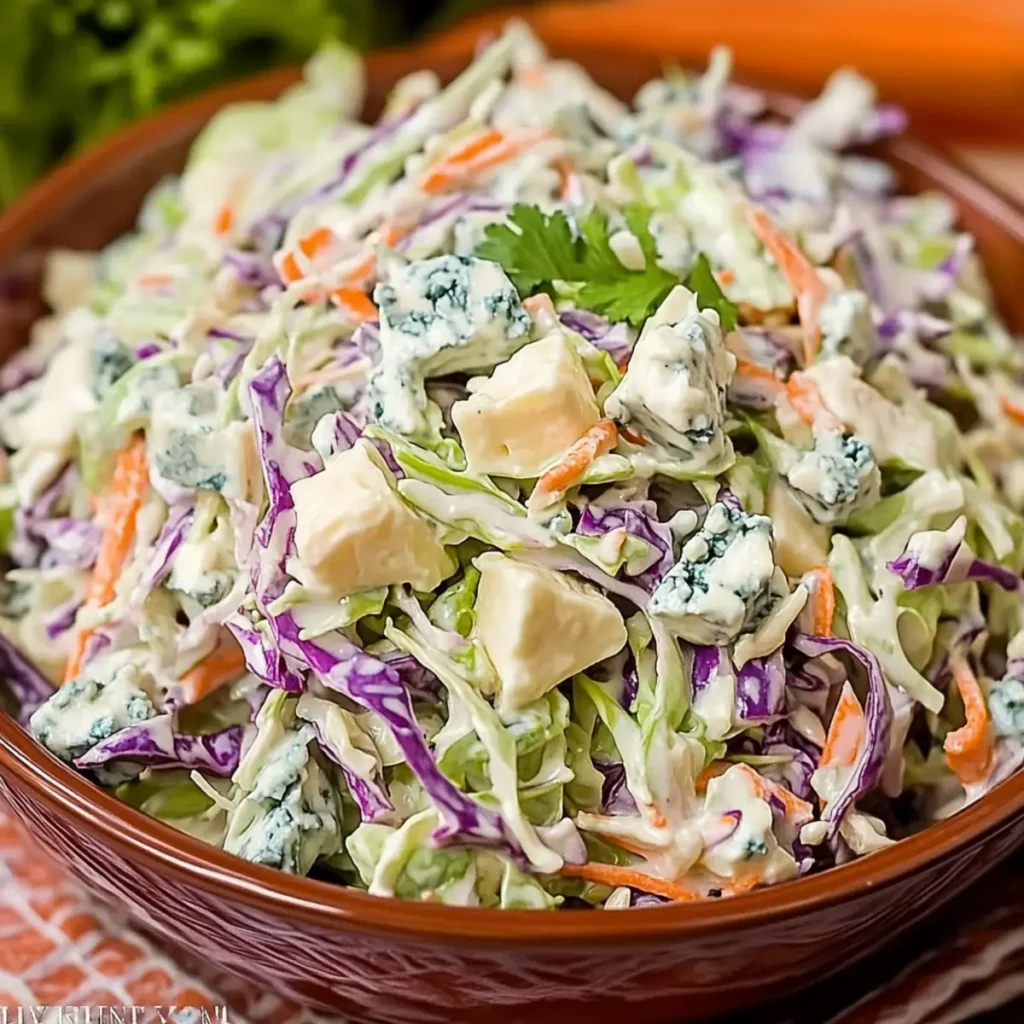
The aroma of freshly shredded cabbage mingling with the tangy creaminess of blue cheese is nothing short of intoxicating. This Delicious Gourmet Blue Cheese Coleslaw Recipe for Any Occasion is not just another salad; it’s a mouthwatering adventure for your taste buds, combining crunchy textures and bold flavors that will make your heart sing. Imagine pulling a bowl of this colorful creation out at your next gathering, instantly transforming an ordinary meal into an unforgettable feast. Perfect for summer barbecues or winter holiday gatherings, this coleslaw is a beloved sidekick to any dish, ensuring everyone comes back for seconds—and maybe even thirds! Ingredients for Delicious Gourmet Blue Cheese Coleslaw Recipe for Any Occasion Here’s what you’ll need to make this delicious Delicious Gourmet Blue Cheese Coleslaw Recipe for Any Occasion: 4 cups shredded green cabbage – choose firm, fresh heads for crunch and color; this is the base of your coleslaw. 2 cups shredded red cabbage – adds a vibrant hue and a slightly sweet flavor, making the dish visually appealing. 1 cup grated carrots – for a touch of sweetness and a crunchy texture that complements the cabbage. 1 cup mayonnaise – the creamy binder that brings everything together; try a low-fat version if you’re looking to cut calories. 3 tablespoons white wine vinegar – provides the necessary acidity to balance the creamy elements and brighten up the flavors. 1 tablespoon extra-virgin olive oil – for added richness and to help the dressing coat the veggies smoothly. 2 tablespoons granulated sugar – counterbalances the tanginess of the vinegar and mayo while enhancing the overall flavor. 1 teaspoon poppy seeds – these little beauties add a delicate crunch and visual appeal to your coleslaw. 1 teaspoon celery salt – deepens the flavor profile and gives a hint of savoriness that complements the other ingredients. 1/4 teaspoon white pepper – adds subtle spice without overwhelming the dish, maintaining a nice balance of flavors. 1/2 teaspoon dry mustard powder – contributes a tangy depth that pairs beautifully with the blue cheese. 8 ounces crumbled blue cheese – the star of the show, providing bold flavor that elevates this coleslaw to gourmet status! How to Make Delicious Gourmet Blue Cheese Coleslaw Recipe for Any Occasion Follow these simple steps to prepare this delicious Delicious Gourmet Blue Cheese Coleslaw Recipe for Any Occasion: Step 1: Prepare the Vegetables In a large bowl, combine the shredded green and red cabbage along with the grated carrots. Take a moment to admire the beautiful colors—it’s like a salad rainbow! Use sharp knives or a mandoline for even shredding to ensure a perfect texture throughout. Step 2: Make the Dressing In another bowl, whisk together the mayonnaise, white wine vinegar, extra-virgin olive oil, granulated sugar, poppy seeds, celery salt, white pepper, and dry mustard powder. You want a smooth, creamy dressing that’s also slightly tangy. Remember, this dressing is what will marry all the ingredients together in glorious culinary harmony! Step 3: Combine Everything Pour the dressing over your magnificent cabbage mixture. Mix well until every shred of cabbage is coated—it’s like giving your vegetable medley a warm hug! Be gentle; you want to keep the veggies crisp. Step 4: Fold in the Blue Cheese Gently fold in the crumbled blue cheese, ensuring it’s evenly distributed throughout the coleslaw. This step is where the magic happens—the tangy blue cheese adds an exquisite layer of flavor that your guests will adore. Step 5: Chill and Meld Refrigerate your coleslaw for at least 20 minutes. This resting period allows all the flavors to meld beautifully, making each bite taste even better when it’s finally served. You can use this time to prep the rest of your meal or perhaps set a lovely table! Step 6: Serve and Enjoy When you’re ready to serve, give the coleslaw a gentle toss. Transfer it to a serving bowl and, if desired, sprinkle some extra crumbled blue cheese on top for added flair. Pair this coleslaw with grilled meats, sandwiches, or just enjoy it on its own. Voilà—a stunning side dish that everyone will ask for the recipe to! This showstopping Delicious Gourmet Blue Cheese Coleslaw Recipe for Any Occasion delivers restaurant-quality results using simple ingredients you probably already have at home. The perfect balance of textures and flavors creates an unforgettable dining experience that will have everyone asking for seconds. Picture-perfect presentation with vibrant colors makes this dish absolutely Instagram-worthy and guaranteed to impress any dinner guest. Incredibly versatile recipe that works beautifully for weeknight dinners, meal prep, special occasions, or even outdoor entertaining sessions. Perfecting Delicious Gourmet Blue Cheese Coleslaw Recipe for Any Occasion Cooking Process Start by prepping your vegetables; shred the green and red cabbage and grate the carrots. While doing that, whip up the dressing in a separate bowl. Combine everything just before serving for the freshest taste. This order saves time and ensures the crunch you crave. Add Your Touch to Delicious Gourmet Blue Cheese Coleslaw Recipe for Any Occasion Feel free to tweak this recipe to your liking! Consider adding ingredients like sliced apples for sweetness, nuts for crunch, or even swapping mayonnaise for Greek yogurt for a tangy twist. The possibilities are endless, and your coleslaw will reflect your unique taste! Storing & Reheating Delicious Gourmet Blue Cheese Coleslaw Recipe for Any Occasion To store leftover coleslaw, transfer it to an airtight container and keep it in the fridge for up to three days. Avoid reheating, as coleslaw is best enjoyed cold, preserving its crisp texture and refreshing flavors. Cooking this coleslaw always reminds me of a family picnic where everyone asked for my secret recipe. Little did they know, it was just chopping and tossing with love! FAQs About Delicious Gourmet Blue Cheese Coleslaw Recipe for Any Occasion What is Delicious Gourmet Blue Cheese Coleslaw Recipe for Any Occasion? The Delicious Gourmet Blue Cheese Coleslaw Recipe for Any Occasion is a sophisticated twist on the classic coleslaw, combining crunchy vegetables with the rich, tangy
Delicious Valentine Garlic Bread Hearts Recipe for Your Sweetheart

When it comes to love, few things can melt the heart quite like the warm, garlicky embrace of a beautifully baked loaf of bread. These Valentine Garlic Bread Hearts are not your ordinary garlic bread; they bring a delightful twist of romance that will surely make your sweetheart swoon. The golden, crispy edges paired with the creamy and flavorful garlic butter create a tantalizing treat that fills the air with enchanting aromas. Imagine a cozy evening, perhaps after a long day, where you surprise your special someone with a plate of these heart-shaped delights. Whether it’s a romantic date night or a simple family dinner, these sweet yet savory bites make every occasion feel like a celebration of love. If you’ve ever wanted to impress someone with your culinary skills without spending hours in the kitchen, you’re in for a treat! Ingredients for Valentine Garlic Bread Hearts Here’s what you’ll need to make this delicious Valentine Garlic Bread Hearts: 1 French Baguette – A classic choice, ensure it’s fresh for the best texture and taste. A day-old baguette works well too, as it crisps up beautifully. 4 cloves fresh garlic, minced – Using fresh garlic offers a bold and aromatic flavor. Feel free to adjust the amount based on your love for garlic. 1/2 cup unsalted butter, softened – Softened butter is essential for easy spreading. Unsalted allows you to control the saltiness of the dish perfectly. 1/4 cup fresh parsley, finely chopped – Fresh parsley not only adds color but also brings a hint of freshness that balances the rich flavors. 1/2 cup grated Parmesan cheese – This cheese adds a nutty flavor that complements the garlic beautifully. Opt for high-quality cheese for the best results. How to Make Valentine Garlic Bread Hearts Follow these simple steps to prepare this delicious Valentine Garlic Bread Hearts: Step 1: Preheat Your Oven Set your oven to 375°F (190°C) to get it nice and hot while you prep the baguette and the delicious garlic butter mixture. Step 2: Slice the Baguette into Hearts With a sharp knife or a heart-shaped cookie cutter, slice the baguette into heart shapes. If you’re using a traditional knife, cut diagonal slices for maximum flair—just imagine how cute they’ll look when served! Step 3: Prepare the Garlic Butter Mix In a bowl, combine the softened butter, minced garlic, chopped parsley, and grated Parmesan cheese. Mix until smooth and creamy, making sure the garlic is evenly distributed to ensure every bite packs a flavor punch. Step 4: Spread the Love Generously spread the garlic butter mixture on both sides of each heart-shaped slice. Don’t skimp on this part; this is where all the flavor is lurking! Step 5: Bake Until Golden Arrange the heart-shaped slices on a baking sheet lined with parchment paper. Bake for about 10-12 minutes or until the slices are golden brown and your kitchen is filled with an irresistible aroma. Step 6: Serve and Enjoy! Once out of the oven, serve your Valentine Garlic Bread Hearts warm. They’re perfect on their own or as a delightful accompaniment to a bowl of hearty soup or a fresh salad. Your loved ones will be begging for seconds! These Valentine Garlic Bread Hearts are bound to become a staple in your kitchen, whether you’re wooing a partner, feeding the family, or just treating yourself. With their irresistible crunch and buttery, garlicky goodness, these little love bites remind us that the best meals are those made with heart. Enjoy every moment spent baking and bonding over these delicious treats! Perfecting Valentine Garlic Bread Hearts Cooking Process To achieve the ultimate Valentine Garlic Bread Hearts, start by preparing the garlic butter mixture first. While it’s blending, slice the baguette, ensuring all heart shapes are ready for that buttery goodness. This way, you maximize flavor while keeping the process efficient. Add Your Touch to Valentine Garlic Bread Hearts Feel free to switch things up with your favorite herbs like thyme or basil instead of parsley. Want a kick? Add a pinch of red pepper flakes to the garlic butter. You can also experiment with different cheeses like mozzarella or cheddar for a unique twist. Storing & Reheating Valentine Garlic Bread Hearts Store leftover Valentine Garlic Bread Hearts in an airtight container for up to two days. To reheat, pop them back in the oven at 350°F for a few minutes until warm and crispy again. Avoid microwaving to keep that delightful crunch. You know, last Valentine’s Day, I decided to whip up these amazing Valentine Garlic Bread Hearts for dinner. My partner loved them so much, they practically licked the plate clean! It was one of those moments that reminded me why I love cooking. FAQs About Valentine Garlic Bread Hearts What is Valentine Garlic Bread Hearts? Valentine Garlic Bread Hearts are a delightful twist on traditional garlic bread, shaped into charming heart forms that make them perfect for romantic occasions. Made from a fresh French baguette, these heart-shaped delights are slathered in a savory garlic butter mixture blended with fresh parsley and grated Parmesan cheese. The result is a visually appealing and deliciously indulgent dish that is sure to impress your sweetheart. Ideal for sharing, they make an excellent addition to any Valentine’s Day dinner or special occasion. How long does it take to make Valentine Garlic Bread Hearts? Making Valentine Garlic Bread Hearts is surprisingly quick and easy. With just 10 minutes of prep time and an additional 12 minutes of baking, you can have these delicious treats ready in about 22 minutes! This is perfect for those moments when you need a scrumptious side dish but don’t have much time. Your loved ones will be amazed by the deliciousness that you can create in such a short period. Can I customize Valentine Garlic Bread Hearts? Absolutely! Valentine Garlic Bread Hearts offer a fantastic base for customization. You can replace parsley with other fresh herbs like basil or thyme for a different flavor profile. For those who
Hawaiian Roll Beef Super Bowl Party Sliders Recipe You’ll Love
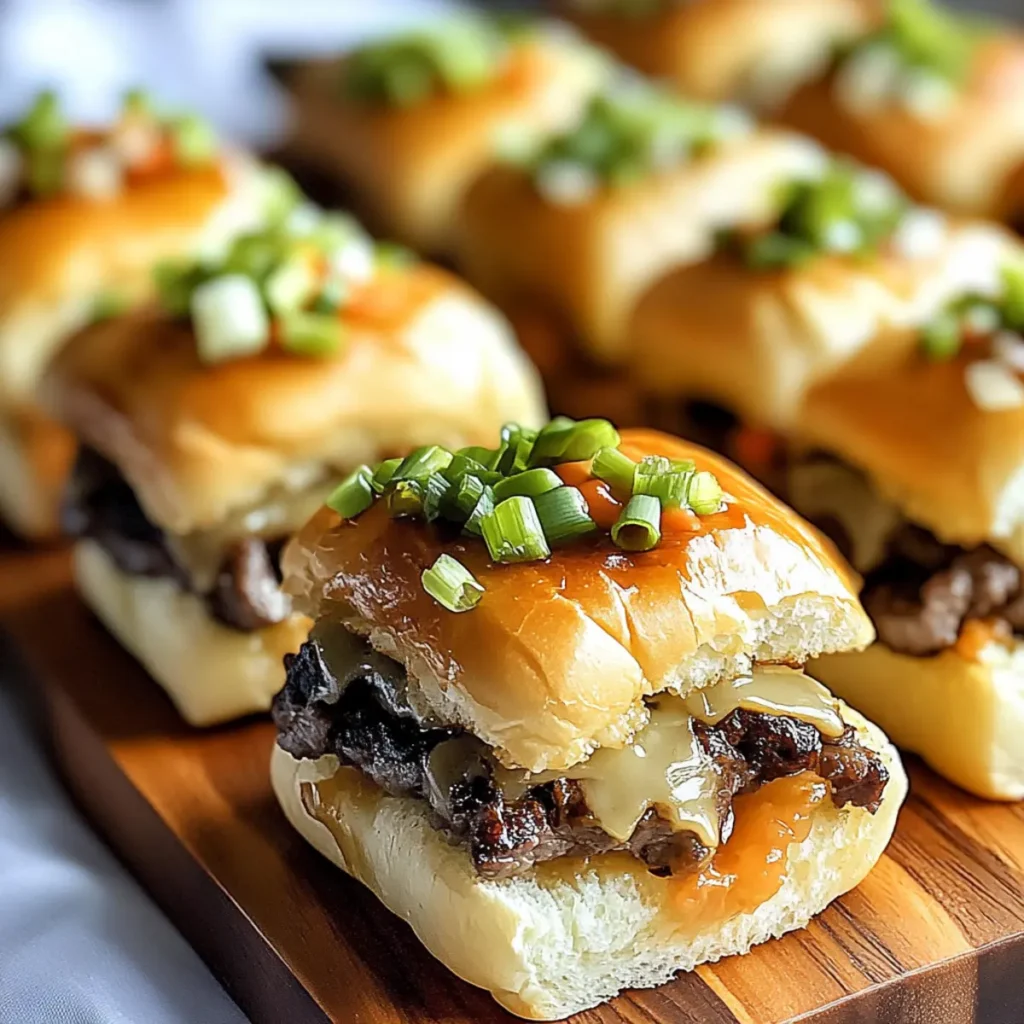
Hawaiian Roll Beef Super Bowl Party Sliders are the perfect combination of soft, sweet bread and hearty, savory beef, creating a flavor explosion that will have your taste buds dancing with joy. Imagine pulling apart warm, gooey sliders that burst with melted cheese and zesty BBQ sauce, all nestled between fluffy Hawaiian rolls—pure bliss on game day, or any day for that matter. These sliders are not just food; they are an experience to savor while surrounded by friends and family, sharing laughter and maybe a little friendly competition if the Super Bowl is on. Picture this: it’s a cool evening, the game is thrilling, and the aroma of these sliders fills the room, pulling everyone together like a warm hug. Your guests will celebrate their culinary fortune as they devour these sliders, asking for seconds, thirds, and maybe even a fourth, because once you start, it’s hard to stop. Ingredients for Hawaiian Roll beef Super Bowl Party Sliders Here’s what you’ll need to make this delicious Hawaiian Roll beef Super Bowl Party Sliders: 12 Hawaiian Sweet Rolls – These small, fluffy rolls are the star of the show, adding a delightful sweetness to each bite while also acting as the perfect vessel for the beef. 1 lb lean ground beef – Opt for lean beef to ensure a juicy finish without excess grease, providing a meaty base full of flavor. 1 cup shredded cheddar cheese – This sharp cheese adds a tangy contrast to the sweetness of the rolls, creating a mouthwatering balance. 1 cup shredded mozzarella cheese – Melty and creamy, mozzarella brings extra gooeyness, making the sliders irresistible. 1 medium onion, diced – Onions provide a savory boost and sweetness when cooked, enhancing the overall flavor profile of the sliders. ½ cup BBQ sauce – Use your favorite BBQ sauce to add a smoky, tangy depth to the beef, sealing in all the delicious flavors. Optional: Sliced pickles for topping – Add a crunchy, tangy contrast on top for those who love a little extra zing with their sliders. How to Make Hawaiian Roll beef Super Bowl Party Sliders Follow these simple steps to prepare this delicious Hawaiian Roll beef Super Bowl Party Sliders: Step 1: Preheat the Oven Start by preheating your oven to 350°F (175°C). Grab a baking dish and grease it lightly with cooking spray or olive oil to prevent sticking. Step 2: Sauté the Beef and Onions In a skillet over medium heat, brown your ground beef along with the diced onions for about 5 to 7 minutes. Make sure to stir occasionally and drain any excess fat to keep it deliciously juicy. Step 3: Incorporate BBQ Sauce Add the BBQ sauce to your beef and onions, stirring it all together. Allow it to simmer for 3 to 5 minutes, letting the flavors meld beautifully. Step 4: Prepare the Rolls Slice the Hawaiian rolls in half horizontally, creating a bottom layer to hold all that deliciousness. Place the bottom halves snugly in your greased baking dish. Step 5: Assemble the Sliders Spoon the beef mixture evenly onto each of the bottom rolls, allowing the savory filling to cascade across every slider. Make it even more decadent by sprinkling both cheddar and mozzarella cheeses on top. Step 6: Bake to Perfection Carefully place the top halves of the rolls back on. Cover the dish with foil and bake for about 15 minutes. Then, remove the foil and let it bake uncovered for an additional 5 minutes until the tops are golden and the cheese is bubbly. Feel free to serve these magnificent sliders with sliced pickles on the side for guests to customize their delectable creations. With every bite, you and your crew will experience the warm flavors melding into the perfect bite-sized treat. Enjoy watching the game while indulging in the delicious joy of Hawaiian Roll beef Super Bowl Party Sliders. Perfecting Hawaiian Roll beef Super Bowl Party Sliders Cooking Process Start by browning the ground beef with onions in a skillet to maximize flavor. While the meat simmers with BBQ sauce, slice your Hawaiian rolls and prepare your baking dish for final assembly. Add Your Touch to Hawaiian Roll beef Super Bowl Party Sliders Feel free to swap the cheeses for your favorites or add some sautéed mushrooms for an earthy twist. You can also kick up the heat with jalapeños or try different sauces like teriyaki for a fun change. Storing & Reheating Hawaiian Roll beef Super Bowl Party Sliders Store leftover sliders in an airtight container in the fridge for up to three days. To reheat, cover the sliders with foil and warm in the oven at 350°F until heated through—approximately 10 minutes. Nothing warms my heart quite like the time I made these Hawaiian Roll beef sliders for a family gathering. After the first bite, my aunt declared them “life-changing,” and honestly, I couldn’t have hoped for a better compliment! FAQs About Hawaiian Roll beef Super Bowl Party Sliders What is Hawaiian Roll beef Super Bowl Party Sliders? Hawaiian Roll beef Super Bowl Party Sliders are delightful mini sandwiches layered with seasoned ground beef, tangy BBQ sauce, and a blend of melted cheeses, all nestled between sweet Hawaiian rolls. These sliders are a popular choice for gatherings, especially during the Super Bowl season, as they are easy to prepare and offer a burst of flavor in every bite. Ideal for sharing, they can transform any occasion into a festive celebration, making them a hit with both kids and adults alike. How do I store leftover Hawaiian Roll beef Super Bowl Party Sliders? To store leftover Hawaiian Roll beef Super Bowl Party Sliders, place them in an airtight container in the refrigerator. They can last for up to three days, allowing you to enjoy them later without losing flavor. For best results, wrap individual sliders in foil or parchment paper before placing them in the container. When you’re ready to eat, simply reheat them in the oven at 350°F
Delicious Onion Soup Cups with Gruyère and Caramelized Onions
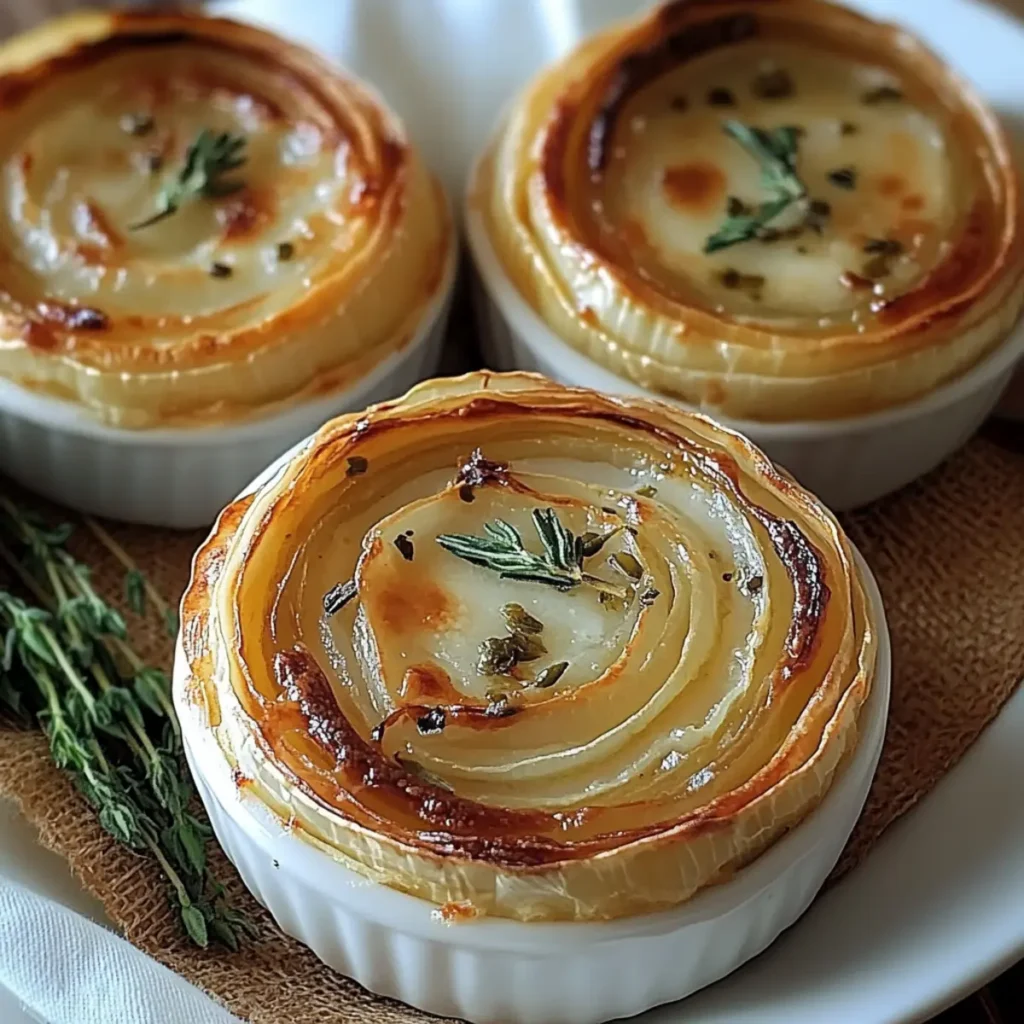
Onion Soup Cups are a comforting delight, perfect for chilly evenings and cozy gatherings. Imagine a warm, rich broth infused with caramelized onions, each sip promising a flavor explosion that warms you from the inside out. Topped with golden, bubbling Gruyère cheese and a slice of crispy French bread, these cups are the very definition of comfort food. Whether you’re sharing stories around the dinner table or treating yourself to a solo night in, Onion Soup Cups create a sense of nostalgia, reminiscent of quaint bistros in Paris. With each spoonful, you’ll be transported to a world where buttery, sweet onions mingle with hearty beef broth, creating not just a dish, but a delightful experience for your palate. Ingredients for Onion Soup Cups Here’s what you’ll need to make this delicious Onion Soup Cups: 4 large onions – Choose sweet onions for a milder flavor and a generous amount of sweetness when caramelized. 4 tablespoons butter – This will help caramelize the onions to a beautiful golden color, adding rich flavor. 1 teaspoon sugar – A pinch of sugar enhances the caramelization, ensuring your onions are perfectly sweet. 8 cups beef broth – Opt for a high-quality broth or homemade if you have it. It forms the flavorful base of the soup. 2 teaspoons thyme – This herbal note complements the richness of the broth and onions beautifully. 8 slices French bread – Sturdy enough to float on top of the soup without sinking, providing a lovely crunch. 2 cups Gruyère cheese – Famous for its melting qualities, this cheese adds a creamy and savory layer that takes the dish over the top. How to Make Onion Soup Cups Follow these simple steps to prepare this delicious Onion Soup Cups: Step 1: Prepare the Onions Begin by melting the butter in a large pot over medium heat. Add thinly sliced onions along with the teaspoon of sugar. Cook until the onions become soft and caramelized, stirring occasionally, which should take about 25-30 minutes. Step 2: Create the Soup Base Once the onions are caramelized to a rich golden brown, pour in the beef broth. Add the thyme, bring it to a simmer, and let the flavors meld together for about 30 minutes. Step 3: Toast the Bread While your soup simmers, preheat your oven to broil. Arrange the slices of French bread on a baking sheet and toast until golden brown, about 2-3 minutes per side. Keep an eye on them to prevent burning! Step 4: Assemble Your Cups Ladle the hot onion soup into individual oven-safe cups or bowls. Place a piece of the toasted French bread on top of each cup, ensuring it fits snugly. Step 5: Add Cheese Sprinkle a generous amount of Gruyère cheese on top of each slice of bread. The more cheese, the better, right? Step 6: Broil to Perfection Slide the cups under the broiler for 3-5 minutes until the cheese is melted, bubbly, and just starting to turn golden brown. Be vigilant—you want that perfect melt without it getting too toasty. Transfer the Onion Soup Cups to a serving platter, making sure to add a sprinkle of thyme or black pepper for that finishing touch and serve immediately. Enjoy the warmth and rich flavors that only a homemade soup can provide. It’s time to dig in, and trust me, this Onion Soup Cups recipe will leave you craving more long after the last spoonful is gone! Perfecting Onion Soup Cups Cooking Process Start by caramelizing the onions for deep flavor, then simmer the broth while preparing the cheese toast. Assemble everything just before serving to keep the crunchiness and warmth intact. Add Your Touch to Onion Soup Cups Feel free to swap out Gruyère cheese for Swiss or add a splash of sherry for a touch of sophistication. Topping your soup with fresh herbs like parsley or chives can also add a delightful flavor boost. Storing & Reheating Onion Soup Cups To store, keep the soup and bread separately in airtight containers to maintain freshness. Reheat the soup on the stove and broil the bread with cheese for a few minutes before serving. Sometimes, I make these Onion Soup Cups for friends, and the moment their eyes light up as the cheese bubbles is a memory I treasure. It brings warmth and laughter to our table every time. FAQs About Onion Soup Cups What is Onion Soup Cups? Onion Soup Cups are a delightful twist on the classic French onion soup, served in individual portions for an elegant touch. This dish features rich, caramelized onions simmered in beef broth, topped with toasted French bread and melted Gruyère cheese. Perfectly portioned, these soup cups are not just easy to serve but also create an exquisite dining experience. They make for an impressive appetizer or a cozy dinner option that’s sure to warm hearts and bellies alike. How can I customize my Onion Soup Cups? You can easily customize your Onion Soup Cups to suit your personal taste. If you prefer a different cheese, Swiss or mozzarella can be excellent substitutes. For a unique twist, consider adding a splash of sherry or white wine during the simmering process. Fresh herbs like thyme or chives sprinkled on top before serving will enhance the flavors. Whether you stick to tradition or get creative, these adjustments can elevate your dish to new heights. Can I make Onion Soup Cups ahead of time? Absolutely, you can prepare Onion Soup Cups ahead of time. Caramelize the onions and prepare the broth in advance, then store them separately in airtight containers. When you’re ready to serve, simply heat the broth, assemble the cups with toasted bread and cheese, and broil until bubbly. This makes it a fantastic option for entertaining guests, allowing you to enjoy their company without spending all your time in the kitchen. What should I serve with Onion Soup Cups? Onion Soup Cups pair wonderfully with a variety of sides to create a well-rounded meal. For
Delicious Mini Pasta Salad Cups for Refreshing Summer Appetizers
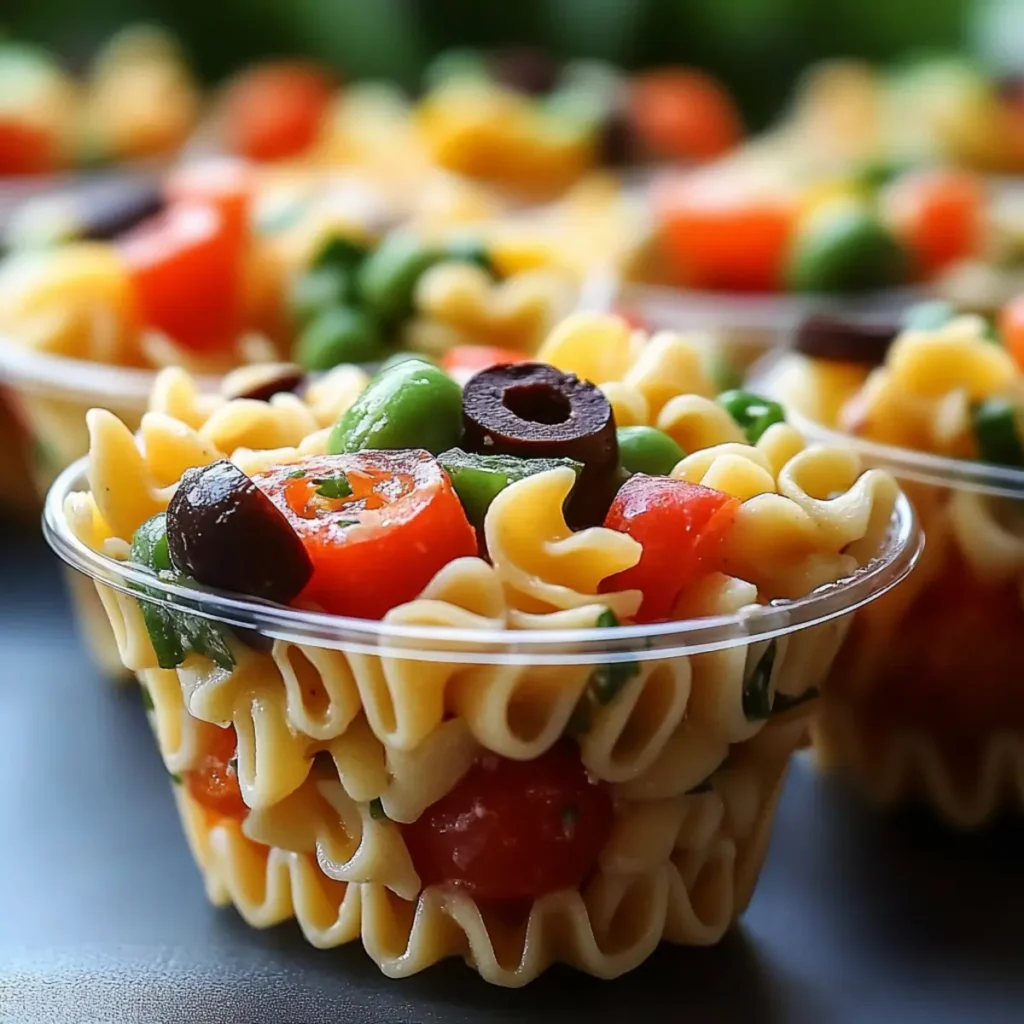
Mini Pasta Salad Cups are the perfect burst of freshness on a warm day, combining the delightful crunch of veggies with the comforting embrace of pasta. These fun little cups will have you coming back for seconds without any guilt. Imagine a sunlit picnic on a blanket with these vibrant, flavor-packed bites waiting to steal the show—sounds good, right? These Mini Pasta Salad Cups not only make a stunning appetizer but also bring back fond memories of summer cookouts. Picture yourself surrounded by friends, laughter in the air, and these tasty treats making a splash at your next gathering. Prepare yourself for a food adventure filled with bright colors, zesty aromas, and that perfect harmony of flavors. Ingredients for Mini Pasta Salad Cups Here’s what you’ll need to make this delicious Mini Pasta Salad Cups: 1 cup cooked small pasta – Cook that heavenly pasta until al dente, and let it cool so it’s ready to mingle with the other ingredients. 1/2 cup cherry tomatoes – Sweet and juicy, halved to show their sunny inside. Use the ripest strawberries for maximum flavor. 1/2 cup cucumber – Diced for crunch, cucumbers add a refreshing twist to the mix. Go for English cucumbers if you want smaller seeds. 1/4 cup red onion – Finely chopped for that zesty punch, red onions offer a lovely color contrast too. 1/4 cup bell pepper – Diced into small pieces for sweetness and that pop of color; any bell pepper works beautifully! 1/4 cup black olives – Sliced for a briny touch; they add depth and a touch of Mediterranean flair. 1/2 cup feta cheese – Crumbled like tiny clouds of cheese; it elevates the salad’s flavor profile with a tangy kick. 3 tablespoons olive oil – A drizzle of this liquid gold brings everything together with its rich flavor. 1 tablespoon red wine vinegar – This adds a sharp and tangy flavor that balances out the richness of the oil and cheese. 1 teaspoon dijon mustard – A secret ingredient that adds depth and a bit of spice. 1 clove garlic – Minced for a punch of flavor; fresh garlic is always the best. 1/2 teaspoon salt – Essential for enhancing all those vibrant flavors. 1/4 teaspoon black pepper – Freshly ground, for that perfect finish. 1 teaspoon dried oregano – Bringing Mediterranean vibes to your dish. 4 large endive leaves – These cups are perfect for serving; they’re crispy and the perfect vessel for your pasta salad. How to Make Mini Pasta Salad Cups Follow these simple steps to prepare this delicious Mini Pasta Salad Cups: Step 1: Gather Your Ingredients Make sure to have all your ingredients prepped and ready to go. It will make the process so much smoother! Step 2: Whisk the Dressing In a small bowl, whisk together the olive oil, red wine vinegar, dijon mustard, minced garlic, salt, black pepper, and oregano. This dressing will be the flavorful blanket for our pasta! Step 3: Combine the Ingredients Grab a large bowl and throw in the cooked pasta, halved cherry tomatoes, diced cucumber, chopped red onion, diced bell pepper, sliced olives, and crumbled feta cheese. A color explosion! Step 4: Dress It Up Drizzle the freshly whisked dressing over the pasta and vegetables. Toss everything gently until all the ingredients are well coated. This is where the magic happens. Step 5: Prepare the Endive Leaves Carefully separate your endive leaves, and rinse them gently under cold water. Pat dry and lay them out on a platter. These will cradle your delicious pasta salad. Step 6: Serve and Enjoy Spoon the prepared pasta salad into each endive leaf, making sure to pile on the goodness. These cute little cups are now ready to impress at your next gathering! With these Mini Pasta Salad Cups, you’re sure to steal hearts and win over taste buds. They’re delightful, easy to make, and perfect for sharing—just be prepared for a few requests for the recipe. Enjoy every moment and every bite! This showstopping Mini Pasta Salad Cups delivers restaurant-quality results using simple ingredients you probably already have at home. The perfect balance of textures and flavors creates an unforgettable dining experience that will have everyone asking for seconds. Picture-perfect presentation with vibrant colors makes this dish absolutely Instagram-worthy and guaranteed to impress any dinner guest. Incredibly versatile recipe that works beautifully for weeknight dinners, meal prep, special occasions, or even outdoor entertaining sessions. Perfecting Mini Pasta Salad Cups Cooking Process To create your Mini Pasta Salad Cups efficiently, start by prepping all your ingredients while the pasta cooks. Mix the vegetables and dressing as the pasta cools to keep everything fresh and flavorful. Add Your Touch to Mini Pasta Salad Cups Feel free to get creative! Swap the feta for mozzarella, add some diced avocado for creaminess, or toss in some cooked chicken for extra protein. The options are limitless! Storing & Reheating Mini Pasta Salad Cups Store any leftovers in an airtight container in the refrigerator for up to three days. Enjoy them cold as a refreshing snack, or briefly heat in the microwave for warmth. There’s nothing quite like the delighted expressions on my friends’ faces when I serve these Mini Pasta Salad Cups at summer parties. They frequently ask for the recipe, and I can’t help but beam with pride. FAQs About Mini Pasta Salad Cups What are Mini Pasta Salad Cups? Mini Pasta Salad Cups are delightful appetizers that feature a combination of small pasta and fresh vegetables served in endive or lettuce leaves. This dish is colorful, flavorful, and perfect for gatherings or casual snacking. The refreshing blend of cherry tomatoes, cucumbers, and feta cheese brings a burst of flavor, while the light dressing enhances the overall taste. These cups are not only visually appealing but also incredibly versatile, allowing for endless ingredient substitutions to suit your preferences. How do you make Mini Pasta Salad Cups? Making Mini Pasta Salad Cups is a straightforward process. Start by cooking