
Delicious Cheesy Onion Bake Recipe for Cheesy Goodness
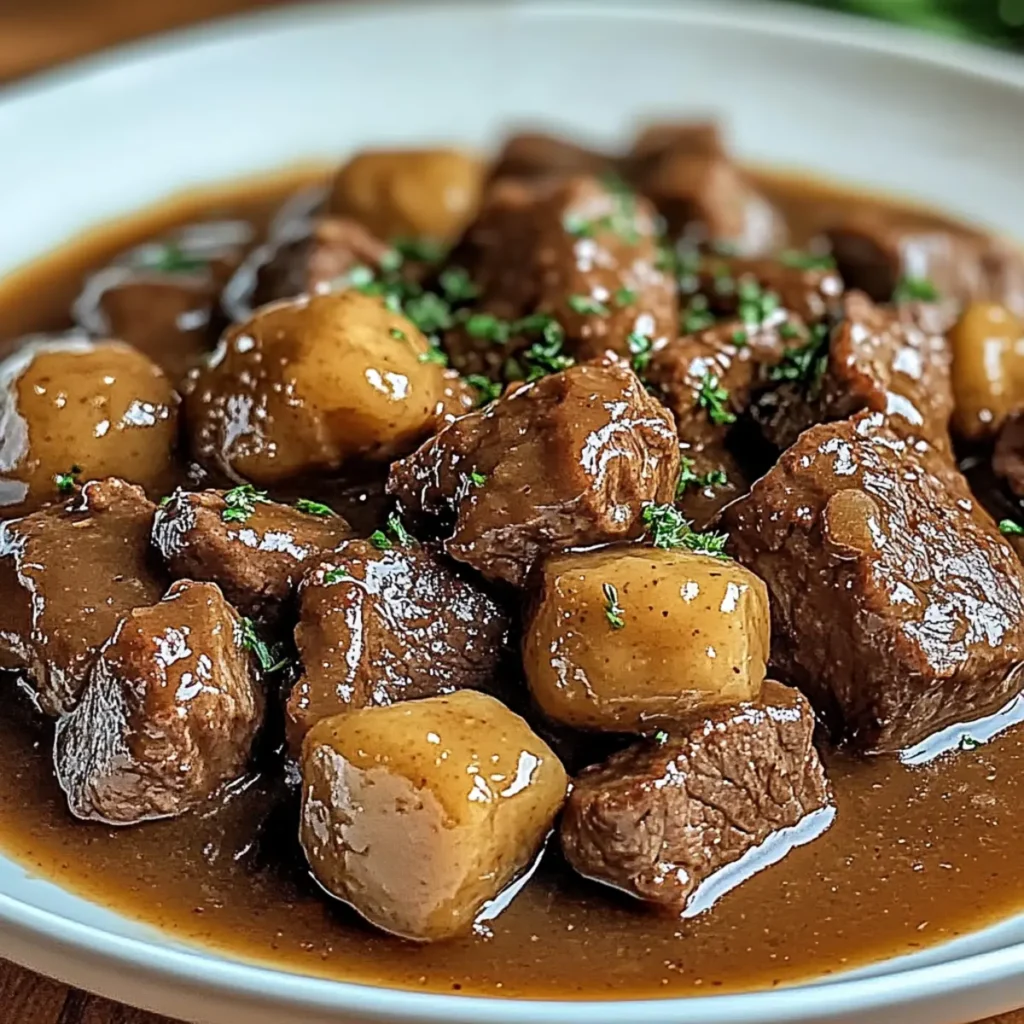
The aroma of a bubbling Cheesy Onion Bake wafts through the air, inviting you to gather around the table and indulge in its cheesy goodness. It’s a dish that promises to deliver a warm, comforting embrace with rich flavors and delightful textures that dance on the palate. This recipe isn’t just about ingredients; it’s a piece of my heart, evoking memories of cozy family gatherings where laughter and delectable bites flow freely. Think of this Cheesy Onion Bake as your go-to dish for chilly evenings, potlucks, or even a weeknight dinner that feels special. You know, the kind of meal that makes everyone feel at home and keeps them coming back for seconds. Get ready for a flavor journey that puts those fast-food cravings to shame! Ingredients for Cheesy Onion Bake Here’s what you’ll need to make this delicious Cheesy Onion Bake: 2 medium Onions – Sweet or yellow onions work best for a delicious flavor that caramelizes beautifully. 2 cups Cheddar Cheese – Use sharp or mild cheddar depending on your taste; it adds a creamy richness and melty texture. 8 oz Cream Cheese – This gives the bake a creamy, dreamy consistency. Make sure it’s softened for easy mixing. 1 cup Sour Cream – Adds a tangy flavor that balances the richness of the cheeses. 1 teaspoon Garlic Powder – Enhances the savory notes and brings depth to the dish. to taste Salt and Pepper – Essential for elevating the flavors and enhancing the overall taste profile. 1 cup Panko Breadcrumbs – These light and crispy breadcrumbs create a delightful topping that contrasts with the creamy base. 1/2 cup Parmesan Cheese – Best for adding that extra layer of umami flavor and a crispy finish. 1/4 cup Fresh Parsley – Chopped fresh parsley adds a pop of color and freshness to the dish right before serving. How to Make Cheesy Onion Bake Follow these simple steps to prepare this delicious Cheesy Onion Bake: Step 1: Preheat the Oven Preheat your oven to 350°F (175°C). It’s essential to have that warmth ready to transform your ingredients into a bubbling masterpiece. Step 2: Sauté the Onions Slice the onions into thin rings or half-moons, whichever you prefer! In a skillet over medium heat, sauté the onions until they become translucent and lightly caramelized, which should take about 5-7 minutes. Their sweet aroma will fill your kitchen, making your mouth water. Step 3: Mix the Cheesy Goodness In a large mixing bowl, combine the sautéed onions, Cheddar cheese, cream cheese, sour cream, and garlic powder. Be sure to mix everything thoroughly until it’s a creamy and cohesive mixture. Don’t forget to season it with salt and pepper to your liking! Step 4: Transfer to Baking Dish Spread the cheesy onion mixture evenly into a baking dish, making sure it’s all nicely laid out. Prepping your dish well will ensure that each scoop is every bit as delicious as the last. Step 5: Top it Off Now for the crunchy topping! Sprinkle the Panko breadcrumbs and Parmesan cheese evenly over the top of the cheesy layer. This will create that irresistible golden-brown crust we all love. Step 6: Bake to Perfection Place the dish in your preheated oven and bake for about 30 minutes, or until the top is beautifully golden brown and crispy. The cheesy aroma will start to envelop your kitchen, drawing everyone in like moths to a flame. Transfer to plates and garnish with freshly chopped parsley before serving. This gorgeous Cheesy Onion Bake isn’t just a feast for the belly but a treat for the eyes too! Enjoy with your family and friends—it’s guaranteed to be the star of the table! Perfecting Cheesy Onion Bake Cooking Process Begin by slicing the onions and sautéing them until soft. While that’s happening, mix together the cheeses and sour cream. Assemble everything in a baking dish, top with breadcrumbs, and bake for perfectly golden results. Add Your Touch to Cheesy Onion Bake Feel free to swap out Cheddar for Gruyere or add in cooked bacon bits for an extra savory kick. Fresh herbs like thyme or rosemary can also elevate the flavor profile, making it your own. Storing & Reheating Cheesy Onion Bake Store leftovers in an airtight container in the fridge for up to three days. To reheat, bake in a preheated oven at 350°F until warmed through, ensuring the topping stays crispy. When I first made this Cheesy Onion Bake for a family gathering, the compliments flowed like wine at a celebration. My aunt even asked if I had secretly taken culinary classes—it was that good! FAQs About Cheesy Onion Bake What is Cheesy Onion Bake? Cheesy Onion Bake is a delightful dish that combines the savory flavors of onions with rich cheeses, resulting in a creamy, satisfying appetizer or side. This dish typically features sautéed onions mixed with cheddar and cream cheese, creating a comforting and gooey texture. Topped with crispy breadcrumbs, it’s perfect for gatherings or cozy family dinners. The combination of ingredients makes it a versatile option that can complement various main courses, and it’s sure to impress your guests. How do I customize my Cheesy Onion Bake? There are countless ways to personalize your Cheesy Onion Bake. For instance, you can substitute the cheddar cheese for Gruyere or even a mix of your favorite cheeses to create a unique flavor profile. Adding bacon bits provides a savory crunch, while fresh herbs like thyme or rosemary can give it a bright, aromatic touch. Don’t hesitate to experiment; make it your own and tailor it to your taste! Can I make Cheesy Onion Bake ahead of time? Absolutely! Cheesy Onion Bake is a fantastic make-ahead dish. You can prepare the mixture earlier in the day or even the night before. Just combine the ingredients, store them in the baking dish, and cover tightly. When ready to serve, bake it in the oven, adjusting the time if it’s coming straight from the fridge. This allows flavors to
Sheet Pan Honey Garlic Chicken and Potatoes: Easy 35-Minute Meal
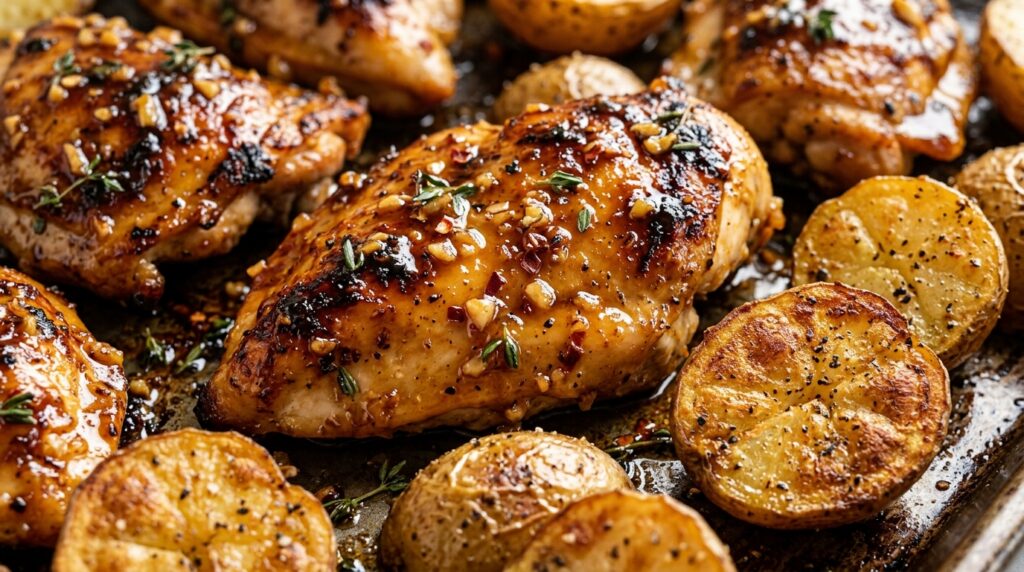
Tender roasted chicken cutlets and crispy baby potatoes coated in a sticky, caramelized honey garlic glaze with fresh thyme. An easy 35-minute sheet pan dinner.
Creamy Tuscan Garlic Butter Salmon Pasta: Easy 30-Minute Meal
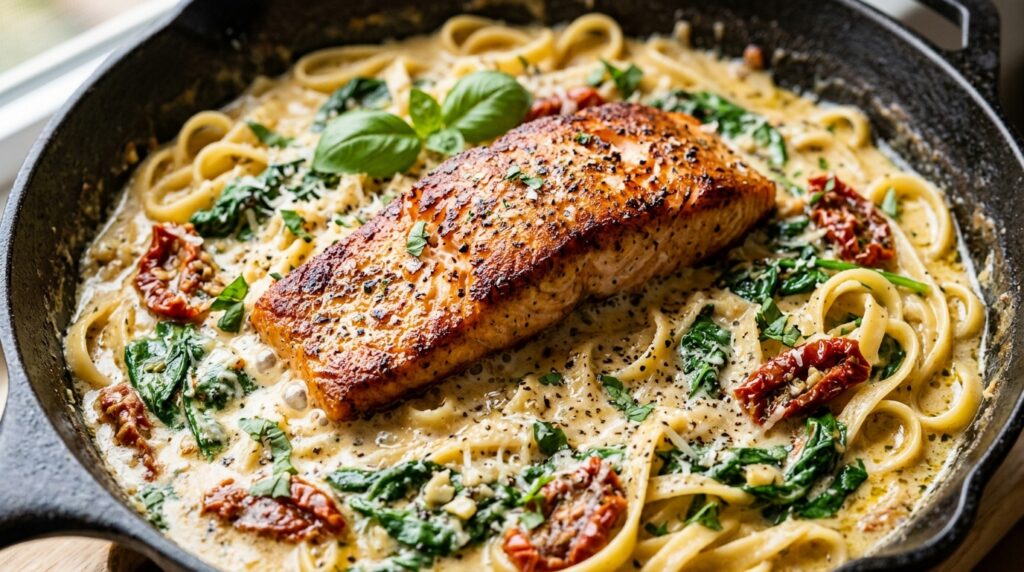
Crispy pan-seared golden salmon fillets served over tender fettuccine in a velvety garlic parmesan cream sauce with spinach and sun-dried tomatoes. An easy 30-minute restaurant meal.
Creamy French Onion Chicken Skillet: Easy 35-Minute Dinner
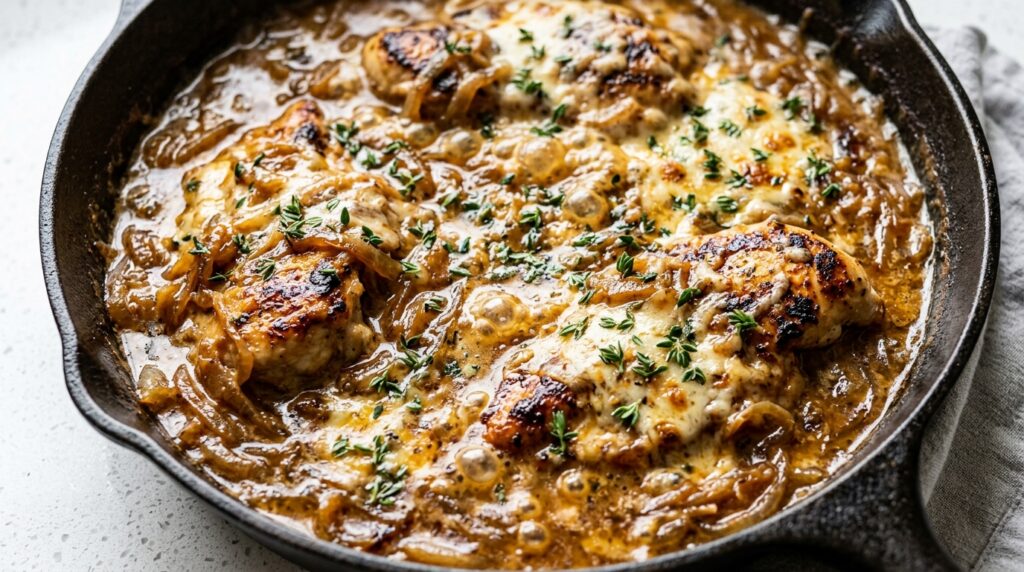
Tender golden chicken breasts smothered in sweet caramelized onions and a velvety gruyere thyme cream sauce. An easy 35-minute single-skillet comfort dinner.
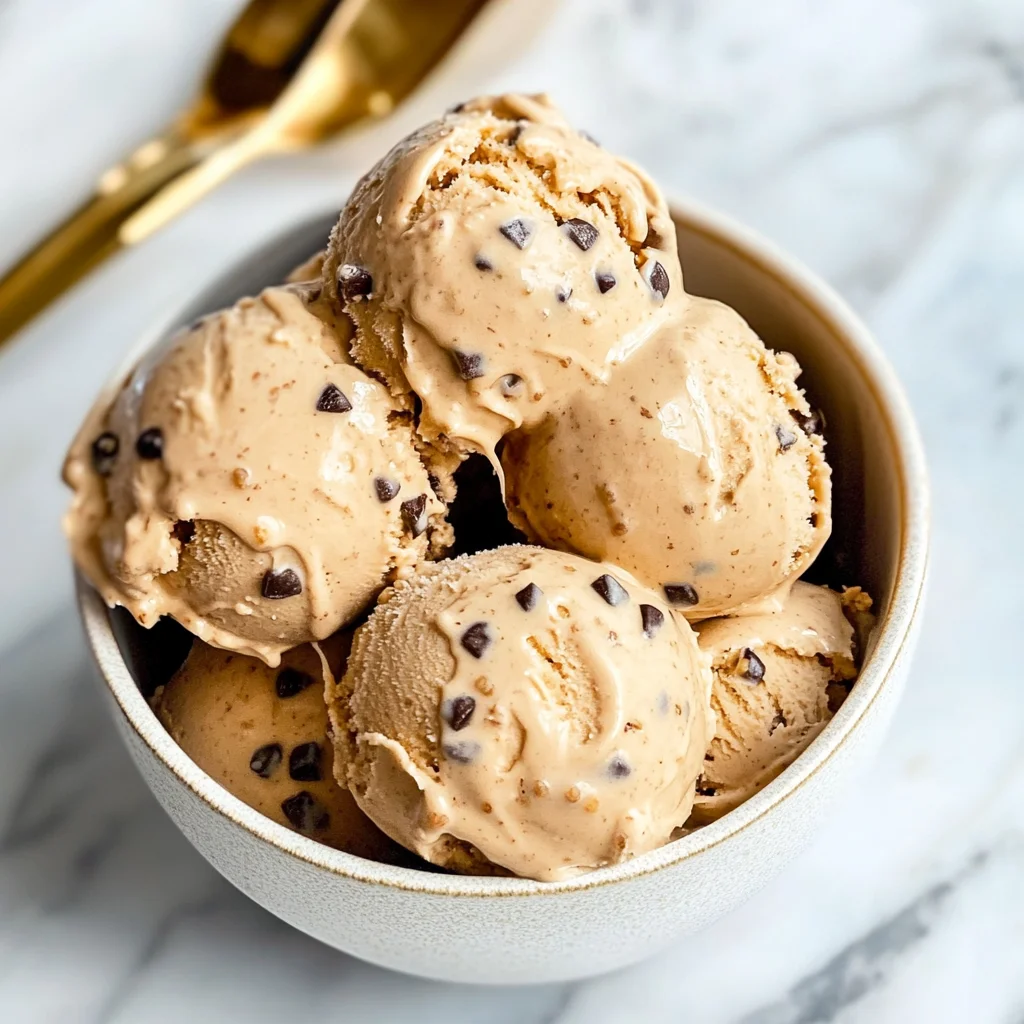
Imagine the blissful moment when a spoonful of Peanut Butter Cottage Cheese Ice Cream glides over your tongue, with its creamy texture and nutty aroma wrapping you in a warm embrace. The rich, velvety flavors dance together like old friends at a reunion, bringing joy to your taste buds and making every scoop a delightful experience. This delightful treat is not just an indulgence; it’s the perfect companion for sunny afternoons or cozy nights in. I still reminisce about the first time I whipped up this recipe, sharing laughter and stories with friends as we savored each bite. Get ready to fall in love with a dessert that’s both healthy and unbelievably satisfying! Why Is Peanut Butter Cottage Cheese Ice Cream So Irresistibly Good? Creamy texture: This ice cream combines the rich creaminess of peanut butter with the smoothness of cottage cheese, creating a delightful mouthfeel that will leave you craving more. Healthy indulgence: Packed with protein from cottage cheese and healthy fats from peanut butter, this dessert satisfies your sweet tooth without the guilt. Quick prep: With just 10 minutes of prep time, you can whip up this luscious treat in no time—perfect for busy weeknights or spontaneous gatherings. Customizable toppings: Add a sprinkle of chopped peanuts or chocolate chips to elevate your experience and cater to everyone’s taste preferences. Crowd-pleaser: Whether serving friends or family, this unique twist on traditional ice cream is sure to impress and become a new favorite! Peanut Butter Cottage Cheese Ice Cream Ingredients For the Base 2 cups cottage cheese (preferably low-fat) – This creamy base adds protein and a delightful texture to your ice cream. 1/2 cup peanut butter (creamy or crunchy) – Choose your favorite style for that rich, nutty flavor in every bite. 1/4 cup honey (or maple syrup for vegan option) – Sweeten naturally with honey or maple syrup, perfect for balancing the flavors. 1 teaspoon vanilla extract – A dash of vanilla enhances the overall taste and aroma of your ice cream. 1/4 cup milk (any type, adjust for consistency) – Use your preferred milk to achieve the desired creaminess; adjust as needed. For Optional Toppings 1/4 cup chopped peanuts (for garnish) – These add a delightful crunch and extra nuttiness on top of your ice cream. 2 tablespoons chocolate chips (for garnish) – Sprinkle these on for a touch of sweetness and a fun treat in your Peanut Butter Cottage Cheese Ice Cream. How to Make Peanut Butter Cottage Cheese Ice Cream 1. Blend: In a blender, combine 2 cups of cottage cheese, 1/2 cup peanut butter, 1/4 cup honey, 1 teaspoon vanilla extract, and 1/4 cup milk. Blend until smooth and creamy for a delightful texture. 2. Chill: Transfer the mixture to a mixing bowl and refrigerate for at least 2 hours. This step helps meld the flavors and ensures a refreshing treat when served. 3. Churn: Pour the chilled mixture into an ice cream maker. Churn according to the manufacturer’s instructions until it reaches that soft-serve consistency we all love—creamy and inviting! 4. Freeze: Transfer the ice cream to an airtight container and freeze for at least 2 hours. This process will firm up your delicious creation, making each scoop perfectly satisfying. 5. Serve: Scoop the ice cream into bowls and top with optional garnishes like chopped peanuts or chocolate chips for an extra crunch and sweetness if desired. Optional: Add a sprinkle of sea salt for a delicious contrast. Exact quantities are listed in the recipe card below. Expert Tips Cottage Cheese Choice: Use low-fat cottage cheese for a creamy texture without the extra calories, ensuring a delightful Peanut Butter Cottage Cheese Ice Cream. Peanut Butter Preference: Choose creamy peanut butter for a smooth blend, or crunchy for added texture. Just remember, both will deliver delicious results! Sweetness Level: Adjust honey or maple syrup based on your taste preference; start with less and add more if you like it sweeter but avoid overpowering the peanut flavor. Chilling Time: Don’t rush the chilling process! Letting the mixture chill for at least 2 hours ensures better churning and creaminess in your ice cream. Consistency Check: When blending, slowly add milk until you reach a smooth consistency. Too much milk can make it icy rather than creamy, so add gradually. Serving Garnishes: Elevate your Peanut Butter Cottage Cheese Ice Cream with chopped peanuts and chocolate chips—they add both crunch and indulgence to each scoop! How to Store and Freeze Peanut Butter Cottage Cheese Ice Cream Fridge: Store any leftover Peanut Butter Cottage Cheese Ice Cream in an airtight container for up to 3 days. It’s best enjoyed fresh, but it will still taste great! Freezer: For longer storage, freeze the ice cream in a freezer-safe container. It can last up to 2 months, but be sure to seal it tightly to prevent freezer burn. Thawing: When ready to enjoy, transfer the ice cream to the fridge for about 30 minutes before serving for easy scooping. Optional Toppings: If you’ve added peanuts or chocolate chips, store them separately in a cool, dry place to maintain their crunchiness until serving. Peanut Butter Cottage Cheese Ice Cream Your Way Feel free to explore your culinary creativity with this delightful treat, adding flavors and textures that excite your taste buds! Chocolate Swirl: Fold in 1/4 cup of chocolate syrup for a rich, indulgent flavor. This twist not only adds sweetness but also creates a beautiful marbled effect throughout the ice cream. Fruit Fusion: Blend in 1 cup of your favorite fruit, like bananas or strawberries, for a refreshing twist. The natural sweetness from the fruit will complement the peanut butter beautifully, creating a creamy and fruity delight. Nutty Crunch: Incorporate 1/4 cup of chopped almonds or walnuts for added texture. The nuts bring a satisfying crunch that contrasts perfectly with the smoothness of the ice cream. Cocoa Dreams: Mix in 2 tablespoons of unsweetened cocoa powder for a chocolatey version. This variation offers a luscious chocolate flavor while keeping it
Delicious Classic Broccoli Salad with Raisins Recipe to Try
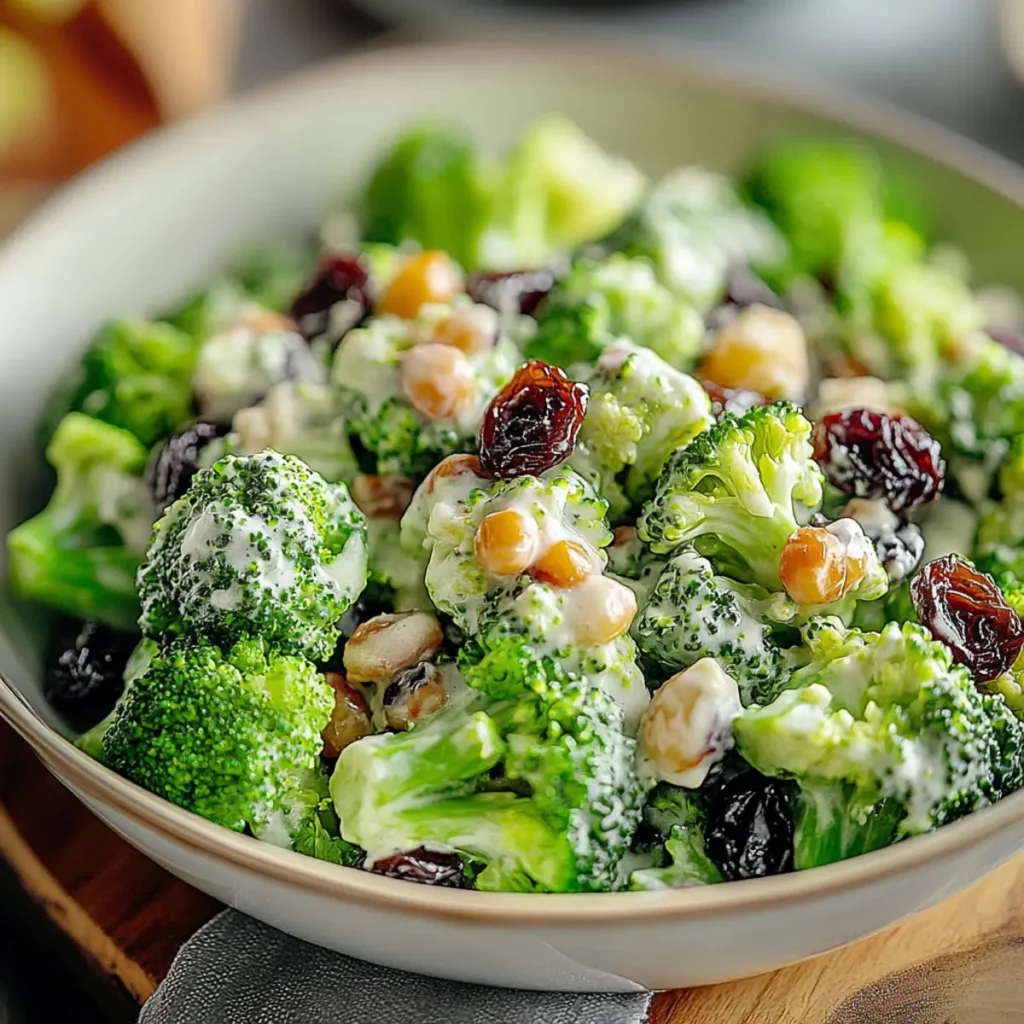
The classic broccoli salad with raisins is like a delightful festival of flavor and crunch on your plate. Imagine fresh broccoli florets lovingly coated in a creamy dressing, mingling with the sweetness of golden raisins and the satisfying crunch of toasted sunflower seeds. The vibrant colors and textures not only make it a feast for the eyes but also bring a refreshing twist to any meal. Whether you are preparing a summer barbecue or looking for a nutritious side dish to accompany a cozy dinner, this salad is bound to elevate your culinary game. Every bite tells a story—maybe a summer picnic you had with friends or a family gathering where dishes were exchanged like souvenirs. This classic broccoli salad brings those memories flooding back, with its comforting flavors reminding us of the joy of gathering around the table. The combination of playful sweetness from the raisins and the crispy bite of broccoli creates an unforgettable flavor journey that promises to brighten any occasion. So, are you ready to toss together this delicious and easy-to-make salad that will steal the spotlight at your next gathering? Ingredients for Classic Broccoli Salad with Raisins Here’s what you’ll need to make this delicious Classic Broccoli Salad with Raisins: 4 cups fresh broccoli florets – Choose vibrant, firm broccoli that has a rich green color for the best flavor and nutrients. 1 cup golden raisins – These sweet gems will add a fruity sweetness that perfectly complements the broccoli. 1 small red onion – Thinly sliced, red onion brings a lovely crunch and mild sweetness to the salad mix. ½ cup toasted sunflower seeds – The sunflower seeds will give your salad a delightful crunch and nutty flavor that takes it to the next level. 1 cup mayonnaise – Use a good quality mayo for a creamy dressing that ties all the ingredients together beautifully. 2 tablespoons cider vinegar – This adds a tangy kick that balances the sweetness of the raisins and richness of the mayonnaise. 1 tablespoon granulated sugar – Just a touch of sugar enhances the overall flavor without overpowering the salad. How to Make Classic Broccoli Salad with Raisins Follow these simple steps to prepare this delicious Classic Broccoli Salad with Raisins: Step 1: Prepare the Broccoli Start by rinsing the fresh broccoli florets under cold water and patting them dry. You can chop them into bite-sized pieces for easy eating. For a brighter color and crisp-tender texture, consider blanching the broccoli in boiling water for about two minutes, then shocking them in ice water to preserve that vibrant green hue. Step 2: Whisk the Dressing In a medium-sized mixing bowl, whisk together the mayonnaise, cider vinegar, and granulated sugar. Keep whisking until the dressing is smooth and creamy. This will be the luscious layer that coats the salad ingredients and unites all the flavors. Step 3: Combine the Ingredients In a large mixing bowl, combine the beautifully prepared broccoli, sweet golden raisins, crunchy sunflower seeds, and the sliced red onion. The colors will start to pop, making your salad not just tasty but visually stunning too! Step 4: Dress the Salad Pour your creamy dressing over the mixed salad ingredients. Gently fold everything together until all ingredients are coated evenly with that scrumptious dressing. Be careful not to mash the ingredients—this salad should have a bit of structure. Step 5: Chill and Enjoy Cover the salad with plastic wrap or a lid, and let it chill in the refrigerator for at least one hour. This waiting time allows the flavors to meld beautifully. When you’re ready to serve, prepare to be showered with compliments! Step 6: Serve with a Smile Serve the salad chilled and watch the smiles grow as each guest takes their first bite. This Classic Broccoli Salad with Raisins is perfect for backyard barbecues, potlucks, or as a delightful side for weekday dinners. You may even want to keep the recipe handy for those surprise guests! This salad isn’t just a side dish; it’s an invitation to gather, share stories, and enjoy delicious food. Enjoy the crispness of the broccoli, the sweetness of the raisins, and the crunch of those sunflower seeds in every bite. What are you waiting for? Dive in and experience the magic of this classic dish. Perfecting Classic Broccoli Salad with Raisins Cooking Process Prepare the ingredients first: rinse and chop the broccoli, slice the onion, and toast sunflower seeds. Then, whisk together your dressing and combine everything in a large bowl, ensuring maximum flavor blending and a beautiful presentation. Add Your Touch to Classic Broccoli Salad with Raisins Feel free to swap raisins for cranberries or add diced apples for a crunchier twist. Want to kick it up a notch? Spice up your dressing with a pinch of cayenne pepper or some chopped fresh herbs like dill or parsley. Storing & Reheating Classic Broccoli Salad with Raisins Store leftovers in an airtight container in the fridge for up to three days. If you want to refresh your salad later, stir in a little mayonnaise and a splash of vinegar to reawaken those delightful flavors; no need for reheating here! Sharing this Classic Broccoli Salad with Raisins always warms my heart. I remember my best friend trying it for the first time and exclaiming, “Why have you been holding out on me?” Now it’s a staple at every potluck! FAQs About Classic Broccoli Salad with Raisins What is Classic Broccoli Salad with Raisins? Classic Broccoli Salad with Raisins is a refreshing dish that combines crunchy broccoli florets, sweet golden raisins, and savory red onion. This delightful salad is typically dressed with a creamy mixture of mayonnaise, cider vinegar, and a pinch of sugar, offering a lovely balance of flavors. Toasted sunflower seeds add a nutty crunch, making it a perfect side for summer barbecues or potlucks. It’s not only delicious but also incredibly easy to prepare, making it a favorite for both novice and experienced cooks alike. How can I customize
Bang Bang Shrimp Super Bowl Party Bites Recipe for Game Day
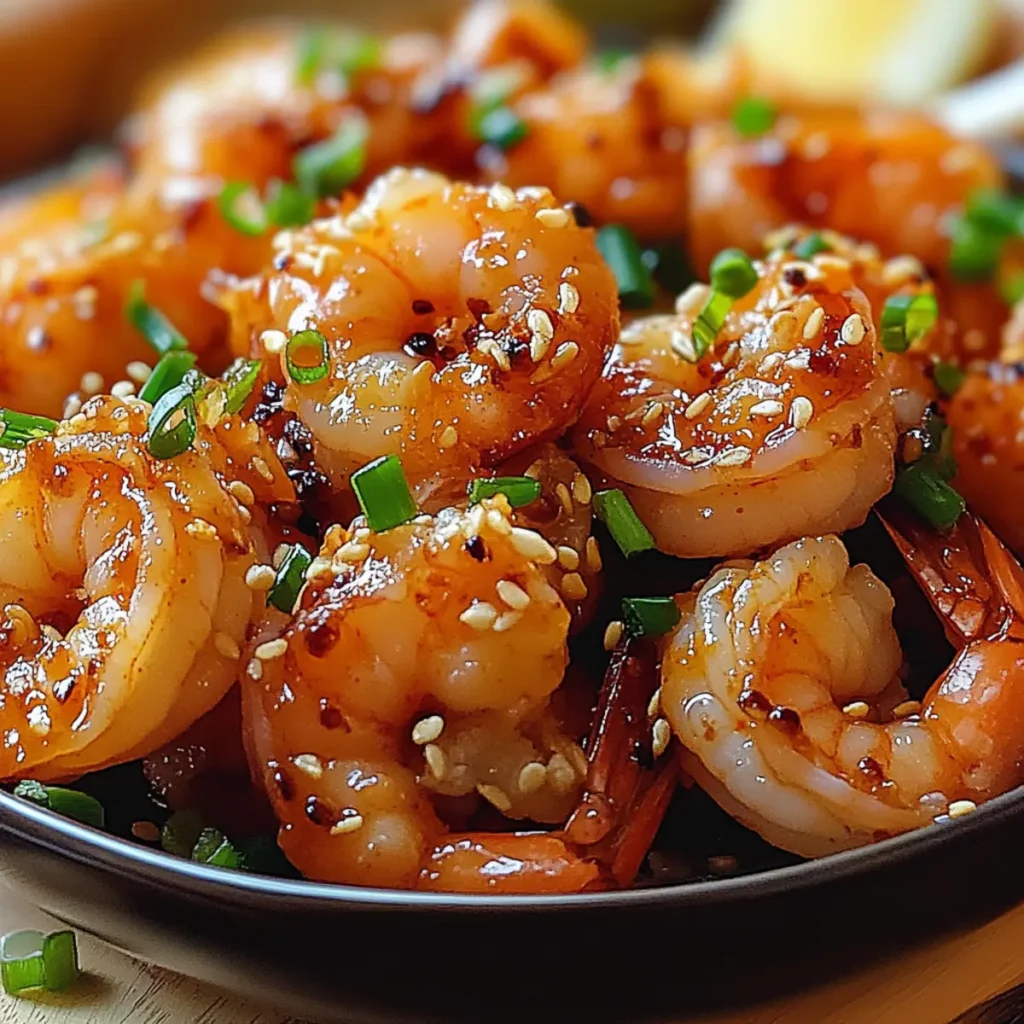
The aroma of spices wafts through the kitchen, a seductive promise of bold flavors and crunchy textures that can only mean one thing: Bang Bang Shrimp Super Bowl Party Bites are on the menu. Picture this: perfectly breaded shrimp are baked to a golden crisp, then brought to life with a spicy and sweet sauce that’ll leave you swooning with every bite. If you’re looking for the ultimate crowd-pleaser for your next gathering, look no further! Whether it’s game day or just a casual get-together, Bang Bang Shrimp Super Bowl Party Bites will become the highlight of your appetizer lineup. Trust me; they’re as enjoyable to make as they are to devour, with a delightful crunch and flavors that dance on your palate. You’ll feel like a culinary rock star serving these beauties, and your friends will be lining up for seconds—potentially even thirds. Ingredients for Bang Bang Shrimp Super Bowl Party Bites Here’s what you’ll need to make this delicious Bang Bang Shrimp Super Bowl Party Bites: 1 lb large shrimp – Look for fresh or thawed shrimp that are peeled and deveined for easy preparation. 1 cup all-purpose flour – The foundation for our crispy coating; feel free to substitute with gluten-free flour if needed. 2 large eggs – Beaten and ready to create a delicious binding for our shrimp. 1 cup panko breadcrumbs – These provide the perfect crunch; opt for whole wheat panko for a healthier touch. 1/2 cup mayonnaise – A creamy base for our sauce that delivers delightful richness. 3 tbsp Sriracha – This spicy kick pairs wonderfully with the sweetness of the other ingredients; adjust based on your spice tolerance. 2 tbsp honey – Adds a subtle sweetness to balance the heat of the Sriracha, making each bite irresistible. How to Make Bang Bang Shrimp Super Bowl Party Bites Follow these simple steps to prepare this delicious Bang Bang Shrimp Super Bowl Party Bites: Step 1: Preheat the Oven Preheat your oven to 400°F (200°C) and line a baking sheet with parchment paper to ensure nothing sticks. The anticipation of crispy shrimp baking in the oven is almost as thrilling as the game itself! Step 2: Set Up the Breading Station Grab three bowls and set them up for the assembly line. In the first bowl, combine the all-purpose flour with a pinch of salt and pepper. In the second bowl, beat the eggs until they’re well mixed. In the final bowl, pour in the panko breadcrumbs, which will become that irresistible crunchy exterior. Step 3: Coat the Shrimp Take each shrimp and dip it into the seasoned flour, coating it well before shaking off the excess. Next, dunk it into the egg wash, allowing any extra liquid to drip off. Finally, roll the shrimp in the panko breadcrumbs, ensuring it is completely covered. Place each shrimp on the prepared baking sheet, ready to bask in the oven’s warmth. Step 4: Bake to Perfection Slide your baking sheet into the preheated oven and bake for 15-20 minutes. Keep an eye on them and flip the shrimp halfway through to achieve that gorgeous golden color all around. You want them crispy, not soggy—trust me, your taste buds will thank you later! Step 5: Prepare the Bang Bang Sauce While the shrimp are baking, whip up the bang bang sauce! In a medium bowl, mix together the mayonnaise, Sriracha, and honey until it’s well combined. You’re looking for a balance of creamy, spicy, and sweet—just like life! Step 6: Serve and Enjoy Once the shrimp are out of the oven and perfectly crisp, you can either drizzle the bang bang sauce over them or toss them directly in the bowl to coat them liberally. Serve them hot, paired with extra sauce for dipping, and watch as your guests dive in like they’re on a treasure hunt for the last bite! These Bang Bang Shrimp Super Bowl Party Bites are more than just food—they’re the essence of shared moments, laughter, and maybe a little too much spice (but hey, that’s what makes it fun). As they vanish from the plate, don’t be surprised if someone asks for the recipe. Just wink and smile—you know you’ve got the secret to great taste in your hands! Perfecting Bang Bang Shrimp Super Bowl Party Bites Cooking Process Start by preheating your oven and prepping your baking sheet. Then, set up your dredging station before handling the shrimp for an efficient workflow. Finally, while the shrimp bake, mix your spicy sauce for a seamless cooking experience. Add Your Touch to Bang Bang Shrimp Super Bowl Party Bites Feel free to experiment with different types of shrimp, swap the Sriracha for a milder sauce, or add spices like garlic powder for an extra flavor kick. Toss in chopped green onions or sesame seeds right before serving for a fresh touch. Storing & Reheating Bang Bang Shrimp Super Bowl Party Bites Store leftover shrimp in an airtight container in the refrigerator for up to two days. Reheat in the oven at 350°F (175°C) for about 10 minutes, ensuring they stay crispy. Sharing the first time I made Bang Bang Shrimp for a gathering, everyone was raving about how addictive they were. It turned from “please pass the snack” to “how do I make these?” in no time! FAQs About Bang Bang Shrimp Super Bowl Party Bites What is Bang Bang Shrimp Super Bowl Party Bites? Bang Bang Shrimp Super Bowl Party Bites are a delicious appetizer that combines crunchy, baked shrimp coated in a spicy, tangy sauce. The dish balances texture and flavor, making it perfect for entertaining guests or celebrating game day. With their crispy exterior and creamy sauce, these bites are designed to impress and satisfy any crowd craving something unique and flavorful. How can I customize my Bang Bang Shrimp Super Bowl Party Bites? You can easily customize Bang Bang Shrimp Super Bowl Party Bites to suit your taste. Consider swapping the Sriracha for a milder sauce if
Ultimate French Onion Super Bowl Party Dip Recipe to Impress Guests
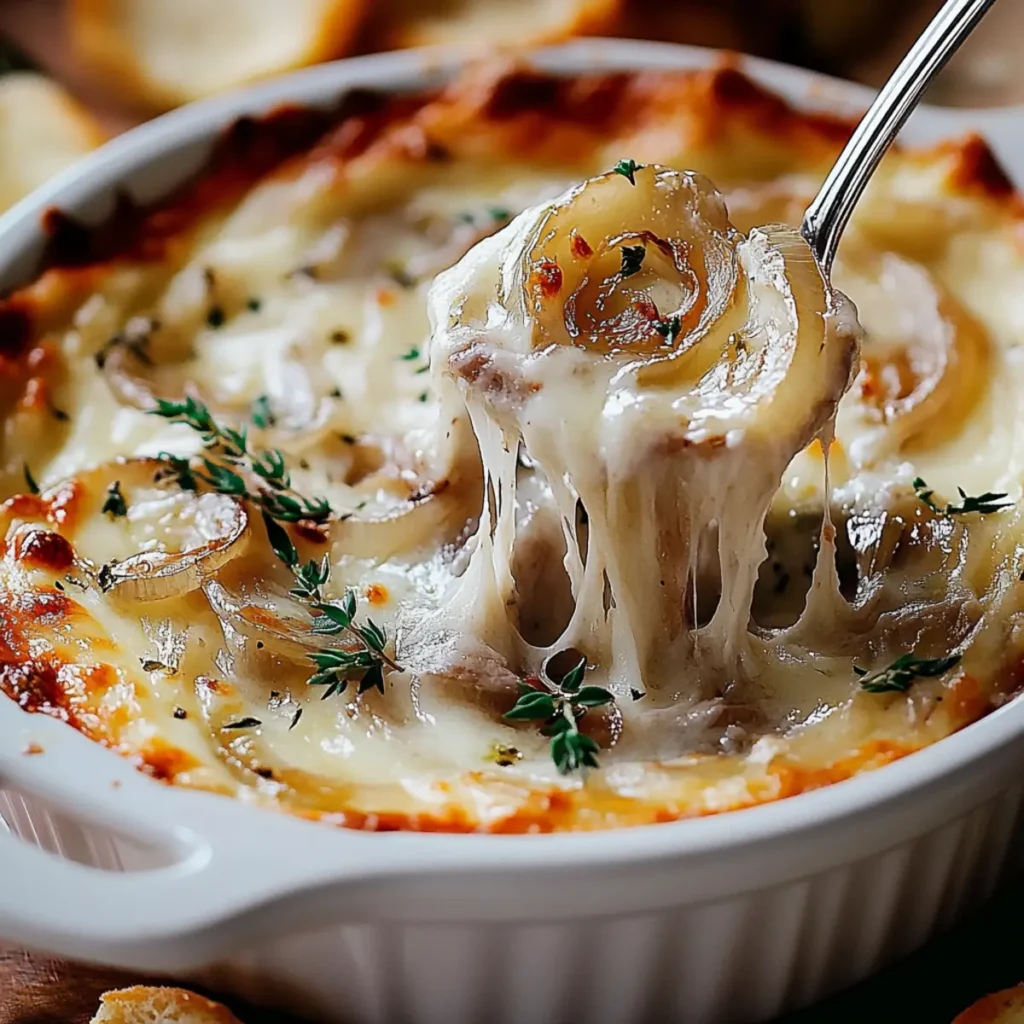
There’s something about the combination of caramelized onions, creamy cheese, and a touch of garlic that elevates any gathering. If you’re looking for a flavor explosion that will have your guests begging for the recipe, look no further than this French Onion Super Bowl Party Dip. Whether you’re hosting a Super Bowl bash or just chilling with friends, this dip is the perfect companion for your crunchy chips. Picture this: you’re surrounded by friends, laughter fills the room, and this glorious dip—a blend of savory bliss and creamy decadence—takes center stage. It’s not just a dip; it’s a conversation starter, a mood lifter, and the highlight of the table. Trust me, once you dive in, there’s no going back. Ingredients for French Onion Super Bowl Party Dip Here’s what you’ll need to make this delicious French Onion Super Bowl Party Dip: 3 medium yellow onions – Sweet and savory, they’re the stars of this dip. Look for firm onions without blemishes. 4 tbsp unsalted butter – Added richness that enhances the caramelization of the onions. 8 oz cream cheese – Provides that creamy texture we crave and helps bind all the flavors together. 1 cup sour cream – Adds tanginess that perfectly balances the richness. 2 cups shredded Swiss cheese – Melts beautifully, giving that signature cheesy pull. 1 cup shredded Parmesan cheese – Brings a nutty, depth of flavor that elevates this dip to the next level. 1 tsp garlic powder – A hint of garlicky goodness that rounds out the flavor profile. Salt and pepper to taste – Essential for enhancing all the other ingredients. How to Make French Onion Super Bowl Party Dip Follow these simple steps to prepare this delicious French Onion Super Bowl Party Dip: Step 1: Sauté the Onions Melt the butter in a large skillet over medium heat. Once it’s all bubbly and fragrant, add the sliced onions. You’ll want to cook these lovely beauties for about 20 minutes, stirring occasionally until they’re deeply caramelized and golden brown. The aroma will make your kitchen feel like a cozy French bistro. Step 2: Mix the Creamy Goodness Meanwhile, in a large mixing bowl, blend the cream cheese, sour cream, garlic powder, salt, and pepper until you achieve a smooth and inviting mixture. Make sure to get rid of any lumps—the last thing we want is a chunky dip! Step 3: Combine the Ingredients Fold the caramelized onions along with the Swiss and Parmesan cheese into the creamy concoction. Stir gently but thoroughly till everything is well mixed, and those melted cheese strings start to appear. Believe me, this is where the magic happens. Step 4: Preheat Your Oven Before you continue, preheat your oven to 350°F (175°C). Get that oven nice and toasty, because we’re about to bake this beauty! Step 5: Bake the Dip Transfer the dip mixture into a baking dish and pop it in the oven. Let it bake for about 25-30 minutes or until it’s all bubbly and golden brown on top. The smell alone will drive your friends wild with anticipation. Step 6: Serve and Enjoy Once out of the oven, allow the dip to cool slightly so you don’t burn your mouth. Pair it with crispy tortilla chips, crunchy veggies, or even fresh baguette slices. The dip is best enjoyed warm, so gather everyone around and dig in—trust me, you won’t have leftovers! Now that you’ve mastered this amazing French Onion Super Bowl Party Dip, don’t be surprised if you find yourself making it for every gathering. The combination of welcoming flavors, gooey cheese, and bite-sized fun will undoubtedly turn any occasion into a celebratory feast. So go ahead, treat yourself and your friends to this delectable dip, and let the compliments roll in! Perfecting French Onion Super Bowl Party Dip Cooking Process Begin by caramelizing the onions to bring out their natural sweetness. While they cook, mix the creamy components separately. Once smooth, combine everything before baking to ensure a deeply flavored dip. Add Your Touch to French Onion Super Bowl Party Dip Feel free to swap Swiss cheese for Gruyère or even add a splash of Worcestershire sauce to deepen the umami. You can also toss in some crispy bacon bits for a savory crunch. Storing & Reheating French Onion Super Bowl Party Dip Store uneaten dip in an airtight container in the fridge for up to three days. Reheat in the oven at 350°F until warm, ensuring it maintains its creamy texture. There’s nothing quite like the moment when friends dive into this dip, each one nodding their approval, and suddenly it’s all gone in minutes; I can still hear my buddy declaring it the best dip ever! FAQs About French Onion Super Bowl Party Dip What is French Onion Super Bowl Party Dip? French Onion Super Bowl Party Dip is a rich and creamy appetizer that combines caramelized onions, creamy cheeses, and savory seasonings. This crowd-pleaser is perfect for parties, serving as a delightful dip for chips or veggies. The blend of Swiss and Parmesan cheeses creates a luscious texture that is hard to resist, making it a favorite dish during the Super Bowl or any celebration. The warm, cheesy goodness, combined with the sweet notes of the caramelized onions, result in a dip that’s both comforting and indulgent. How can I customize French Onion Super Bowl Party Dip? Customizing your French Onion Super Bowl Party Dip is easy and fun! You can substitute Swiss cheese with Gruyère or even add some crumbled blue cheese for a bolder flavor. For an added crunch, consider folding in crispy bacon bits or topping it with fried onions before serving. A splash of Worcestershire sauce can enhance umami depth as well. The base recipe is flexible and encourages creativity, allowing you to make it uniquely yours each time. Can I make French Onion Super Bowl Party Dip ahead of time? Absolutely! You can prepare French Onion Super Bowl Party Dip ahead of time, making it a
Delicious Smoked Salmon Poke Super Bowl Party Bites Recipe
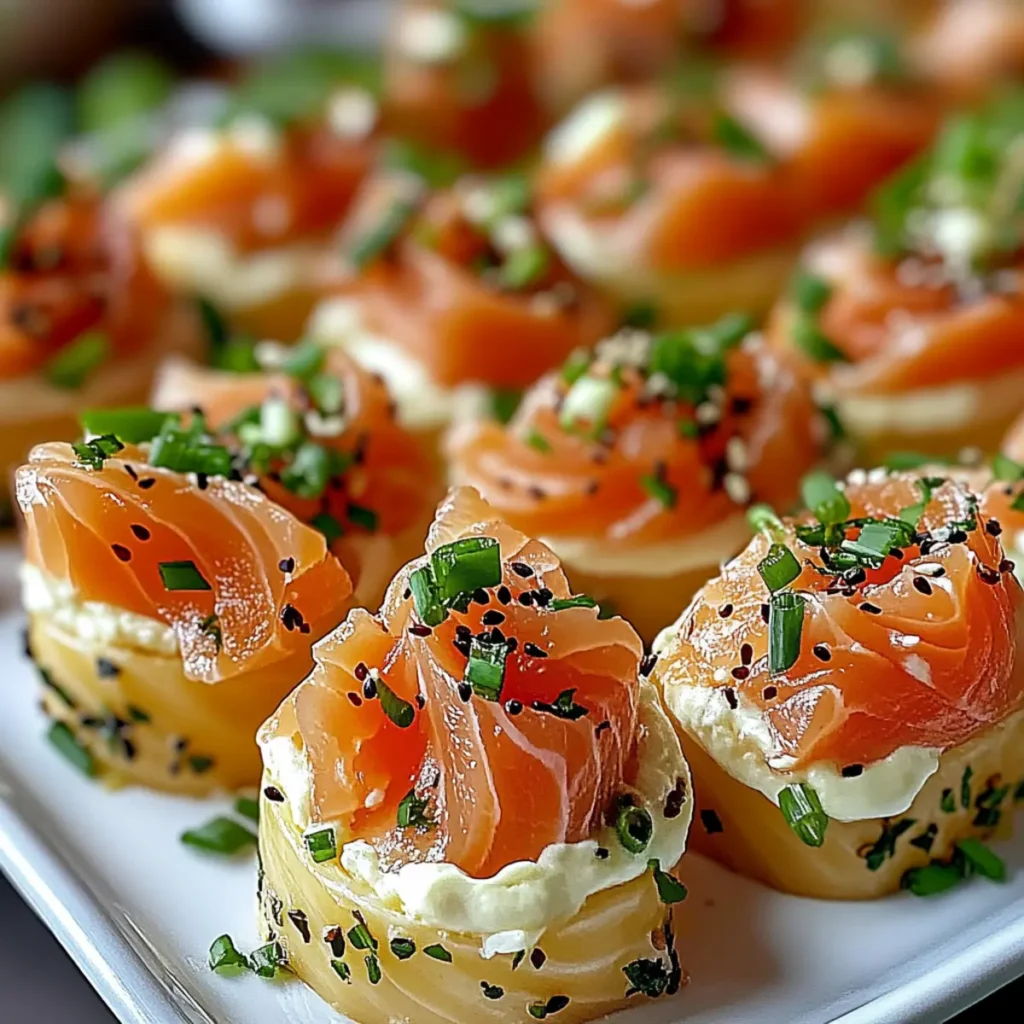
Indulging in the world of flavors and textures, the Smoked Salmon Poke Super Bowl Party Bites are a delightful fusion that will whisk your taste buds away to a culinary paradise. As the rich, smoky aroma fills the air, you can already imagine the refreshing crunch of the cucumber perfectly mingling with the creamy avocado, creating a symphony of taste and texture that promises to elevate your gathering to a whole new level of deliciousness. These party bites aren’t just appetizers; they are a conversation starter, a showstopper, and the highlight of your Super Bowl festivities. Picture your friends and family diving into these stunning little morsels, their eyes lighting up with joy as they savor the flavor of fresh ingredients, and you can already hear the cheers echoing as everyone reaches for seconds. Trust me, once you set these on the table, the excitement will be palpable, and the game-winning moments will just start rolling in. Ingredients for Smoked Salmon Poke Super Bowl Party Bites Here’s what you’ll need to make this delicious Smoked Salmon Poke Super Bowl Party Bites: 8 oz smoked salmon – Look for high-quality smoked salmon for a rich flavor. It’s the star of the show here! 1 large English cucumber – Slice into ½-inch rounds. The thicker slices provide a sturdy base for your bites and a refreshing crunch. 1 ripe avocado – Choose a perfectly ripe, creamy avocado to add a luscious texture that balances the smoky salmon. 2 tbsp low-sodium soy sauce – This adds a savory depth to the dish. Opt for low-sodium to control the saltiness. 1 tsp sesame oil – A drizzle of this will enhance the overall flavor profile with its rich, nutty aroma. 2 green onions – Thinly sliced for a fresh, oniony kick that complements the other flavors beautifully. 1 tbsp toasted sesame seeds – Sprinkled on top for that delightful crunch and a lovely visual finish. How to Make Smoked Salmon Poke Super Bowl Party Bites Follow these simple steps to prepare this delicious Smoked Salmon Poke Super Bowl Party Bites: Step 1: Prepare the Cucumber Base Slice the cucumber into thick rounds—approximately ½-inch thick—to create a sturdy base for each poke bite. Step 2: Dice the Avocado Halve your gently ripe avocado, carefully remove the pit, and scoop out the flesh with a spoon. Cut the avocado into small, delightful cubes that will nestle comfortably on top of the cucumber. Step 3: Assemble the Bites Layer each cucumber slice with a generous dollop of diced avocado, followed by a piece of smoked salmon. It’s all about creating those beautiful layers of flavor. Step 4: Whip Up the Dressing In a small bowl, combine the low-sodium soy sauce and sesame oil. Stir them together and drizzle this luscious mixture over each assembled bite, ensuring every mouthful is bursting with flavor. Step 5: Garnish with Green Onions and Sesame Seeds Sprinkle sliced green onions and toasted sesame seeds on top of each bite. This adds both flavor and a sprinkle of color that makes the dish pop! Step 6: Serve with Style Carefully arrange your beautifully created bites on a serving platter and chill them for a few minutes before serving. This way, they are refreshingly cool when your guests take their first joyful bites. These Smoked Salmon Poke Super Bowl Party Bites promise to be the star of your next gathering, bringing a wave of fresh flavors and an untouched elegance that will keep your friends coming back for more. Whether you’re hosting a big Super Bowl party or a cozy gathering to catch up with friends, these bites will create memorable moments and, let’s be honest, offer an amazing taste experience that will make your guests cheer! Enjoy every delightful bite, and may your Super Bowl snacks always be as winning as your favorite team! Perfecting Smoked Salmon Poke Super Bowl Party Bites Cooking Process Start by prepping all your ingredients to streamline the cooking process. Slice the cucumber and avocado first, then assemble the bites. This sequence ensures you maximize flavor while keeping the presentation fresh and vibrant. Add Your Touch to Smoked Salmon Poke Super Bowl Party Bites Feel free to swap the smoked salmon for your favorite fish or add a twist with spicy mayo or wasabi for an extra kick. You can also experiment with different toppings like pickled ginger or seaweed. Storing & Reheating Smoked Salmon Poke Super Bowl Party Bites Store assembled bites in an airtight container in the fridge for up to two hours to maintain freshness. For best results, consume them cold; reheating can compromise the dish’s delicate textures and flavors. Sometimes when I serve these Smoked Salmon Poke Bites at gatherings, the compliments come pouring in! One time, a friend told me they tasted even better than the ones at a fancy restaurant, which absolutely made my day! FAQs About Smoked Salmon Poke Super Bowl Party Bites What is Smoked Salmon Poke Super Bowl Party Bites? Smoked Salmon Poke Super Bowl Party Bites are a delightful fusion of flavors and textures, perfect for gatherings. These bites feature fresh cucumber rounds topped with creamy avocado and savory smoked salmon, drizzled with a zesty soy-sesame dressing. They’re not only visually stunning but also incredibly easy to prepare. In just 15 minutes, you’ll have a platter of these delectable morsels ready to impress your guests. Ideal for game day or any celebratory occasion, these bites offer a refreshing alternative to traditional party snacks. How do you store Smoked Salmon Poke Super Bowl Party Bites? To keep your Smoked Salmon Poke Super Bowl Party Bites as fresh as possible, store them in an airtight container in the refrigerator. They are best enjoyed cold and should ideally be consumed within two hours of assembly. While storing, it’s wise to separate the components if you want to keep them fresh for a longer period. If you need to reassemble them later, the freshness of the cucumber and avocado will remain
Delicious Sticky Sesame Cauliflower Wings Recipe for a Perfect Snack
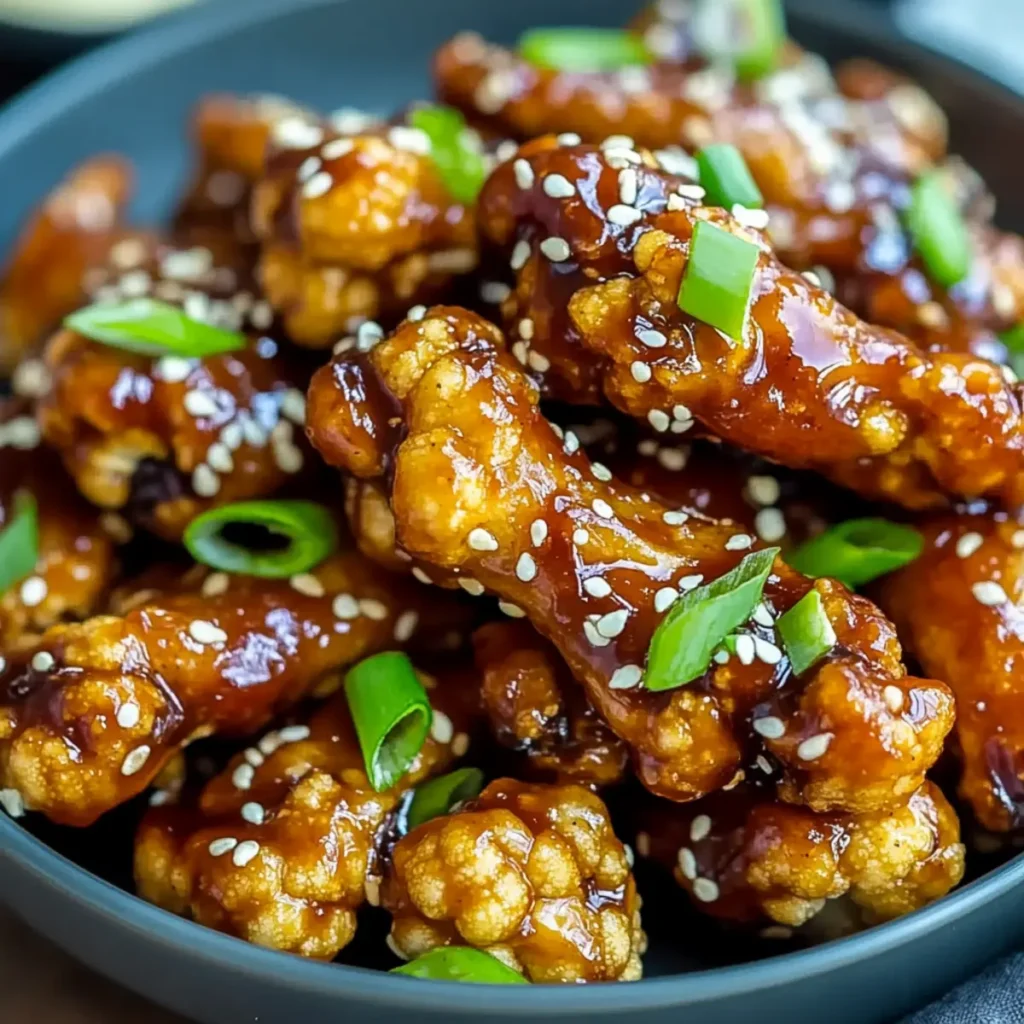
There’s nothing quite like sinking your teeth into crispy Sticky Sesame Cauliflower Wings that are bursting with flavor and irresistible crunch. Imagine biting into these golden morsels, coated in a glossy sesame glaze, with the warmth of garlic and ginger dancing on your taste buds. These wings are the kind of dish that can turn any gathering into a celebration, converting even the most steadfast carnivores into cauliflower fans. Now, picture this: you’re kicking back with friends, the game is on, and the aroma of these Sticky Sesame Cauliflower Wings fills the air, making everyone’s mouths water in anticipation. This dish isn’t just a treat—it’s an enchanting experience waiting to happen on your dinner table or at your next party. Ingredients for Sticky Sesame Cauliflower Wings Here’s what you’ll need to make this delicious Sticky Sesame Cauliflower Wings: 1 cup all-purpose gluten-free flour – choose a quality flour for a crispy batter texture without gluten. 1/2 teaspoon garlic powder – adds flavor punch without the work of mincing fresh garlic. 1/4 teaspoon salt – essential for enhancing all flavors in the dish. 1 cup water (plus more as needed) – helps to create the perfect batter consistency. 1 small head cauliflower (cut into florets) – fresh cauliflower for the best crispiness and flavor. 2 and 1/2 teaspoons toasted sesame oil (divided) – use the toasted version for rich, nutty flavor. 1/2 inch ginger (minced or grated) – adds a spicy zing and aromatic warmth. 2-3 cloves garlic (minced or grated, to taste) – fresh garlic will elevate the flavor even more; adjust the amount based on your preference. 3 and 1/2 tablespoons agave nectar (or less, to taste) – balances the savory notes with its sweetness. 2 and 1/2 tablespoons soy sauce – gives that delicious umami flavor to the sauce. 1 teaspoon rice vinegar – adds necessary acidity and brightness to the dish. 2 tablespoons tomato paste – thickens the sauce, preventing it from being too watery. 1 teaspoon chili paste (like sriracha) – adjusts the heat level; feel free to scale it up or down. Toasted sesame seeds – garnish for extra crunch and added visual appeal. Chopped green onions – fresh garnish that enhances the dish’s visual appeal. How to Make Sticky Sesame Cauliflower Wings Follow these simple steps to prepare this delicious Sticky Sesame Cauliflower Wings: Step 1: Preheat the Oven Preheat your oven to 425 degrees Fahrenheit. This high temperature is essential for getting those cauliflower wings nice and crispy. Prepare two large baking sheets lined with parchment paper for easy cleanup. Step 2: Prepare the Batter In a mixing bowl, stir together the gluten-free flour, garlic powder, and salt. Gradually add 1 cup of water, mixing until you achieve a consistency similar to pancake batter. If the batter is too thick, feel free to add more water, one tablespoon at a time. Step 3: Coat the Cauliflower Take each cauliflower floret and dip it into the batter, shaking off any excess. Place each coated piece on the baking sheet, making sure to leave adequate space between them to ensure even baking. Step 4: Bake Until Crispy Bake the battered cauliflower for 20 minutes. After this, carefully rotate the position of the baking sheets in the oven to ensure even cooking. Bake for another 5-10 minutes, or until they are golden brown and deliciously crispy. Step 5: Make the Sauce While the cauliflower is baking, heat two teaspoons of sesame oil in a small saucepan over medium-low heat. Add the minced garlic and ginger, sautéing for about 60-90 seconds until fragrant. Then, add the agave nectar, soy sauce, rice vinegar, tomato paste, and chili paste. Stir well and let it simmer for about 5 minutes, allowing it to thicken and bubble. Step 6: Combine and Bake Again Once your cauliflower is crispy, transfer it to a mixing bowl and pour the sauce over it, gently tossing to coat. Spread the sauced cauliflower wings back onto the baking sheets. Return them to the oven for an additional 2-4 minutes to help the sauce adhere perfectly. Transfer to plates and sprinkle with toasted sesame seeds and chopped green onions as desired, then serve immediately. These wings are an irresistible starter or snack that will surely impress your guests! This showstopping Sticky Sesame Cauliflower Wings delivers restaurant-quality results using simple ingredients you probably already have at home. The perfect balance of textures and flavors creates an unforgettable dining experience that will have everyone asking for seconds. Picture-perfect presentation with vibrant colors makes this dish absolutely Instagram-worthy and guaranteed to impress any dinner guest. Incredibly versatile recipe that works beautifully for weeknight dinners, meal prep, special occasions, or even outdoor entertaining sessions. Perfecting Sticky Sesame Cauliflower Wings Cooking Process To achieve the best results, start by preparing the batter while the oven preheats. Once the cauliflower florets are coated and baking, prepare the sticky sauce. This timing ensures everything finishes cooking simultaneously for a perfect dish. Add Your Touch to Sticky Sesame Cauliflower Wings Feel free to customize your Sticky Sesame Cauliflower Wings by swapping agave nectar for honey or maple syrup. For a spicy kick, consider adding more chili paste or tossing in some chopped bell peppers for extra flavor. Storing & Reheating Sticky Sesame Cauliflower Wings Store any leftovers in an airtight container in the fridge for up to three days. To reheat, bake in a preheated oven at 350 degrees Fahrenheit for 10-15 minutes to maintain crispiness. Sharing this recipe with friends for the first time was a joy; their smiles and compliments filled the kitchen with warmth, making it a moment I cherish. FAQs About Sticky Sesame Cauliflower Wings What is Sticky Sesame Cauliflower Wings? Sticky Sesame Cauliflower Wings are a delicious and healthier alternative to traditional chicken wings. These plant-based bites consist of battered cauliflower florets that are baked until crispy and then coated in a sweet and savory sauce made with ingredients like sesame oil, soy sauce, and agave nectar. They are