
Taco Ranch Party Bites: Easy and Flavorful Appetizer Recipe

With every crunchy bite of these Taco Ranch Party Bites, you’ll experience the delightful explosion of flavors that takes your taste buds on a festive journey. This appetizer is a crowd-pleaser, perfect for gatherings where everyone wants to nibble on something fun and utterly delicious, packing a flavorful punch in every single tart. They’re not just tasty; these little delights evoke memories of lively parties and good friends mingling, laughter echoing in the air while everyone gets their hands on these irresistible morsels. Picture yourself at a summer barbecue or a game day gathering, where everyone is reaching for the last tart shell while savoring the delicious blend of taco spice and creamy ranch. With these bite-sized wonders, you’re in for an amazing flavor experience that leaves everyone asking for the recipe. Ingredients for Taco Ranch Party Bites Here’s what you’ll need to make this delicious Taco Ranch Party Bites: 1 lb ground beef – A classic choice for richness and flavor; you can also opt for turkey or plant-based ground meat for a healthier or vegetarian version. 1 oz taco seasoning – Use your favorite blend of spices to bring in that authentic taco flavor, or make your own for a fresh twist. 10 oz diced tomatoes and green chiles – These give a zesty kick and a splash of color; canned options work perfectly for easy preparation. 2 cups shredded cheddar cheese – This glorious cheese will melt beautifully, adding a gooey factor that makes it irresistible; feel free to mix in some pepper jack for an extra spice boost. 8 oz ranch dressing – This creamy dressing ties all the flavors together, providing that ranch flavor that everyone loves; homemade ranch elevates the dish if you’re feeling adventurous. 5 count frozen phyllo tart shells – These crispy shells serve as the perfect vessel to carry all the delicious filling, making the recipe quick and easy. How to Make Taco Ranch Party Bites Follow these simple steps to prepare this delicious Taco Ranch Party Bites: Step 1: Preheat the Oven Preheat your oven as directed on the phyllo tart shell package. This will ensure that your tarts bake perfectly, achieving that golden, crispy texture we all crave. Step 2: Cook the Ground Beef In a skillet over medium heat, cook the ground beef until it’s browned and fully cooked through. Don’t forget to drain any excess fat so your tarts don’t end up swimming! Step 3: Mix in the Flavor Now it’s time for the magic! Stir in the taco seasoning along with the diced tomatoes and green chiles. Cook everything together for just 2-3 minutes until heated through, enjoying the tantalizing aroma that fills your kitchen. Step 4: Assemble the Tarts Place the phyllo tart shells on a baking sheet. With a spoon, generously pile the beef mixture into each shell, ensuring every tart is bursting with flavor. Step 5: Dress It Up Top each filled tart with a sprinkle of shredded cheddar cheese and a drizzle of ranch dressing. You can never have too much cheese—am I right? Step 6: Bake to Perfection Slide the baking sheet into the oven and bake according to the tart shell package instructions, or until the cheese is melted and bubbly, achieving that divine golden look. Once these Taco Ranch Party Bites are out of the oven, let them cool for a minute—if you can resist the smell! These little guys are perfect for serving warm, allowing your guests to grab and go while mingling. Not only do they look fantastic on a platter, but they also provide that satisfying crunch with every mouthful. Try not to eat too many before your guests arrive; you definitely want to share these delightful tarts! No need to Tesla your way through the kitchen; this recipe is simple, flavorful, and will be the highlight of your next gathering. So, gather your ingredients, channel your inner culinary artist, and get ready to impress with your Taco Ranch Party Bites! This showstopping Taco Ranch Party Bites delivers restaurant-quality results using simple ingredients you probably already have at home. The perfect balance of textures and flavors creates an unforgettable dining experience that will have everyone asking for seconds. Picture-perfect presentation with vibrant colors makes this dish absolutely Instagram-worthy and guaranteed to impress any dinner guest. Incredibly versatile recipe that works beautifully for weeknight dinners, meal prep, special occasions, or even outdoor entertaining sessions. Perfecting Taco Ranch Party Bites Cooking Process Start by prepping your ingredients and cooking the ground beef until it’s browned. While it’s cooking, get your oven preheated for the phyllo tart shells. This helps everything come together quickly. Add Your Touch to Taco Ranch Party Bites Feel free to swap out the ground beef for turkey, chicken, or even black beans for a vegetarian twist. Mix in some jalapeños or swap ranch dressing for guacamole to give it a fresh spin. Storing & Reheating Taco Ranch Party Bites Store any leftovers in an airtight container in the fridge. To reheat, pop them in the oven at 350°F for about 10 minutes or until heated through, so they remain crispy. Sometimes, I whip up these Taco Ranch Party Bites for game nights, and they disappear within minutes. I once watched my friends fight over the last bite, which is always a winning moment in my kitchen. FAQs About Taco Ranch Party Bites What is Taco Ranch Party Bites? Taco Ranch Party Bites are a fun and flavorful appetizer made with ground beef, taco seasoning, and a delightful ranch dressing, all nestled in crispy phyllo tart shells. These delicious bites combine the vibrant flavors of taco night with the creamy goodness of ranch, creating a perfect finger food option for game days, parties, or any casual get-together. With a crispy outer shell and a warm, savory filling, these bites are sure to impress your guests and keep them coming back for more. How can I customize my Taco Ranch Party Bites? One of the
Crispy Air Fryer Parmesan Green Beans Ready in Just 15 Minutes
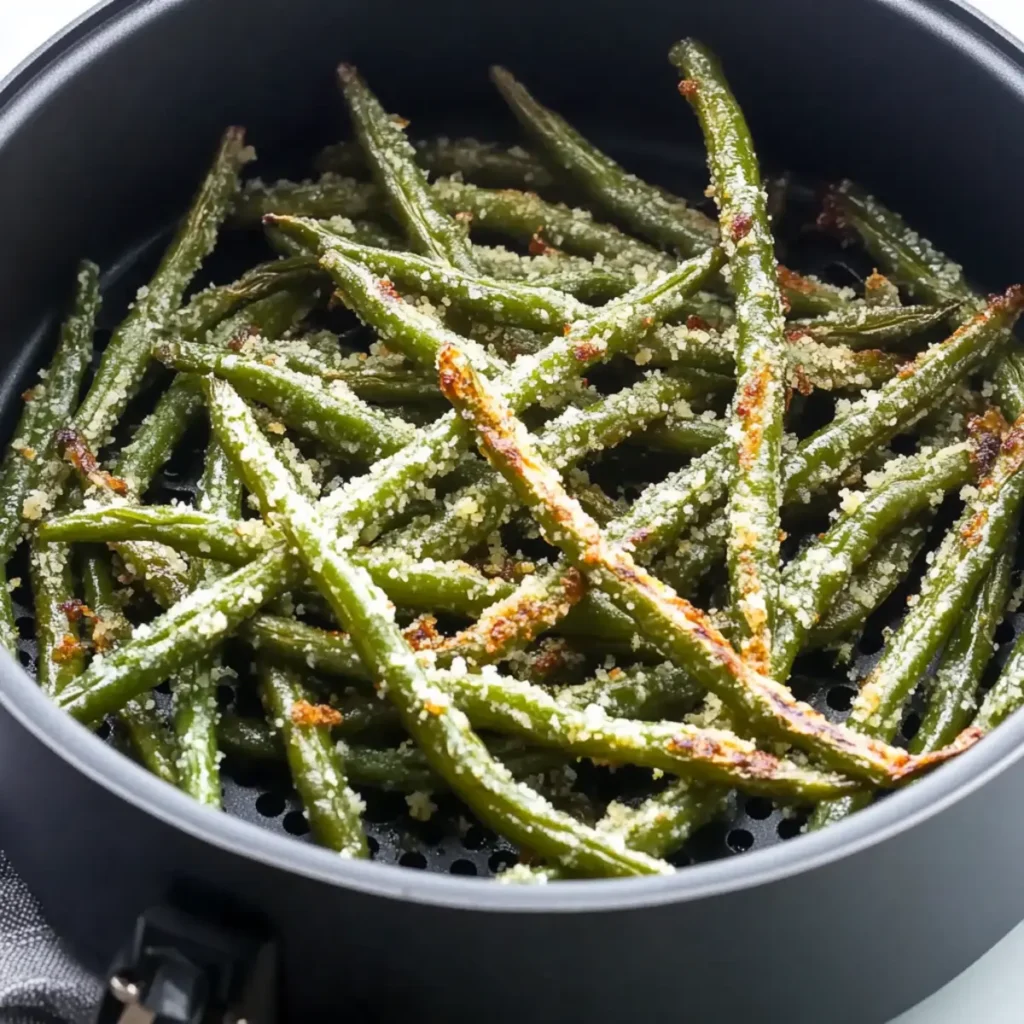
Imagine a plate of crispy, golden green beans, tossed in nutty Parmesan, and kissed by zesty lemon. With a crackle on the outside and a tender bite on the inside, these Crispy Air Fryer Parmesan Green Beans ready in just 15 minutes are what culinary dreams are made of. The aroma wafts through your kitchen, instantly teleporting you to a charming bistro on a sunlit balcony, where the best flavors meet the most delightful conversations. These vibrant green delights are perfect for a quick weeknight dinner or as a stellar side dish at your next gathering. While you may picture your taste buds having a party, you’ll love knowing they’re also packed with nutrients, making every bite feel like a victory. After all, who could say no to that blend of healthiness, incredible flavor, and minimal effort? Ingredients for Crispy Air Fryer Parmesan Green Beans Ready in Just 15 Minutes Here’s what you’ll need to make this delicious Crispy Air Fryer Parmesan Green Beans Ready in Just 15 Minutes: 1 pound green beans – Look for vibrant and crisp beans. Snap them before cooking to ensure freshness and taste. 2 tablespoons olive oil – Extra virgin olive oil gives a rich flavor, but any good-quality olive oil will work. 2 tablespoons lemon juice – Freshly squeezed is best; it adds brightness and a tangy zest that balances the cheese. 1/4 cup grated parmesan – Use fresh grated parmesan for a richer taste; the pre-grated kind may not melt as beautifully. 1 teaspoon garlic powder – This adds a delightful aroma and depth of flavor, lending a savory profile to the dish. 1/2 teaspoon salt – Season to taste, but remember that parmesan is salty too, so adjust as needed. 1/4 teaspoon pepper – Freshly ground black pepper enhances the overall flavor and adds a subtle warmth. How to Make Crispy Air Fryer Parmesan Green Beans Ready in Just 15 Minutes Follow these simple steps to prepare this delicious Crispy Air Fryer Parmesan Green Beans Ready in Just 15 Minutes: Step 1: Prepare the Green Beans Start by rinsing your green beans under cold water. Trim the ends, and snap any that look limp. Freshness is key for that crisp, satisfying bite! Step 2: Create the Flavor Mixture In a mixing bowl, combine the olive oil, lemon juice, garlic powder, salt, and pepper. Whisk them together until fully blended and get ready for the flavor explosion. Step 3: Add the Parmesan and Green Beans Toss the green beans into the bowl with the seasoning mix. Then sprinkle in the grated Parmesan. Use your hands or a spatula to ensure that every bean gets a loving coat of cheesy goodness. Step 4: Air Fry the Green Beans Preheat your air fryer to 370°F (190°C). Once heated, transfer the green bean mixture into the air fryer basket. Arrange them in a single layer to maximize crispiness. Step 5: Cook Until Crispy Cook the green beans for 5 minutes. Then, shake the basket to toss them around a bit. This will help them cook evenly. Continue cooking for another 5 minutes or until they are mouthwateringly golden and tender. Step 6: Serve Up Your Masterpiece Once your air fryer beeps, remove the basket and marvel at your creation. Transfer the crispy beans to a serving plate, and sprinkle a tad more Parmesan for an extra touch of elegance. Serve them hot and watch them disappear in a flash! With these crispy green beans, you’ll have a vegetable side dish that even the pickiest eaters won’t turn their nose up at. Perfect for complementing grilled chicken or a hearty steak, they also shine brightly on vegetarian dinner night. Simple, scrumptious, and practically foolproof, these Crispy Air Fryer Parmesan Green Beans truly deliver every time. Enjoy your culinary triumph! Perfecting Crispy Air Fryer Parmesan Green Beans Ready in Just 15 Minutes Cooking Process To achieve the best results with Crispy Air Fryer Parmesan Green Beans Ready in Just 15 Minutes, start by washing and trimming the beans. Then, mix the ingredients in a bowl, ensuring everything is well coated before air frying. Add Your Touch to Crispy Air Fryer Parmesan Green Beans Ready in Just 15 Minutes Feel free to customize your Crispy Air Fryer Parmesan Green Beans Ready in Just 15 Minutes by adding crushed red pepper flakes for some heat or tossing in toasted almonds for added crunch. The possibilities are endless! Storing & Reheating Crispy Air Fryer Parmesan Green Beans Ready in Just 15 Minutes To store your Crispy Air Fryer Parmesan Green Beans Ready in Just 15 Minutes, keep leftovers in an airtight container in the refrigerator. Reheat in the air fryer to maintain their crispy texture, about 3-4 minutes at 350 degrees. When I first served these Crispy Air Fryer Parmesan Green Beans Ready in Just 15 Minutes at a family gathering, the laughter and compliments flowed like a fine wine. Everyone loved the crunch, and a few relatives even snuck back for seconds! FAQs About Crispy Air Fryer Parmesan Green Beans Ready in Just 15 Minutes What is Crispy Air Fryer Parmesan Green Beans Ready in Just 15 Minutes? Crispy Air Fryer Parmesan Green Beans Ready in Just 15 Minutes is an easy, flavorful side dish that elevates your vegetable game. Made with fresh green beans, olive oil, lemon juice, and Parmesan cheese, this recipe transforms simple ingredients into a crunchy, savory delight. In just a fraction of the time it takes to prepare traditional roasted or sautéed vegetables, you can serve up this crispy treat that’s perfect for all occasions—from weeknight dinners to festive gatherings. How can I customize my Crispy Air Fryer Parmesan Green Beans Ready in Just 15 Minutes? Customization is key with Crispy Air Fryer Parmesan Green Beans Ready in Just 15 Minutes! If you want to spice things up, add a sprinkle of red pepper flakes or a dash of cayenne pepper for a kick. You can also toss in toasted almonds or pine
Delicious Cheesy Spinach and Artichoke Pinwheels Recipe

The aroma of melted cheese mingling with savory spinach and artichokes greets you like an old friend as you unroll your puff pastry. These Cheesy Spinach and Artichoke Pinwheels are not just snacks; they’re the kind of tasty delight that can make you the hero of any gathering, be it a laid-back game night or a fancy dinner party. Close your eyes and imagine biting into a perfectly baked pinwheel, the layers flaky and buttery, with a cheesy filling that dances on your taste buds. This delicious appetizer is not just a feast for the senses but also a simple way to impress your friends. Whether you’re a kitchen novice or a seasoned chef, these pinwheels come together quickly, making them the ultimate treat when you want something delicious without diving into a complicated recipe. They’re delightful for sharing—because who doesn’t love a dish that encourages community and conversation? Ingredients for Cheesy Spinach and Artichoke Pinwheels Here’s what you’ll need to make this delicious Cheesy Spinach and Artichoke Pinwheels: 1 sheet puff pastry – Look for a high-quality, thawed puff pastry that puffs beautifully when baked for the perfect flakiness. 4 ounces dairy-free cream cheese – This creamy base will hold everything together. A plain or herbed variety can add extra flavor. 2 cloves garlic – Minced garlic adds a punch of flavor that complements the other ingredients wonderfully. 1 tablespoon nutritional yeast – This ingredient gives a cheesy, nutty flavor that enhances the overall richness while being dairy-free. 1/4 teaspoon kosher salt – Essential for balancing the flavors, but feel free to adjust based on personal preference. 3 ounces frozen spinach – Make sure to thaw and squeeze out excess moisture to avoid a soggy filling. 7 ounces canned artichoke hearts – Canned artichokes are convenient and offer a delicate taste that blends perfectly into the pinwheel filling. 1/2 cup dairy-free mozzarella cheese – The melty factor! Choose your favorite brand for a gooey texture. flour – A light dusting for the surface when rolling out the puff pastry, preventing it from sticking. How to Make Cheesy Spinach and Artichoke Pinwheels Follow these simple steps to prepare this delicious Cheesy Spinach and Artichoke Pinwheels: Step 1: Preheat the Oven Preheat your oven according to puff pastry package instructions, typically around 400°F (200°C). A hot oven is key to achieving that golden, flaky crust. Step 2: Prepare the Filling In a mixing bowl, combine the dairy-free cream cheese, minced garlic, nutritional yeast, and kosher salt. Use a spatula to mix everything until it forms a smooth and creamy paste, full of flavor. Step 3: Add the Greens and Artichokes Next, add the thawed spinach and chopped artichoke hearts to your mixture. Stir until everything is fully combined, making sure the artichokes are evenly distributed throughout the filling. Step 4: Roll Out Puff Pastry On a floured surface, roll out your puff pastry sheet gently. You want it to be an even thickness, as this ensures that all parts of your pinwheels cook uniformly and look gorgeous. Step 5: Assemble the Pinwheels Spread the cream cheese mixture evenly over the entire puff pastry sheet. Sprinkle the dairy-free mozzarella cheese on top. Now, roll the pastry tightly into a log shape, using your fingers to guide the edges as you roll. Step 6: Slice and Bake Take a sharp knife and slice your log into equal pinwheels, about an inch wide. Place them on a baking sheet lined with parchment paper, then bake according to the puff pastry instructions, around 18 minutes or until they are golden brown and irresistible. Once they’re out of the oven, let the pinwheels cool slightly before serving. Pair them with a side of marinara or your favorite dip, and watch as your guests rave about these flavorful bites. Enjoy the moment as everyone complements your culinary skills—you deserve it! This showstopping Cheesy Spinach and Artichoke Pinwheels delivers restaurant-quality results using simple ingredients you probably already have at home. The perfect balance of textures and flavors creates an unforgettable dining experience that will have everyone asking for seconds. Picture-perfect presentation with vibrant colors makes this dish absolutely Instagram-worthy and guaranteed to impress any dinner guest. Incredibly versatile recipe that works beautifully for weeknight dinners, meal prep, special occasions, or even outdoor entertaining sessions. Perfecting Cheesy Spinach and Artichoke Pinwheels Cooking Process To achieve perfectly golden and flaky Cheesy Spinach and Artichoke Pinwheels, start by prepping your filling. As the oven preheats, assemble the ingredients, then roll out your puff pastry. This method ensures that everything flows seamlessly and that you won’t be scrambling at the last minute. Add Your Touch to Cheesy Spinach and Artichoke Pinwheels Feel free to customize the base of your filling! Swap in vegan ricotta for a creamier texture, or add a kick of spice with some red pepper flakes. Mix in sun-dried tomatoes or olives for added bursts of flavor that you won’t forget. Storing & Reheating Cheesy Spinach and Artichoke Pinwheels Store any leftover pinwheels in an airtight container in the fridge for up to three days. To reheat, pop them in an oven at 350°F for about 10 minutes, ensuring they regain some of that delightful crispiness. It was one of those cozy Friday nights when my friends decided to have an impromptu gathering at my place. I whipped up these Cheesy Spinach and Artichoke Pinwheels, and the way they disappeared faster than I could say “second helpings” filled my heart with joy. FAQs About Cheesy Spinach and Artichoke Pinwheels What is Cheesy Spinach and Artichoke Pinwheels? Cheesy Spinach and Artichoke Pinwheels are delightful bite-sized snacks made from a sheet of puff pastry, filled with a creamy mixture of dairy-free cream cheese, garlic, spinach, artichoke hearts, and mozzarella cheese. These pinwheels are perfect for gatherings and serve as a fantastic appetizer that combines the rich flavors of spinach and artichokes with a cheesy, savory filling. They are easily customizable and can be baked until golden brown, offering a flaky
Delicious Pepperoni Pizza Roses Recipe Ready in 20 Minutes

Here’s a delightful recipe that will have your kitchen smelling like an Italian pizzeria! Just picture a warm, flaky crust cradling gooey mozzarella and zesty pepperoni, all rolled up into beautiful little roses. This Delicious Pepperoni Pizza Roses Recipe in Just 20 Minutes is perfect for game day, movie night, or just to impress your family. It’s like a party in your mouth, and trust me, you won’t be able to stop at just one. Whether you’re cooking for yourself or entertaining friends, these pizza roses will surely steal the spotlight. So, dust off that apron and let’s bring some joy to your dinner table with a recipe that’s as fun to make as it is to eat! Ingredients for Delicious Pepperoni Pizza Roses Recipe in Just 20 Minutes Here’s what you’ll need to make this delicious Delicious Pepperoni Pizza Roses Recipe in Just 20 Minutes: 1 8 oz. crescent dough sheet – This golden pastry serves as the flaky base for your pizza roses, providing the perfect texture. 1/4 cup pizza sauce – A zesty blend of tomatoes and spices, this sauce is essential for that authentic pizza flavor. 1 cup shredded mozzarella cheese – This gooey cheese is the star of the show, melting beautifully as the pizza roses bake. 5 oz. sliced pepperoni – These savory slices add that classic pizza taste that everyone loves. 1/2 tsp. fresh basil, chopped small – Fresh basil brightens up the dish with a burst of herbal flavor, making it even more delightful. 1/4 tsp. garlic powder – A touch of garlic adds depth and richness to the flavor profile of these tasty treats. How to Make Delicious Pepperoni Pizza Roses Recipe in Just 20 Minutes Follow these simple steps to prepare this delicious Delicious Pepperoni Pizza Roses Recipe in Just 20 Minutes: Step 1: Preheat Your Oven Preheat your oven to 375 degrees Fahrenheit (190 degrees Celsius). While it’s warming up, grab your trusted muffin pan and give it a good spray with non-stick cooking spray — we don’t want any pizza roses to get stuck! Step 2: Prepare Your Dough Unroll the crescent dough sheet onto a clean surface. With a sharp knife or pizza cutter, slice the dough into 1-inch wide strips. Imagine these strips as the canvases on which you’ll paint your culinary masterpiece. Step 3: Spread the Sauce With a spoon, spread a light layer of pizza sauce onto each strip of dough. Make sure to leave some edges clear because we’re going to roll this beauty up tight, and we want everything to stick! Step 4: Cheese and Seasoning Sprinkle shredded mozzarella cheese generously over the sauce. Next, add the chopped fresh basil and a hint of garlic powder. Don’t forget to add a pinch of salt and pepper to taste; it’s the secret handshake of flavors! Step 5: Layer the Pepperoni Now for the fun part! Layer the pepperoni slices on top of the cheese, overlapping each slice slightly as you go. The tops of the slices should peek out over the sides of the dough — it’s all about presentation here! Step 6: Roll and Bake Starting from one end of the dough strip, begin to roll it up tightly. Place each rolled dough into the muffin pan, standing up like little skyscrapers of deliciousness. Pop in the oven and bake for 15-20 minutes, or until they’re gloriously golden brown. Serve these pizza roses warm, paired with extra pizza sauce or a drizzle of hot honey for an exquisite finishing touch. They may just become your new favorite comfort food! Enjoy the burst of flavors and textures with every bite, and watch as they disappear faster than you can say, “Delicious Pepperoni Pizza Roses Recipe in Just 20 Minutes!” This showstopping Delicious Pepperoni Pizza Roses Recipe in Just 20 Minutes delivers restaurant-quality results using simple ingredients you probably already have at home. The perfect balance of textures and flavors creates an unforgettable dining experience that will have everyone asking for seconds. Picture-perfect presentation with vibrant colors makes this dish absolutely Instagram-worthy and guaranteed to impress any dinner guest. Incredibly versatile recipe that works beautifully for weeknight dinners, meal prep, special occasions, or even outdoor entertaining sessions. Perfecting Delicious Pepperoni Pizza Roses Recipe in Just 20 Minutes Cooking Process Begin by preheating your oven and preparing your muffin pan. While that heats up, roll out the crescent dough and add your favorite pizza ingredients. The early prep ensures a smooth and speedy cooking experience. Add Your Touch to Delicious Pepperoni Pizza Roses Recipe in Just 20 Minutes Feel free to swap out pepperoni for other toppings like spinach or mushrooms. You can also experiment with different cheeses or add a sprinkle of crushed red pepper for extra spice! Storing & Reheating Delicious Pepperoni Pizza Roses Recipe in Just 20 Minutes Store leftovers in an airtight container in the fridge for up to three days. Reheat in the microwave for quick enjoyment or pop them in the oven to restore that crispy texture. There was that one night when I made these pepperoni pizza roses for a gathering, and my friends couldn’t stop raving about them. They said it was like having pizza but with a twist. FAQs About Delicious Pepperoni Pizza Roses Recipe in Just 20 Minutes What is Delicious Pepperoni Pizza Roses Recipe in Just 20 Minutes? The Delicious Pepperoni Pizza Roses Recipe in Just 20 Minutes is a fun and creative twist on traditional pizza. This dish combines flaky crescent dough, zesty pizza sauce, gooey mozzarella cheese, and savory pepperoni to create bite-sized pizza roses that are not only visually stunning but also incredibly delicious. Perfect for parties, family dinners, or a cozy movie night, these pizza roses deliver restaurant-quality flavors right from your kitchen in under 20 minutes. How do I customize the Delicious Pepperoni Pizza Roses Recipe in Just 20 Minutes? You can easily customize the Delicious Pepperoni Pizza Roses Recipe in Just 20 Minutes by swapping out toppings
Authentic Italian Black Cherrycello Recipe for Homemade Liqueur
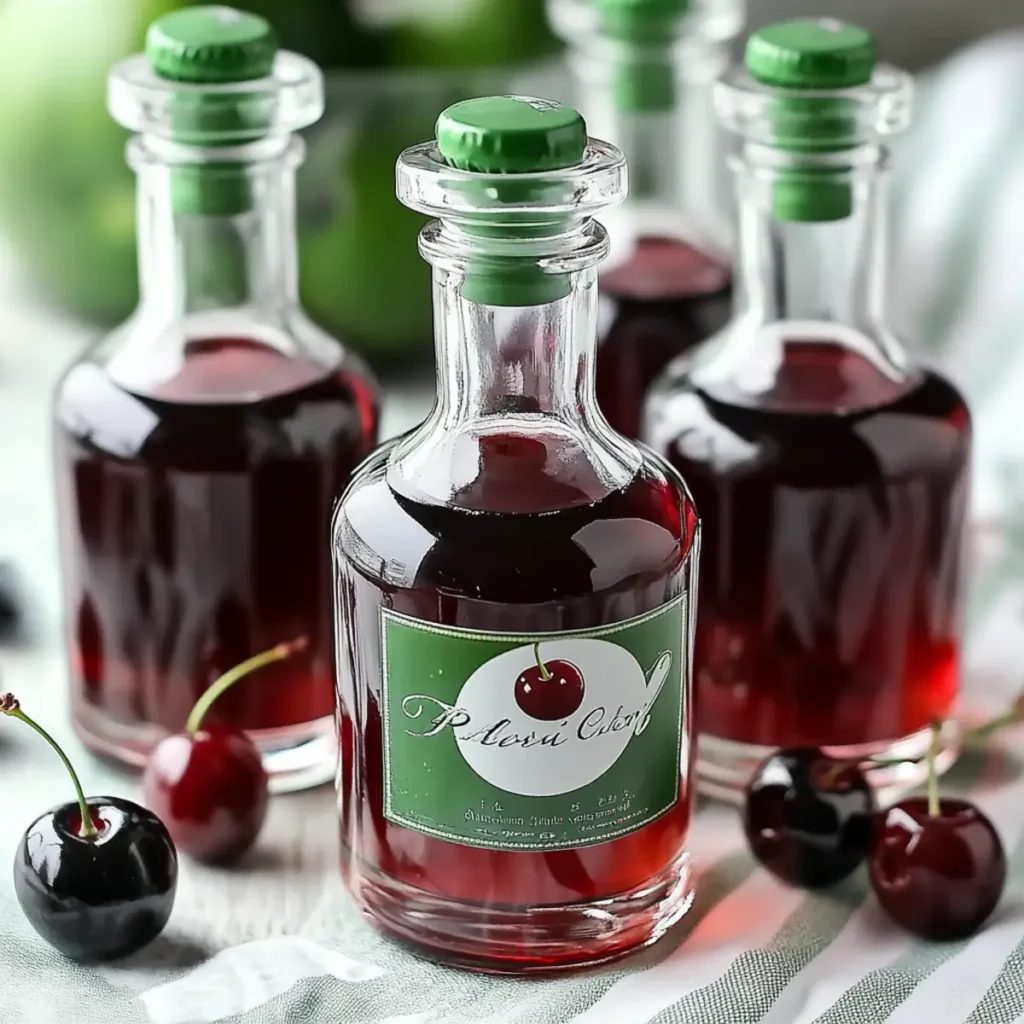
There’s something magical about capturing the essence of summer in a jar, and this Authentic Italian Black Cherrycello Recipe for Homemade Liqueur does just that. Imagine a rich, dark liqueur bursting with the sweet tartness of cherries, lovingly blended with vodka, creating a delightful elixir that’s perfect for sipping on warm evenings or sharing with friends. As you embark on this spirited adventure, picture the moment when you pop open a bottle and the aromas waft around you. It’s a drink that transforms simple gatherings into unforgettable soirées, and trust me, nothing brings people together quite like a homemade liqueur. Get ready to enjoy the fruits of your labor, quite literally, with this easy-to-follow recipe. Ingredients for Authentic Italian Black Cherrycello Recipe for Homemade Liqueur Here’s what you’ll need to make this delicious Authentic Italian Black Cherrycello Recipe for Homemade Liqueur: 1.75 liters vodka – Use a good-quality vodka for the best flavor. A mid-range brand works well, as it allows the cherry flavor to shine through without being overpowered. 4 cups frozen dark pitted cherries – Frozen cherries are a convenient option that retains freshness. Be sure to choose dark varieties for a rich flavor that complements the vodka. 2 cups granulated sugar – This is the sweet element that brings everything together, adding a delightful balance to the tartness of the cherries and elevating the liqueur’s overall flavor. How to Make Authentic Italian Black Cherrycello Recipe for Homemade Liqueur Follow these simple steps to prepare this delicious Authentic Italian Black Cherrycello Recipe for Homemade Liqueur: Step 1: Prepare the Jars Start by dividing the vodka evenly between two large canning jars. Ensure they are clean and dry, ready to hold all that cherry goodness. Step 2: Add the Cherries To each jar, add two cups of the frozen dark pitted cherries. Watching those beautiful cherries tumble in is a sight to behold; they’re like tiny jewels waiting to infuse their flavor. Step 3: Sweeten the Deal Next, pour one cup of granulated sugar into each jar. When you seal these jars and shake them, the sugar will dissolve, creating a deliciously sweet environment for the cherries to soak in. Step 4: Seal and Shake Screw the lids tightly on the jars and give them a good shake. It’s almost like giving a little dance party to the ingredients inside. This step mixes everything together, and now the anticipation starts to build. Step 5: Let It Steep Store the jars in a cool, dark cupboard for at least one month. It’s crucial to shake them at least twice a week. This process ensures that all the flavors meld beautifully. Trust me, patience pays off big time! Step 6: Strain and Bottle After a month, strain the cherries from one jar into a large glass measure with a pour spout. Fill two sterilized 8.5 oz. bottles with this lovely liqueur. Don’t toss out those cherries yet; they’ll surprise you in just a moment! Serve it up at your next gathering, pour it over ice, or mix it into cocktails. The cherries left behind can be packed into one of the jars and topped off with rum, bourbon, or brandy to make delightful cocktail cherries that are just waiting to enhance your drink. When you finally reach for that bottle of your homemade Authentic Italian Black Cherrycello, know that you’ve created something truly special. It’s not just a beverage; it’s a story, a memory, and a treat that elevates any occasion. Cheers to that! Perfecting Authentic Italian Black Cherrycello Recipe for Homemade Liqueur Cooking Process Start by dividing the vodka evenly between two large canning jars. Add cherries and sugar, then securely lid and shake. Store the jars in a dark place, shaking biweekly for the optimum flavor infusion over one month. Add Your Touch to Authentic Italian Black Cherrycello Recipe for Homemade Liqueur For a twist, consider substituting vodka with high-proof rum or brandy. You could also add other fruits like raspberries or blueberries to enhance the flavor profile of your homemade liqueur. Storing & Reheating Authentic Italian Black Cherrycello Recipe for Homemade Liqueur Store your finished liqueur in cool, dry places to maintain optimal flavor and quality. For cocktail cherries, keep them submerged in your choice of spirit to extend their shelf life and taste. Creating my first batch of this Authentic Italian Black Cherrycello was a delightful experience; my friends raved about it and insisted I make it for every gathering! That support kept me perfecting my version, making it a cherished part of our celebrations. FAQs About Authentic Italian Black Cherrycello Recipe for Homemade Liqueur What is Authentic Italian Black Cherrycello Recipe for Homemade Liqueur? The Authentic Italian Black Cherrycello Recipe for Homemade Liqueur is a delightful liqueur made by infusing vodka with dark pitted cherries and sugar. This delicious concoction is perfectly sweet yet tangy, capturing the essence of Italian flavor. Traditionally enjoyed as a digestif, it makes a fantastic homemade gift or an impressive addition to your cocktail repertoire. The recipe is simple and requires minimal ingredients, making it enjoyable to create and share with friends and family. How long does it take to prepare the Authentic Italian Black Cherrycello Recipe for Homemade Liqueur? The preparation time for the Authentic Italian Black Cherrycello Recipe for Homemade Liqueur is minimal, only about 10 minutes. However, patience is key when it comes to letting the flavors infuse. Ideally, you should allow the mixture to steep for at least one month. During this time, you should shake the jars every week, enhancing the flavor and creating an aromatic liqueur that will impress anyone who tries it. Can I customize the Authentic Italian Black Cherrycello Recipe for Homemade Liqueur? Absolutely! This Authentic Italian Black Cherrycello Recipe for Homemade Liqueur offers plenty of room for creativity. You can substitute vodka with rum or brandy for a different flavor profile. Additionally, try adding other fruits like raspberries or blueberries to the mix for a delightful twist. Feel free to experiment
Easy Homemade Garlic Mayonnaise Recipe for Flavorful Dishes
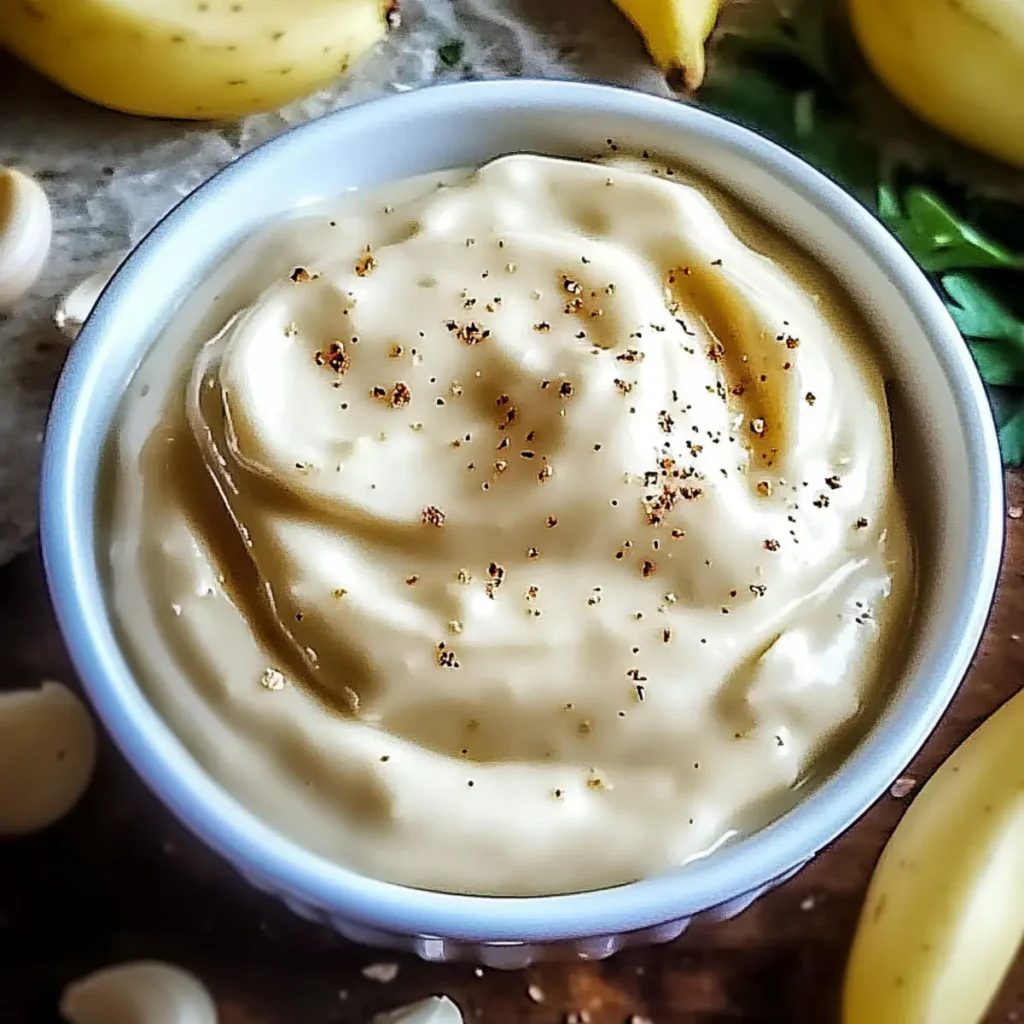
Garlic Mayonnaise is the kind of condiment that takes everything up a notch. Imagine a creamy, rich spread bursting with aromatic garlic and a zesty hint of lemon, perfect for slathering on sandwiches, dipping fresh veggies, or enhancing any dish that dares to cross its path. One bite of this luscious creation, and you’ll swear off store-bought stuff forever. Not only is Garlic Mayonnaise a game-changer in the flavor department, but it also brings a bit of culinary magic to the table. Share it at gatherings or keep it hidden away for your own late-night snack rendezvous. Trust me, once you have a jar of this delightful concoction in the fridge, it’ll become your ultimate secret weapon for flavor. Ingredients for Garlic Mayonnaise Here’s what you’ll need to make this delicious Garlic Mayonnaise: 1 cup mayonnaise – For a creamy base, opt for full-fat mayonnaise for the best taste and texture. 4 cloves garlic, minced – Fresh garlic is key here; it adds a punchy, robust flavor. Adjust the quantity based on your love for garlic! 2 tablespoons freshly squeezed lemon juice – Fresh is best! It brightens the mayo and balances the richness. Salt (to taste) – A simple seasoning to enhance flavors; kosher salt works wonderfully. Freshly ground black pepper (to taste) – For that subtle kick, freshly ground gives the best flavor profile. How to Make Garlic Mayonnaise Follow these simple steps to prepare this delicious Garlic Mayonnaise: Step 1: Prepare the Base Start by placing the mayonnaise into a small bowl. Use a spatula or whisk to stir until it’s smooth and creamy. This is the blank canvas for our flavor explosion. Step 2: Add the Garlic Toss in the minced garlic and stir to combine. The aroma at this point will be downright intoxicating – you may find yourself wanting to eat it straight away! Step 3: Incorporate the Lemon Juice Now, add the freshly squeezed lemon juice and stir until smooth. The bright acidity complements the creamy mayo perfectly. Don’t be afraid to taste and add more lemon if you feel adventurous. Step 4: Chill for Flavor Fusion Cover the bowl and let it chill in the fridge for at least 30 minutes. This step is crucial; allowing the flavors to meld will elevate your Garlic Mayonnaise to new heights. Step 5: Season to Perfection After chilling, give it a taste. This is the moment of truth! Adjust the garlic and lemon juice as desired, adding salt and freshly ground black pepper to taste. You want a flavor that dances on the palate. Step 6: Serve and Enjoy Transfer your Garlic Mayonnaise to a serving dish or a mason jar for storage. This delightful dip is now ready to elevate sandwiches, veggies, or whatever else your heart desires! And there you have it! A version of Garlic Mayonnaise that is not only easy to whip up but exciting to share. So gather your fresh vegetables for dipping or prep those sandwiches – this condiment is going to make you feel like a culinary rockstar! Perfect for parties or those sneaky late-night cravings, you’ll soon see it as an indispensable kitchen staple. Dive in and savor every fantastic, garlicky bite! Perfecting Garlic Mayonnaise Cooking Process To make the best Garlic Mayonnaise, start by mixing the mayonnaise in a bowl. As you stir until smooth, incorporate the minced garlic right after. Add lemon juice next and chill, letting the flavors mingle for that gourmet touch. Add Your Touch to Garlic Mayonnaise Feel free to customize your Garlic Mayonnaise. Consider swapping regular mayonnaise for a vegan version, adding spices like smoked paprika for depth, or including fresh herbs like dill or basil for a refreshing twist. Storing & Reheating Garlic Mayonnaise Store your Garlic Mayonnaise in an airtight container in the fridge for up to a week. If you need to reheat it, avoid high temperatures to prevent separation; simply let it reach room temperature gently. Cooking Garlic Mayonnaise reminds me of the time I brought it to a family barbecue. Everyone raved about its creamy texture and zesty flavor, turning mundane burgers into gourmet delights in no time! FAQs About Garlic Mayonnaise What is Garlic Mayonnaise? Garlic mayonnaise is a creamy condiment made from mayonnaise and fresh garlic, often mixed with lemon juice for an extra zesty kick. This flavorful sauce can elevate a variety of dishes, from sandwiches and salads to grilled meats. The beauty of garlic mayonnaise lies in its simplicity—using basic ingredients you likely have at home, you can create a gourmet-style dip or spread that enhances any meal. How can I customize my Garlic Mayonnaise? Customizing your garlic mayonnaise is easy and fun! You might consider using vegan mayonnaise to create a plant-based version. Another thoughtful addition could be fresh herbs like dill or basil for a burst of flavor. For those who love a smoky taste, adding smoked paprika can provide depth. Experimenting with different spices or even incorporating spicy elements like Sriracha can turn this classic into something uniquely yours. How long does Garlic Mayonnaise last? Once prepared, garlic mayonnaise can be stored in an airtight container in the refrigerator for about one week. It’s best enjoyed fresh, but you can keep it handy for quick meal prep. Ensure you use a clean utensil each time you scoop out the mayonnaise to maintain its freshness and avoid contamination. Over time, the flavors may intensify, so give it a good stir before using! What are some dishes that pair well with Garlic Mayonnaise? Garlic mayonnaise is incredibly versatile and can complement various dishes beautifully. Use it as a luscious spread on sandwiches, elevate a simple salad with it as a dressing, or serve it as a dip for fresh vegetables. It also goes wonderfully with grilled meats, seafood, and even crispy fries. Whether you’re hosting a gathering or enjoying a quiet dinner, this sauce can add that touch of gourmet flair to countless meals. Conclusion for Garlic Mayonnaise In summary,
Easy Homemade Béarnaise Sauce Recipe for Perfect Steaks
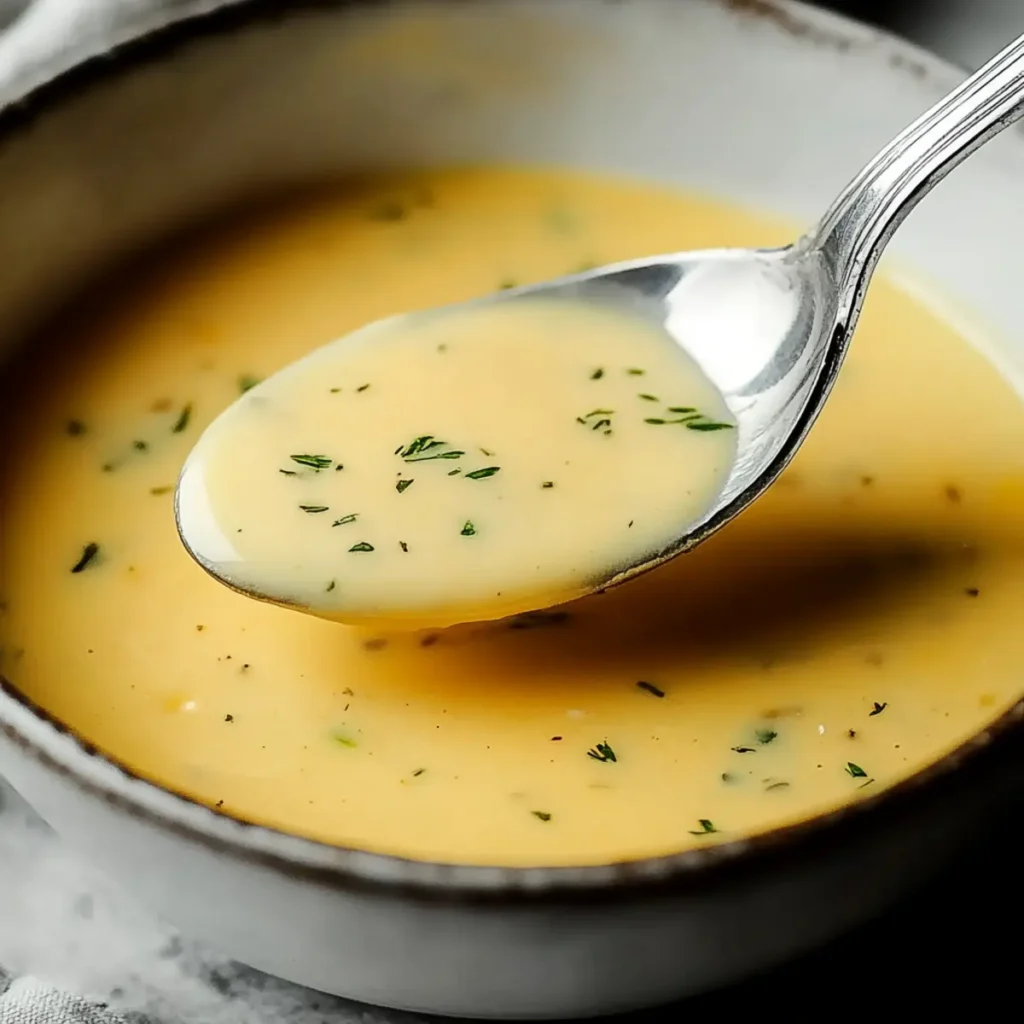
Imagine a rich, buttery Béarnaise Sauce cascading over a perfectly grilled steak, creating a union of flavors so divine it could make even the most seasoned chef weak at the knees. This sauce, with its herbaceous notes of tarragon and a punch of tangy white wine, is not just a condiment; it’s a culinary hug that transforms any dish into a gourmet experience. You’ll want to keep this dreamy sauce in your back pocket, ready for those moments when a simple dinner needs a splash of flair. This Béarnaise Sauce is perfect for special occasions or just a weekday treat when you want to feel a little fancy. It whisks together egg yolks and melted butter, resulting in a velvety texture that’s simply irresistible. Whether drizzling it over grilled meats or vegetables, this sauce promises to elevate your meals with its rich flavor profile and creamy consistency. Ingredients for Béarnaise Sauce Here’s what you’ll need to make this delicious Béarnaise Sauce: 1/4 cup dry white wine – Adds a hint of acidity and depth to balance the richness of the sauce. Choose a quality wine you enjoy drinking. 1/4 cup white wine vinegar – Provides an additional tangy kick, enhancing the flavor profile and complexity of the sauce. 1 small shallot, peeled and thinly sliced – Offers delicate sweetness and aromatic notes that complement the tarragon beautifully. 1 tablespoon tarragon leaves – Fresh tarragon is key here; its unique anise flavor is what makes Béarnaise Sauce iconic. 3 large egg yolks – The base of the sauce, contributing to its silky texture and richness. 1 teaspoon lemon juice – Brightens the rich flavors of the sauce, adding a touch of freshness. 1/4 teaspoon kosher salt – Enhances the flavors of all the ingredients without overpowering them. 1/2 cup unsalted butter or ghee, melted and hot – Provides the creamy consistency that Béarnaise is known for; make sure it’s hot when added. 2 teaspoons finely chopped tarragon leaves – For a burst of fresh flavor right before serving, intensifying the allure of the sauce. How to Make Béarnaise Sauce Follow these simple steps to prepare this delicious Béarnaise Sauce: Step 1: Prepare the Reduction In a saucepan, combine the dry white wine, white wine vinegar, sliced shallot, and tarragon leaves. Bring to a simmer over medium heat, stirring occasionally until the liquid reduces down to about 2 tablespoons. This step concentrates the flavors and sets the foundation for your Béarnaise. Step 2: Strain the Mixture Once the reduction has thickened, strain it into a heatproof bowl, discarding the shallots and tarragon leaves. You want only the liquid for the next steps, so make sure to press down lightly to squeeze out every ounce of flavor. Step 3: Whisk in the Egg Yolks Add the egg yolks and lemon juice to the bowl with the strained reduction. Whisk them together until well combined, creating a smooth mixture. This is where the magic starts to happen! Step 4: Create the Double Boiler Place the bowl over a pot of simmering water to create a double boiler. This gentle heat will cook the egg yolks slowly while whisking continuously. Keep whisking until the mixture thickens and becomes fluffy, about 3-5 minutes. Step 5: Incorporate the Butter Gradually pour in the hot melted butter or ghee while whisking furiously. This is where you transform that egg mixture into the luscious sauce it’s meant to be. Keep whisking until everything is fully incorporated and the sauce is creamy—congratulations, you’re almost there! Step 6: Final Touches Stir in the finely chopped tarragon and season your Béarnaise Sauce with kosher salt to taste. Adjust the seasoning as necessary; you want it to sing with flavor. Serve immediately over your favorite steak or veggies for an unforgettable meal. Transfer to plates and drizzle with sauce for the perfect finishing touch. Whether it’s a casual dinner or a special celebration, this Béarnaise Sauce will steal the show and elevate even the simplest dishes into something extraordinary! Enjoy each drool-worthy bite – you deserve it. Perfecting Béarnaise Sauce Cooking Process To master the art of Béarnaise Sauce, start by reducing the wine and vinegar mixture. While that simmers, you can melt the butter. Whisk together the egg yolks and lemon juice until creamy and smooth before gently folding in your flavorful reduction. Add Your Touch to Béarnaise Sauce Feel free to swap out tarragon for your favorite herbs like dill or chervil for a unique twist! You might also add some minced garlic or shallots for an extra punch of flavor. Experimenting can lead to delightful surprises. Storing & Reheating Béarnaise Sauce Store any leftover sauce in an airtight container in the fridge for up to two days. To reheat, use a double boiler method on low heat, whisking continuously to avoid scrambling the eggs. Creating my first Béarnaise was an adventure! My friends were blown away when I served it over steak, declaring it “restaurant-worthy.” Their compliments still warm my heart and reinforce that cooking is about love and joy. FAQs About Béarnaise Sauce What is Béarnaise Sauce? Béarnaise Sauce is a classic French sauce that transforms ordinary dishes into culinary masterpieces. Made primarily with egg yolks, clarified butter, and an infusion of white wine and vinegar, this sauce offers a rich, creamy texture and a zingy flavor profile thanks to its key ingredient: tarragon. Commonly served over grilled meats, especially steak, it’s the perfect accompaniment to elevate your dining experience. Whether you’re hosting a fancy dinner or just treating yourself, mastering Béarnaise Sauce can truly impress your guests. How do I make Béarnaise Sauce from scratch? Creating Béarnaise Sauce from scratch might sound daunting, but it’s quite simple with the right technique. Start by reducing white wine, vinegar, shallots, and tarragon into a flavorful syrup. After straining this mixture, whisk in egg yolks and lemon juice before heating it gently over a double boiler. The key is to gradually add melted butter while whisking continuously until you achieve
Delicious Vegetable Tortilla Roll Ups Perfect for Easy Snacking
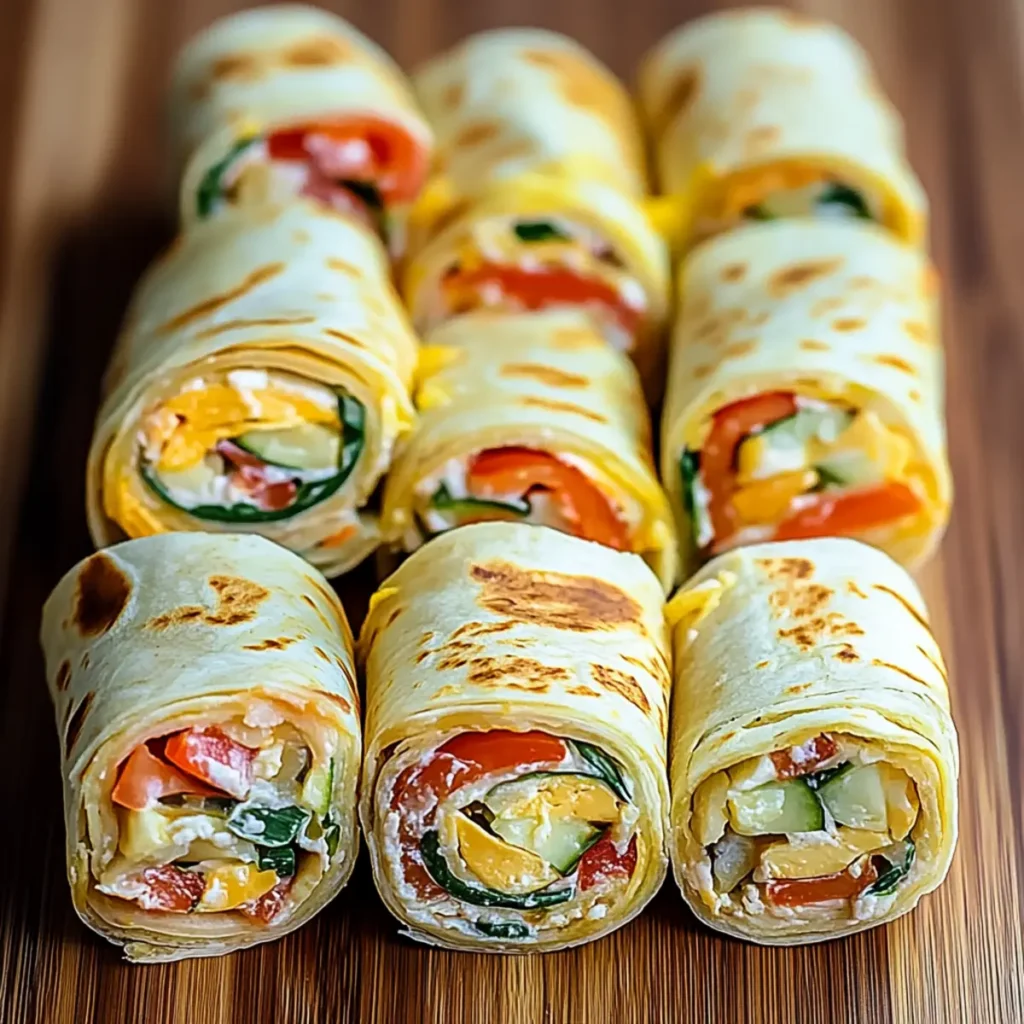
Indulge yourself in the flavor explosion of Delicious Vegetable Tortilla Roll Ups that are as visually delightful as they are tasty. Imagine biting into a scrumptious roll filled with colorful veggies and creamy goodness, a flavor party in every bite! Whether you’re prepping for a casual gathering or just looking to elevate your snack game, these roll-ups will transform your kitchen escapades into a delightful culinary adventure. Picture this: it’s a cozy evening with friends, laughter fills the air, and you’re serving these vibrant rolls while watching everyone’s eyes light up with happiness. These tortilla roll-ups are not just delicious; they’re a testament to easy entertaining that leaves everyone wanting more. Get ready to create an unforgettable flavor experience that will become a staple in your recipe repertoire. Ingredients for Delicious Vegetable Tortilla Roll Ups Here’s what you’ll need to make this delicious Delicious Vegetable Tortilla Roll Ups: 1 cup chopped veggies – A colorful mix of broccoli, carrots, and red bell pepper brings crunch and vibrant color to your tortillas. 4 oz cream cheese (softened) – This rich and creamy base binds the flavors together while adding a delightful smoothness. ⅓ cup mayo – A little tang from mayonnaise elevates the dish and adds to the creamy texture. ½ tsp garlic powder – A hint of garlic flavor makes everything better; it’s like a flavor hug for your taste buds. ¼ tsp dried dill – This herb adds a fresh, slightly tangy kick that complements the veggies perfectly. ¼ tsp salt – A pinch of salt enhances all the flavors, ensuring nothing gets left behind. ⅛ tsp black pepper – Just a dash to spice things up; feel free to add more if you like a little heat. 2 large burrito-sized flour tortillas – The sturdy foundation that holds everything together, making each bite a hand-held delight. ½ cup grated cheddar cheese – Because cheese makes everything better, adding richness and flavor. 2 TBSP chopped green onion – These fresh greens add a crunchy texture and an extra layer of flavor. How to Make Delicious Vegetable Tortilla Roll Ups Follow these simple steps to prepare this delicious Delicious Vegetable Tortilla Roll Ups: Step 1: Mix the Filling In a mixing bowl, combine the chopped veggies, softened cream cheese, mayo, garlic powder, dried dill, salt, and black pepper. Use a spatula or spoon to mix thoroughly until all ingredients are well-blended. Step 2: Spread the Mixture Take one of the flour tortillas and spread the creamy veggie mixture evenly across the surface. Be generous, making sure to cover the edges for all-around flavor. Step 3: Add Toppings Sprinkle half of the grated cheddar cheese and half of the chopped green onions over the cream cheese mixture on the tortilla, ensuring every bite has cheesy goodness. Step 4: Roll It Up Starting from one end, carefully roll the tortilla tightly until you have a full log. The goal is to securely wrap all the deliciousness inside! Step 5: Slice and Serve Using a sharp knife, slice the rolled tortilla into pinwheels about one inch thick. Arrange them on a platter—your guests will be wowed! Step 6: Optional Chilling For best results, chill the assembled pinwheels in the refrigerator for about 30 minutes before serving. This helps the flavors meld beautifully and makes slicing easier. Enjoy your beautiful array of Delicious Vegetable Tortilla Roll Ups as they fly off the plate, leaving everyone craving more! Whether served at a party, a picnic, or as an easy snack for your family, these delightful bites are sure to bring smiles and satisfaction. Now, who knew veggies could be this much fun? Thank you, tortilla magic! Perfecting Delicious Vegetable Tortilla Roll Ups Cooking Process To achieve creamy and flavorful Delicious Vegetable Tortilla Roll Ups, start by prepping all your veggies. Then, mix the cream cheese and other ingredients before spreading the mixture onto the tortillas. Finally, roll tightly and cut for perfect pinwheels every time. Add Your Touch to Delicious Vegetable Tortilla Roll Ups Feel free to jazz up your Delicious Vegetable Tortilla Roll Ups by swapping in different veggies like spinach or cucumbers. You can also switch the cheeses or add herbs like basil or cilantro for extra flavor. Personalize them for your taste! Storing & Reheating Delicious Vegetable Tortilla Roll Ups Store leftover Delicious Vegetable Tortilla Roll Ups in an airtight container in the fridge for up to three days. When ready to eat, enjoy them cold or warm them slightly in the microwave for about 10 seconds for a soft snack. Sometimes, when I whip up Delicious Vegetable Tortilla Roll Ups for a gathering, I hear laughter and chatter as folks dive right in. The joy on their faces as they enjoy every bite reminds me why I love cooking for loved ones. FAQs About Delicious Vegetable Tortilla Roll Ups What are Delicious Vegetable Tortilla Roll Ups? Delicious Vegetable Tortilla Roll Ups are a fun and colorful snack or appetizer made by spreading a creamy veggie mixture onto large flour tortillas, rolling them up tightly, and slicing into pinwheels. Packed with chopped vegetables, cream cheese, and spices, these roll ups offer a tasty way to enjoy fresh produce. They’re versatile and can be served at parties, picnics, or as a quick snack. The vibrant colors and flavors make them not only delicious but also visually appealing, ensuring they’ll be a hit at any gathering. How do I make Delicious Vegetable Tortilla Roll Ups? Making Delicious Vegetable Tortilla Roll Ups is simple! Start by mixing your choice of chopped veggies—like broccoli, carrots, and bell peppers—with softened cream cheese, mayo, and seasonings. Once your mixture is well-blended, spread it evenly over a tortilla, sprinkle some cheese and green onions, roll it up tightly, and slice into bite-sized pieces. This process takes only about 10 minutes, making it an ideal recipe for last-minute entertaining. Enjoy them fresh, or chill them for a refreshing snack later! What can I substitute in Delicious Vegetable Tortilla Roll
Easy Banana Oatmeal Bars Recipe for A Healthy Snack Delight
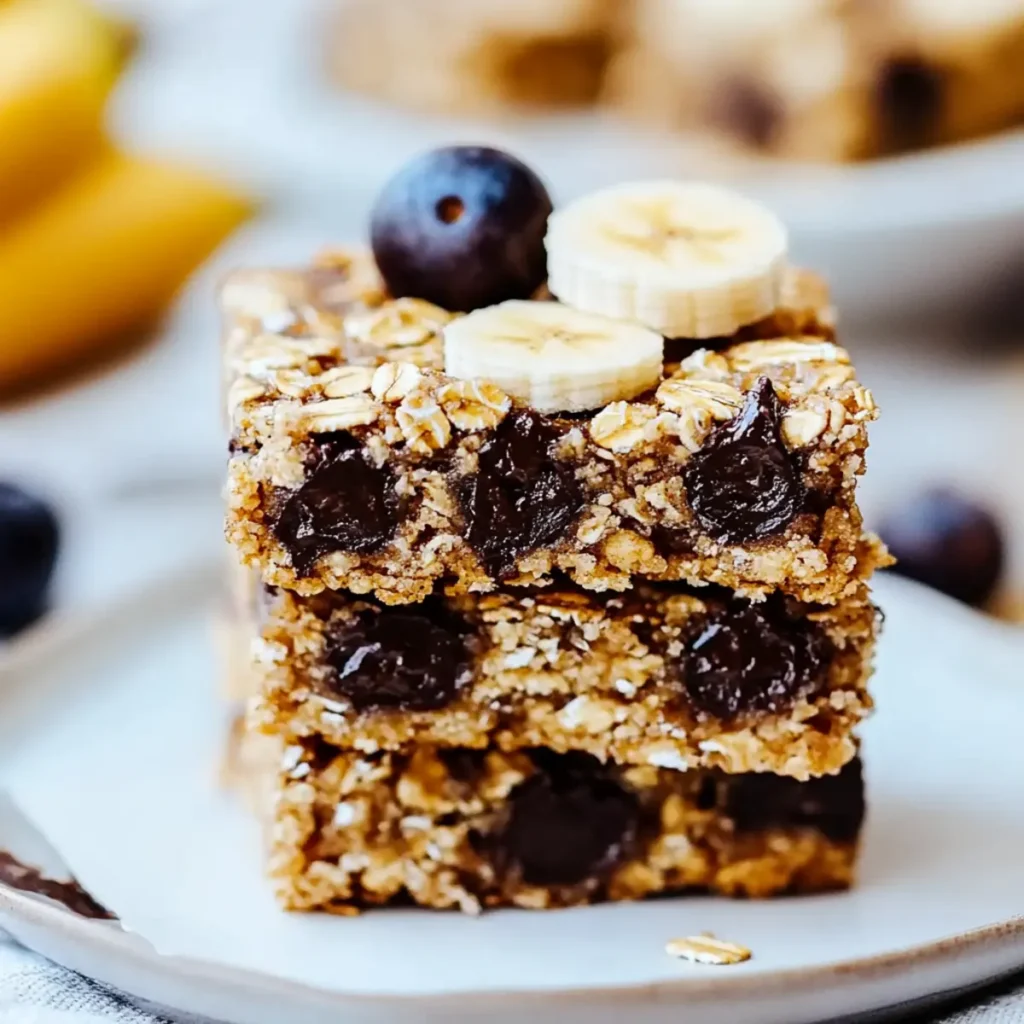
Crispy on the outside, chewy on the inside, the Easy Banana Oatmeal Bars Recipe for A Healthy Snack Delight is the ultimate comfort food that magically combines flavor and nutrition. Imagine biting into a warm bar that is bursting with the sweet aroma of ripe bananas and hints of rich, creamy peanut butter, all while chocolate chips melt in your mouth. Best of all, this delightful recipe invites you to indulge guilt-free! Whether you’re whipping up a quick breakfast, a midday snack, or a post-workout treat, these banana oatmeal bars are here to save the day. These bars are so delicious that you’ll wonder if they can truly be this healthy. Spoiler alert: they can! Ready to dig in? Let’s make magic happen in the kitchen! Ingredients for Easy Banana Oatmeal Bars Recipe for A Healthy Snack Delight Here’s what you’ll need to make this delicious Easy Banana Oatmeal Bars Recipe for A Healthy Snack Delight: 3 medium ripe bananas – Make sure they are fully ripe for maximum sweetness and flavor. The squishier, the better! 2 large eggs – These are essential for binding the ingredients together and provide structure to your bars. 0.5 cup pure maple syrup – This natural sweetener not only adds sweetness but also contributes moisture to the bars. 0.75 cup creamy peanut butter – Opt for a good-quality, no-stir variety for a smooth texture that blends well. 0.25 cup avocado oil or unsweetened applesauce – Use avocado oil for richness or applesauce for a lighter alternative. 2 teaspoons pure vanilla extract or almond extract – Vanilla extract enhances the overall flavor, while almond adds a delightful twist. 2.5 cups old-fashioned oats – Old-fashioned oats give the bars a hearty texture and chewiness that’s simply irresistible. 1 teaspoon baking powder – This is your leavening agent that helps the bars puff up slightly during baking. 1 teaspoon ground cinnamon – Cinnamon adds a warm spice that complements the sweetness of bananas. 1 teaspoon kosher salt – A pinch of salt helps balance all those sweet flavors. 0.75 cup chocolate chips – Because life is better with chocolate! Add some for topping, too, if you’re feeling extra indulgent. 1 tablespoon flaky sea salt (for topping, optional) – This is the finishing touch that adds a delightful contrast to the sweetness. How to Make Easy Banana Oatmeal Bars Recipe for A Healthy Snack Delight Follow these simple steps to prepare this delicious Easy Banana Oatmeal Bars Recipe for A Healthy Snack Delight: Step 1: Preheat the Oven Preheat your oven to 350°F (175°C) and line a baking dish with parchment paper. This prevents sticking and makes for easy cleanup. Step 2: Mix the Wet Ingredients In a large mixing bowl, combine the mashed bananas, eggs, maple syrup, peanut butter, avocado oil or applesauce, and vanilla or almond extract. Use a fork or whisk to blend everything together until it’s beautifully smooth. Step 3: Add Dry Ingredients Next, fold in the old-fashioned oats, baking powder, cinnamon, kosher salt, and chocolate chips. Stir until everything is nicely combined, ensuring the oats are evenly distributed. Step 4: Pour into Baking Dish Pour the luxurious batter into the prepared baking dish, using a spatula to spread it out evenly. If you’re feeling generous, sprinkle additional chocolate chips and flaky sea salt on top for that Instagram-worthy finish. Step 5: Bake Place the dish in the preheated oven and bake for about 30 minutes, or until the edges are golden brown and a toothpick comes out clean from the center. The aroma wafting through your home will be simply irresistible. Step 6: Cool and Slice Once baked, allow the bars to cool in the pan for a bit before slicing them into 24 perfect squares. Enjoy them warm or let them cool fully for later snacking. Now, let your kitchen fill with the teasing smells of warmth and sweetness, and relish in the joy of serving these bars. Whether for breakfast on the go or an afternoon pick-me-up, the Easy Banana Oatmeal Bars Recipe for A Healthy Snack Delight promises to cheer up any day. These bars not only hold a special place in my heart, but I can assure you that they will become a staple in your kitchen. So grab those ripe bananas, and let’s get munching! This showstopping Easy Banana Oatmeal Bars Recipe for A Healthy Snack Delight delivers restaurant-quality results using simple ingredients you probably already have at home. The perfect balance of textures and flavors creates an unforgettable dining experience that will have everyone asking for seconds. Picture-perfect presentation with vibrant colors makes this dish absolutely Instagram-worthy and guaranteed to impress any dinner guest. Incredibly versatile recipe that works beautifully for weeknight dinners, meal prep, special occasions, or even outdoor entertaining sessions. Perfecting Easy Banana Oatmeal Bars Recipe for A Healthy Snack Delight Cooking Process Start by preheating your oven and lining a baking dish with parchment paper. Mix your wet ingredients first before adding the dry ingredients for a seamless blend. Pour the batter into your dish, spread it out, and finish with toppings for that extra crunch. Add Your Touch to Easy Banana Oatmeal Bars Recipe for A Healthy Snack Delight Feel free to swap the peanut butter for almond or sunflower seed butter for a nut-free version. You can also toss in some dried fruits, nuts, or even a sprinkle of shredded coconut to give your bars a personalized twist. Storing & Reheating Easy Banana Oatmeal Bars Recipe for A Healthy Snack Delight Store your banana oatmeal bars in an airtight container in the fridge for up to a week. For a quick snack, reheat in the microwave for about 15 seconds to bring back that fresh-from-the-oven warmth. Making these banana oatmeal bars always reminds me of that one rainy afternoon when my friends gathered for a cozy bake-off. We chatted, laughed, and, of course, devoured every last bite of those delicious bars. FAQs About Easy Banana Oatmeal Bars Recipe for A Healthy